Blog
Design Templates
In Hederis, every book design is actually a design template. When you’re creating a design for a specific project, that design is saved as a template within your project, and all of your settings are stored inside that template. Projects can have as many design templates as you’d like. You could create a few different templates as you’re coming up with your design, and then pick the one you like best; or you could create separate templates for your ebook and print (Hederis will automatically translate a print design to be compatible with the ebook format, but sometimes you just need more control).
Every project is started off with a default (rather stark) design template. This first template will always be named “initial template.” In order to be able to create more templates for your project, you need to save your initial template at least once (in the Design pane, press “Save Design”).
To create more templates for your project:
Go to your project Dashboard, and scroll down to the section labeled “Design.”
Click the “Clone a Template From…” button.
To create a new template from scratch, choose “From Elsewhere > From Defaults.”
To create a new template based on the design you already created in your initial template, choose “From this Project > initial template.”
To import a template from one of your other books, choose “From Elsewhere > From Another Project…”. A new window will open, listing all your projects, and all the templates you’ve created for your projects. If your project belongs to a group, then all the group projects will be listed here. Choose the one you want.
Give your new template a name, and press “Cone & Select.”
You’ve not only created your new template, but this new template has automatically been selected and applied to your book. You can see which template is currently applied right there on the Dashboard, or in the Design pane, next to the Design, Page Layout, and Styles tab headers. To change which template is applied, go to your project Dashboard, and choose the template you want from the dropdown menu.
Design
Topics in this section:
- Design
- Design Templates
- The top-right toolbar: Single View, Guides, Grid, and Run Layout
- Working with the Baseline Grid
- The left sidebar: Design tools
- General Page Design
- Page Templates
- Sections & Text
- Designing SECT elements (sections)
- Designing BOX elements (wrappers)
- Designing text paragraphs
- Use a Custom Font
- Adjusting the design of only certain paragraphs
- Adjust PDF trim size and margins
- Add printer marks
- View baseline grid
- Add special layout instructions
- Customize the design of specific paragraphs, wrappers, or sections
- Customize the design of an entire group of paragraphs, wrappers, or sections
- Create a custom design template
- Upload a custom design template
Include content only in the PDF or EPUB
You can designate part of the content in your to appear only in the PDF or EPUB output by using a processing instruction (see “Add special layout instructions”). The example below displays a different ISBN on the copyright page, depending on whether the output format is PDF or EPUB.
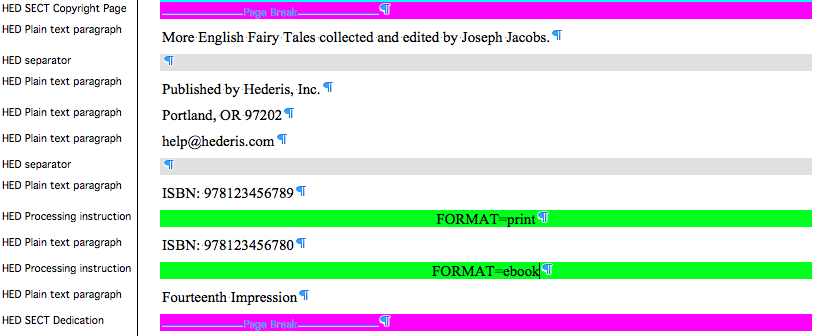
In your Word manuscript, find the paragraph, section, or wrapper that you want to hide in certain output formats.
If it’s a paragraph, insert a new paragraph below it. If it’s a section, insert a new paragraph just below the section break paragraph (see “Add a Section”). If it’s a wrapper, insert a new paragraph after either the start or end of the wrapper (see “Add a Wrapper”). Here’s an example of a processing instruction applied to a whole section:

Style your new paragraph with the “HED Processing instruction” style (see Fine-tune Word Styles”).
Type the following text inside your new HED Processing instruction paragraph: FORMAT=, and then type one of the following keywords, depending on which output format you want the element to appear in: ebook, print.
Set up a Table of Contents Manually
You can customize the text that appears in your Table of Contents by setting it up manually in your Word file; once you’ve got it set up, Hederis will automatically add the final page numbers for you when you build the PDF. To set up a Table of Contents for Hederis, you should use a combination of bookmarks and hyperlinks. Bookmarks and hyperlinks are built-in features of Word, and allow you to create internal links in your document. The destination of the link should have a Bookmark, and the link itself should be inserted as a hyperlink. Here’s how:
Create Your Table of Contents
The first step is to create the text that will be included in your Table of Contents.
You do this the same way you’d insert any paragraph: simply place your cursor in the document, and start typing. For Hederis, there are some rules about how your Table of Contents should be styled:
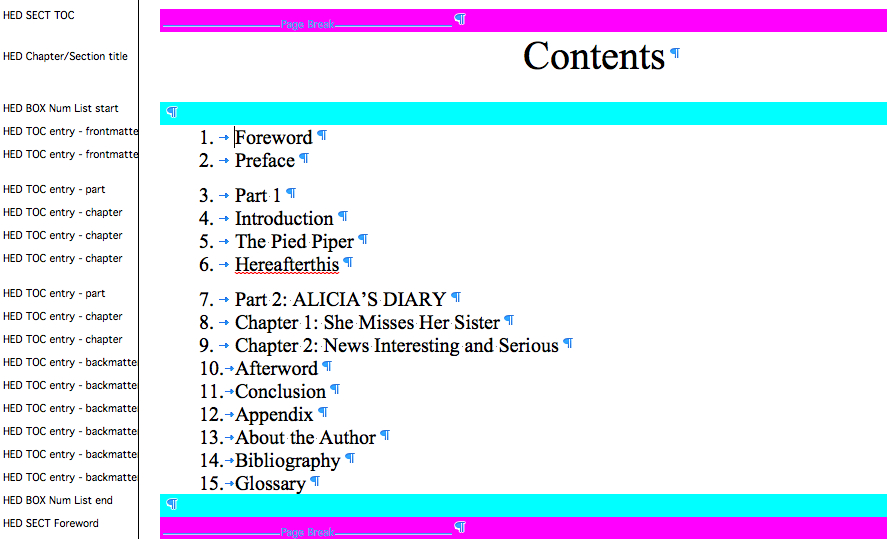
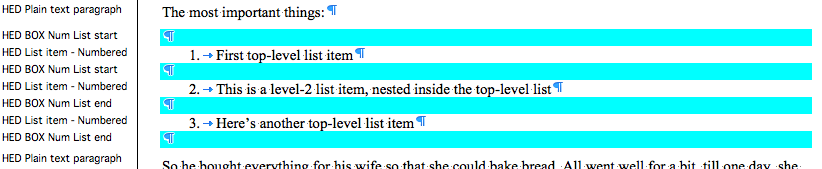
It should be wrapped in a Num List wrapper (see the section on Wrappers).
Each TOC item should be styled with one of the 4 following styles:
HED TOC entry - frontmatter
HED TOC entry - part
HED TOC entry - chapter
HED TOC entry - backmatter
Insert Bookmarks
You also need to insert a Bookmark before every heading that you want to include in your Table of Contents. The general steps will be as follows:
Scroll through your document to find the heading that you want to link to.
Click before the first character of the heading text.
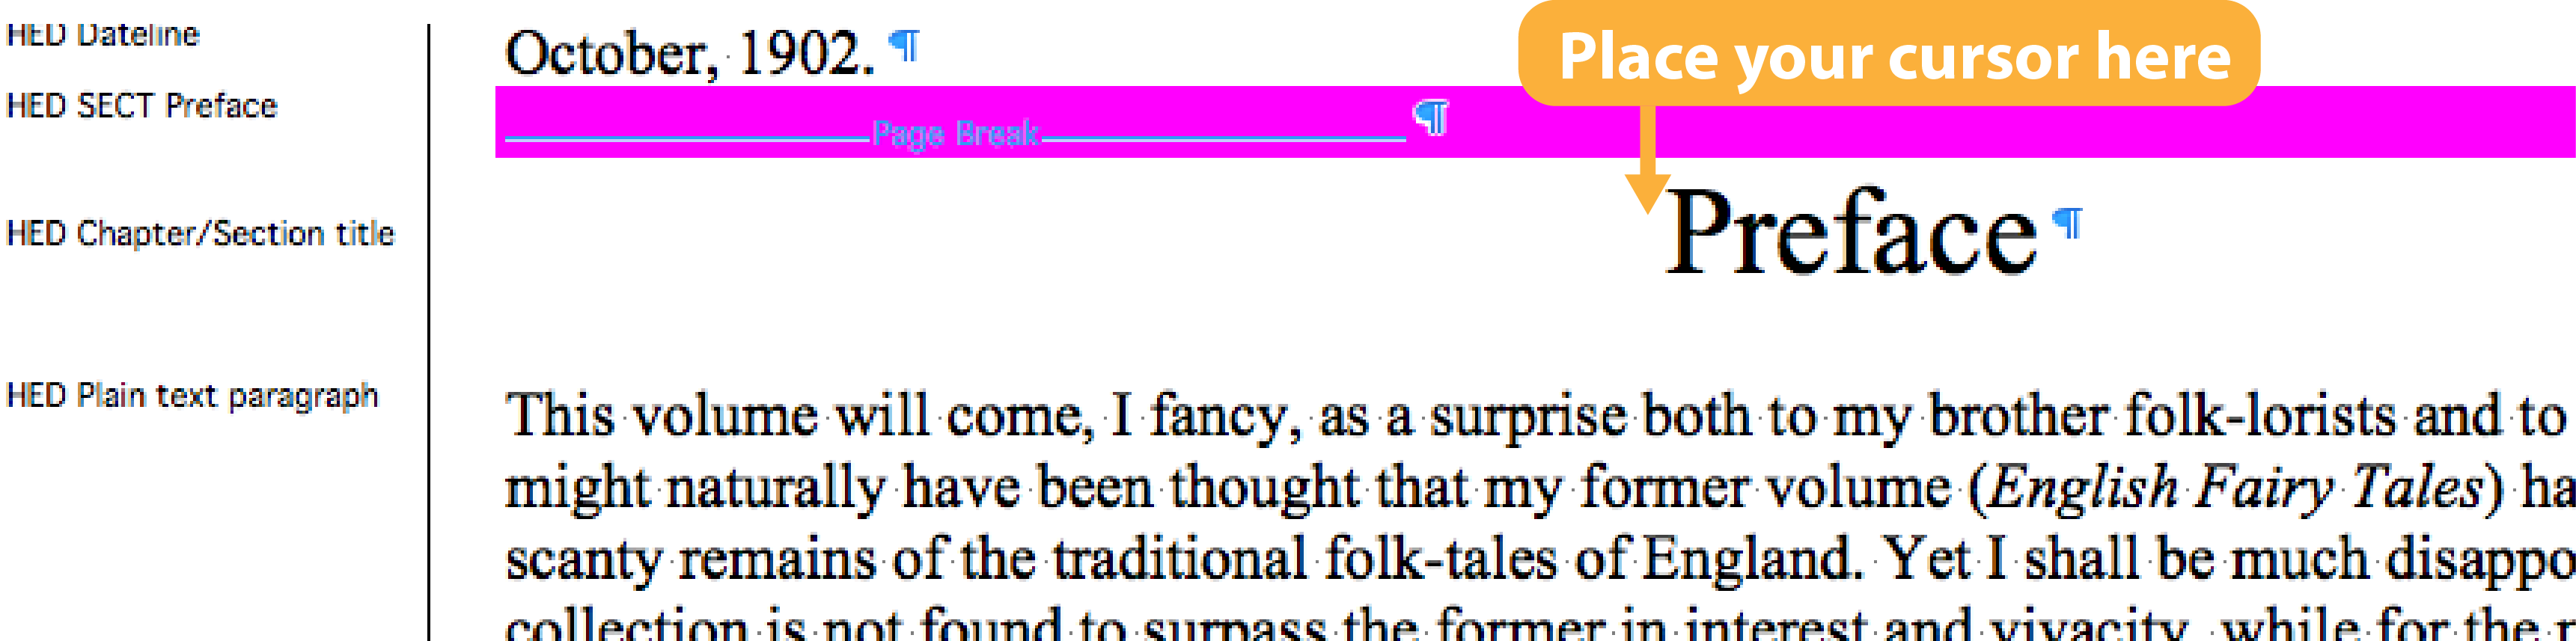
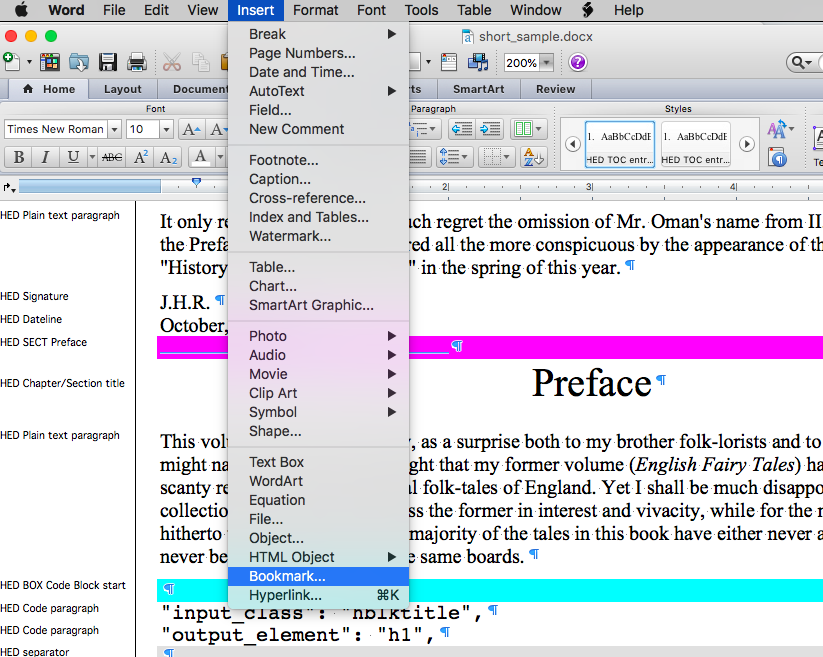
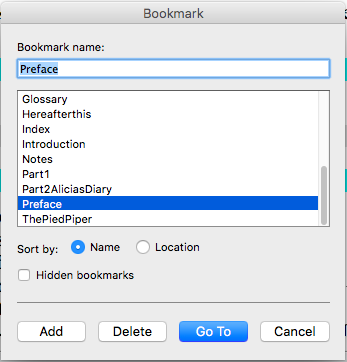
Go to Insert > Bookmark…
In the “Bookmark name” field, type a name for your Bookmark, and then click “Add”.
You won’t see anything happen, but when you go to insert your hyperlink, you’ll see the new Bookmark in your list of Bookmarks.
Insert Hyperlinks
Finally, we’ll create the TOC links. Go back to the Table of Contents text that you added in the first step and do the following:
Select the whole text of one of your TOC items.
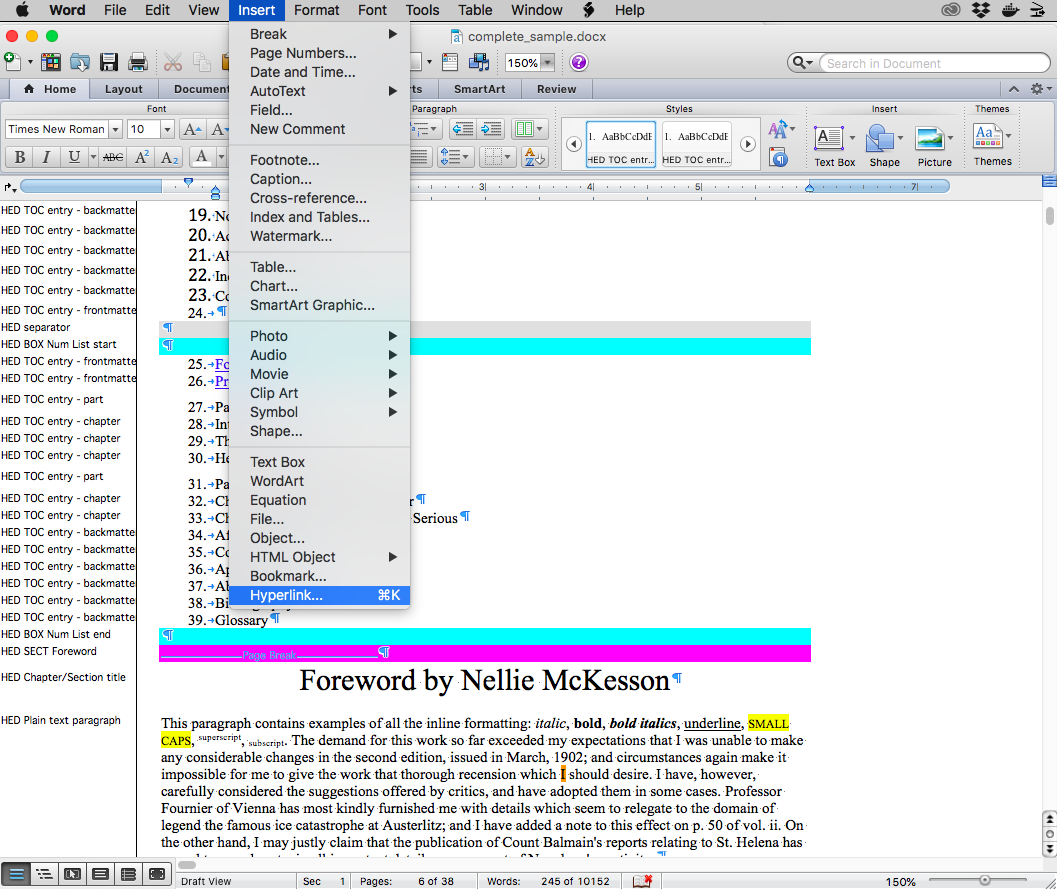
Go to Insert > Hyperlink…
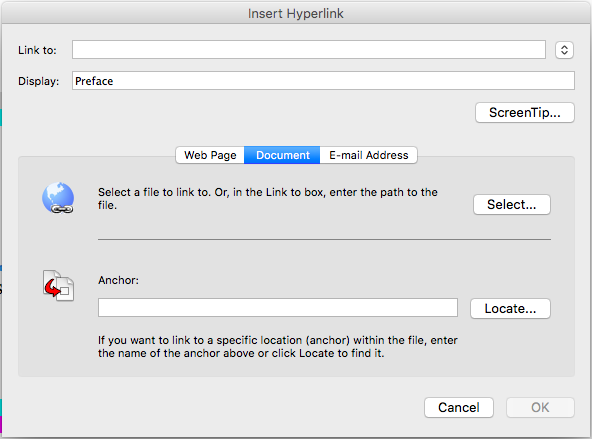
Next to the “Anchor” box, click Locate.
Expand the “Bookmarks” header and choose the Bookmark that you want to link to.
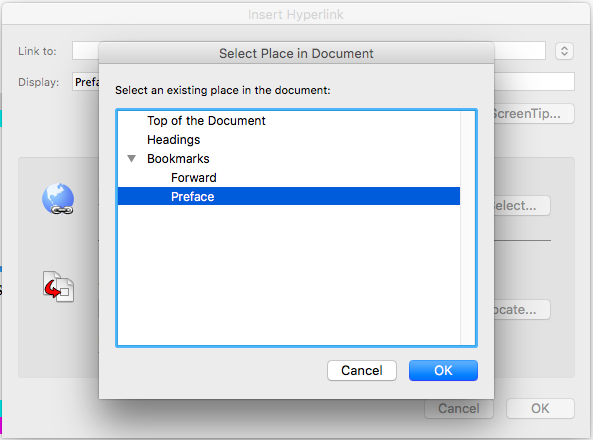
Click OK, and then click OK again in the main Hyperlinks dialog box.
Your TOC item will appear blue and underlined, which means that your link was successfully inserted.
Automatically Generate a Table of Contents
Hederis can automatically generate a Table of Contents for you, and insert it into your print file in any location you choose. Additionally, you can specify not to include certain chapters or sections in your generated Table of Contents, and specify how many levels deep you want the Table of Contents to go (for example, you can include only chapter-level headings, or include nested subsections to any level). Here’s how:
In your Word manuscript, insert a paragraph in the exact location that you’d like your Table of Contents to appear. This paragraph can use any style, and contain any text, which will be deleted when your generated Table of Contents is inserted.
Insert another paragraph below this placeholder paragraph, and style it with the HED Processing instruction style.
Inside this processing instruction paragraph, type the following text: ATTRS=data-auto-toc: true; data-toc-level: 2.

Set the level number to the depth of subsections that you’d like to include. For example, data-toc-level: 1 would only include chapter-level headings; data-toc-level:2 would also include the first level of subsections within any chapters; data-toc-level: 3 would include a further level of nested subsections within the first level of subsections; and so on.
To exclude a chapter or section from being listed in your Table of Contents, go to the section divider paragraph for the section that you want to exclude and insert a HED Processing instruction paragraph below the section divider paragraph.
If you already have a HED Processing instruction paragraph in that location, then there’s no need to insert another one—simply type a + after your existing processing instruction text, and then proceed to the next step.
Type the following text in your processing instruction paragraph: ATTRS=data-toc-display: none.

Here we have two examples of sections to be excluded from a Table of Contents. The first section also uses a processing instruction to suppress it from the print version of the book.
The next time you upload and build your PDF, a Table of Contents will automatically be created and inserted in the text. If you’d like your Table of Contents to appear in its own section, precede it with a HED SECT TOC paragraph, like this:

For even finer control over your Table of Contents (e.g., to customize all the text that appears in each Table of Contents item), you can insert a Table of Contents manually. See “Set up a Table of Contents Manually” for instructions.
Add a Section
However, it’s likely that you’ll need to re-classify some sections, or add new sections. In your Word manuscript, section breaks look like this:

To add a new section break:
In the Hederis Edit Text pane, do the following:
Find the paragraph above which you want to add your new section, and click to select it.
In the top menu, select Insert Section, and choose the type of section you’d like to insert.
In Microsoft Word, do the following:
Insert a blank paragraph in the location where you want the new section to start.
Click inside your new blank paragraph.
Open the Styles pane (see “Fine-tune Word Styles”), find the name of the correct section break type for this new section, and click to apply it to your section break paragraph.
To re-classify a section:
Click anywhere inside the section break paragraph that you want to re-classify.
Open the Styles pane (see “Fine-tune Word Styles”), find the name of the correct section break type, and click to apply it to your section break paragraph.
Add a Wrapper
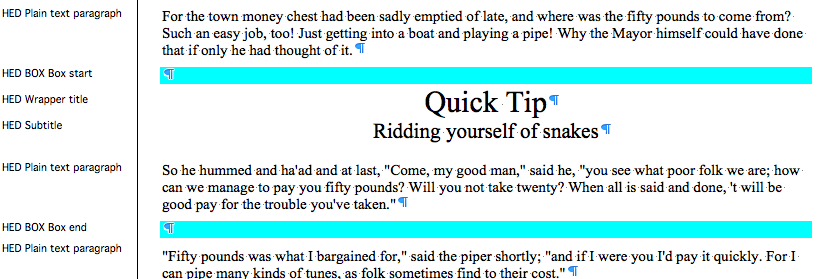
Certain groups of paragraphs need to be enclosed in a wrapper, which will add special design and formatting instructions for the paragraphs inside it. Examples of types of wrappers are: extracts, letters, code blocks, poems, complex lists, complex figures, and more. Wrapper styles all start with the prefix “HED BOX”, and always come in a pair: one style to mark the beginning of the wrapper, and one style to mark the end.
Many paragraph styles can be re-used both in the main flow of text and inside wrappers, and will appear differently depending on whether or not they’re in a wrapper. For example, the HED Plain text paragraph style is used as the basic paragraph type for content in the main text, as well as for paragraphs inside boxes and sidebars, like this:
Here’s how to add a wrapper around a group of paragraphs.
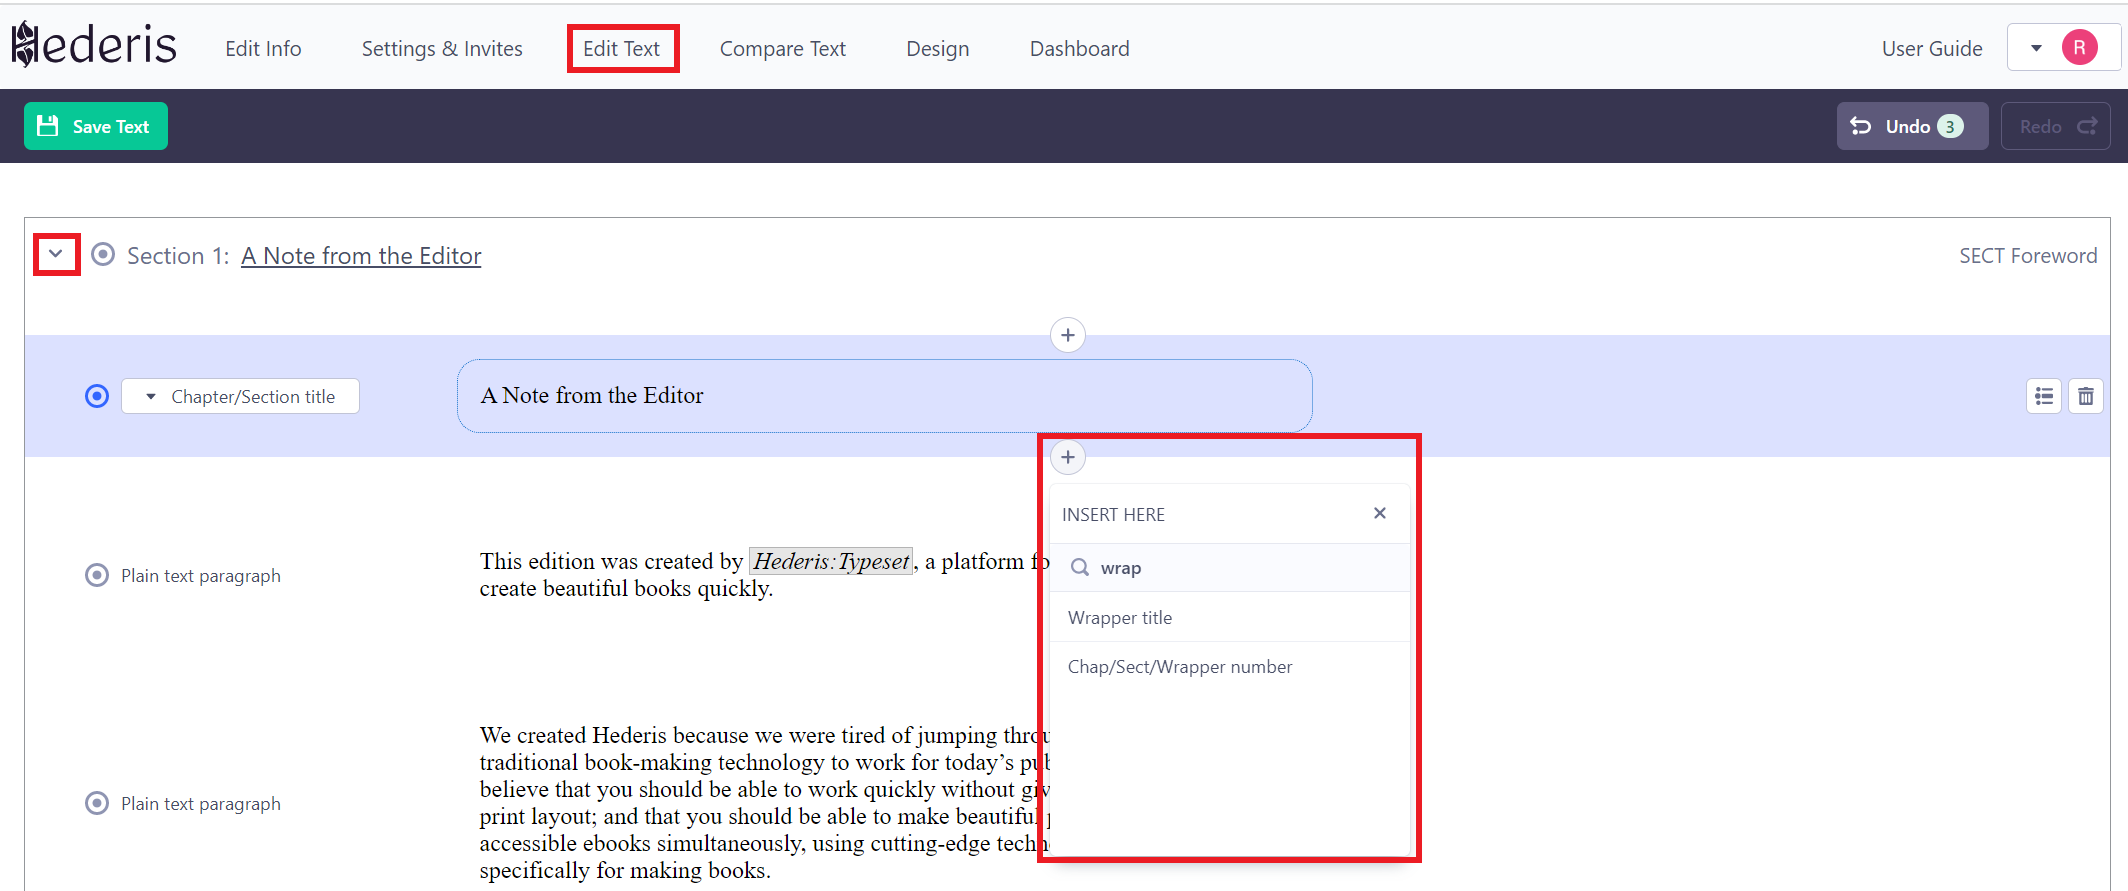
In the Hederis Edit Text pane, do the following:
Find the paragraph above which you want to add your new wrapper, and click to select it.
In the top menu, select Insert Wrapper, and choose the type of wrapper you’d like to insert.
Two new paragraphs will be inserted: one to mark the start of the wrapper, and one to mark the end. You can now move existing content inside the wrapper (see “Moving Text Around”), or add new paragraphs (see “Add a Paragraph”).
In Microsoft Word, do the following:
Insert new paragraphs both before the first paragraph in your group of paragraphs, and after the last paragraph in the group.
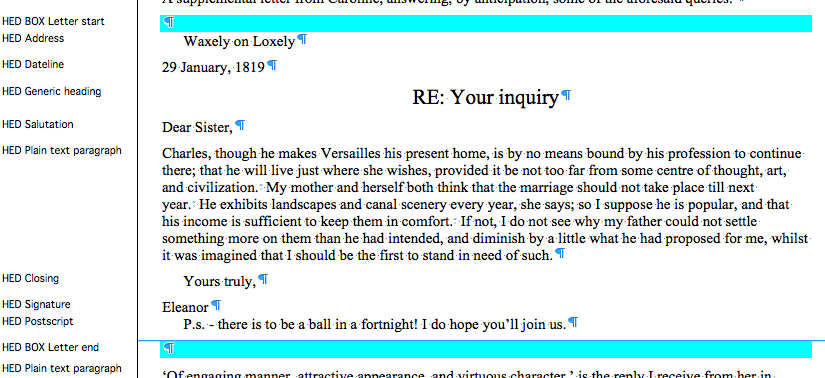
Style the first new paragraph with the “start” style for the wrapper that you want to use. For example, if you’re inserting a letter, you should style this paragraph with the “HED BOX Letter start” style.
Style the second new paragraph with the “end” style for the wrapper that you want to use. For example, if you’re inserting a letter, you should style this paragraph with the “HED BOX Letter end” style.
Add a Paragraph
Adding paragraphs is what Microsoft Word was made to do, and it’s as easy as you expect it to be. Just click your cursor into the Word file, and press enter: voila, you’ve got a new paragraph! If you’re working with the Hederis Word file, then all of the Hederis styles will already be available to you in the Styles Pane (see the previous section, “Working With Microsoft Word”).
To add a paragraph in the Hederis Edit Text pane:
Find the paragraph above which you want to insert your new paragraph, and click to select it.
In the top menu, click “Insert Paragraph.” Your new paragraph will be inserted, and you can adjust the style as needed (see “Styles and the Edit Text Pane”).
Working with Microsoft Word
When you upload a Word manuscript to Hederis, we automatically make some guesses about the parts of your document, but these will undoubtedly need to be adjusted and fleshed out. Hederis returns a new Word manuscript to you, that contains all of our tagging and conversion instructions - you should be sure to download and use this new Word file going forward, or you’ll have to do this process all over again.
Hederis uses a specific set of Word styles, that all start with the prefix “HED”. When you download and open your new Word file, you’ll see that all the paragraphs in your document have been tagged with one of these styles. Chances are, there will be at least a few paragraphs that you want to re-classify with different styles. (See the appendix for a full list of Hederis styles and notes about how to use them.) Here’s how to work with styles in your Word manuscript:
To see at a glance which styles your paragraphs are using, open your manuscript in Draft View:
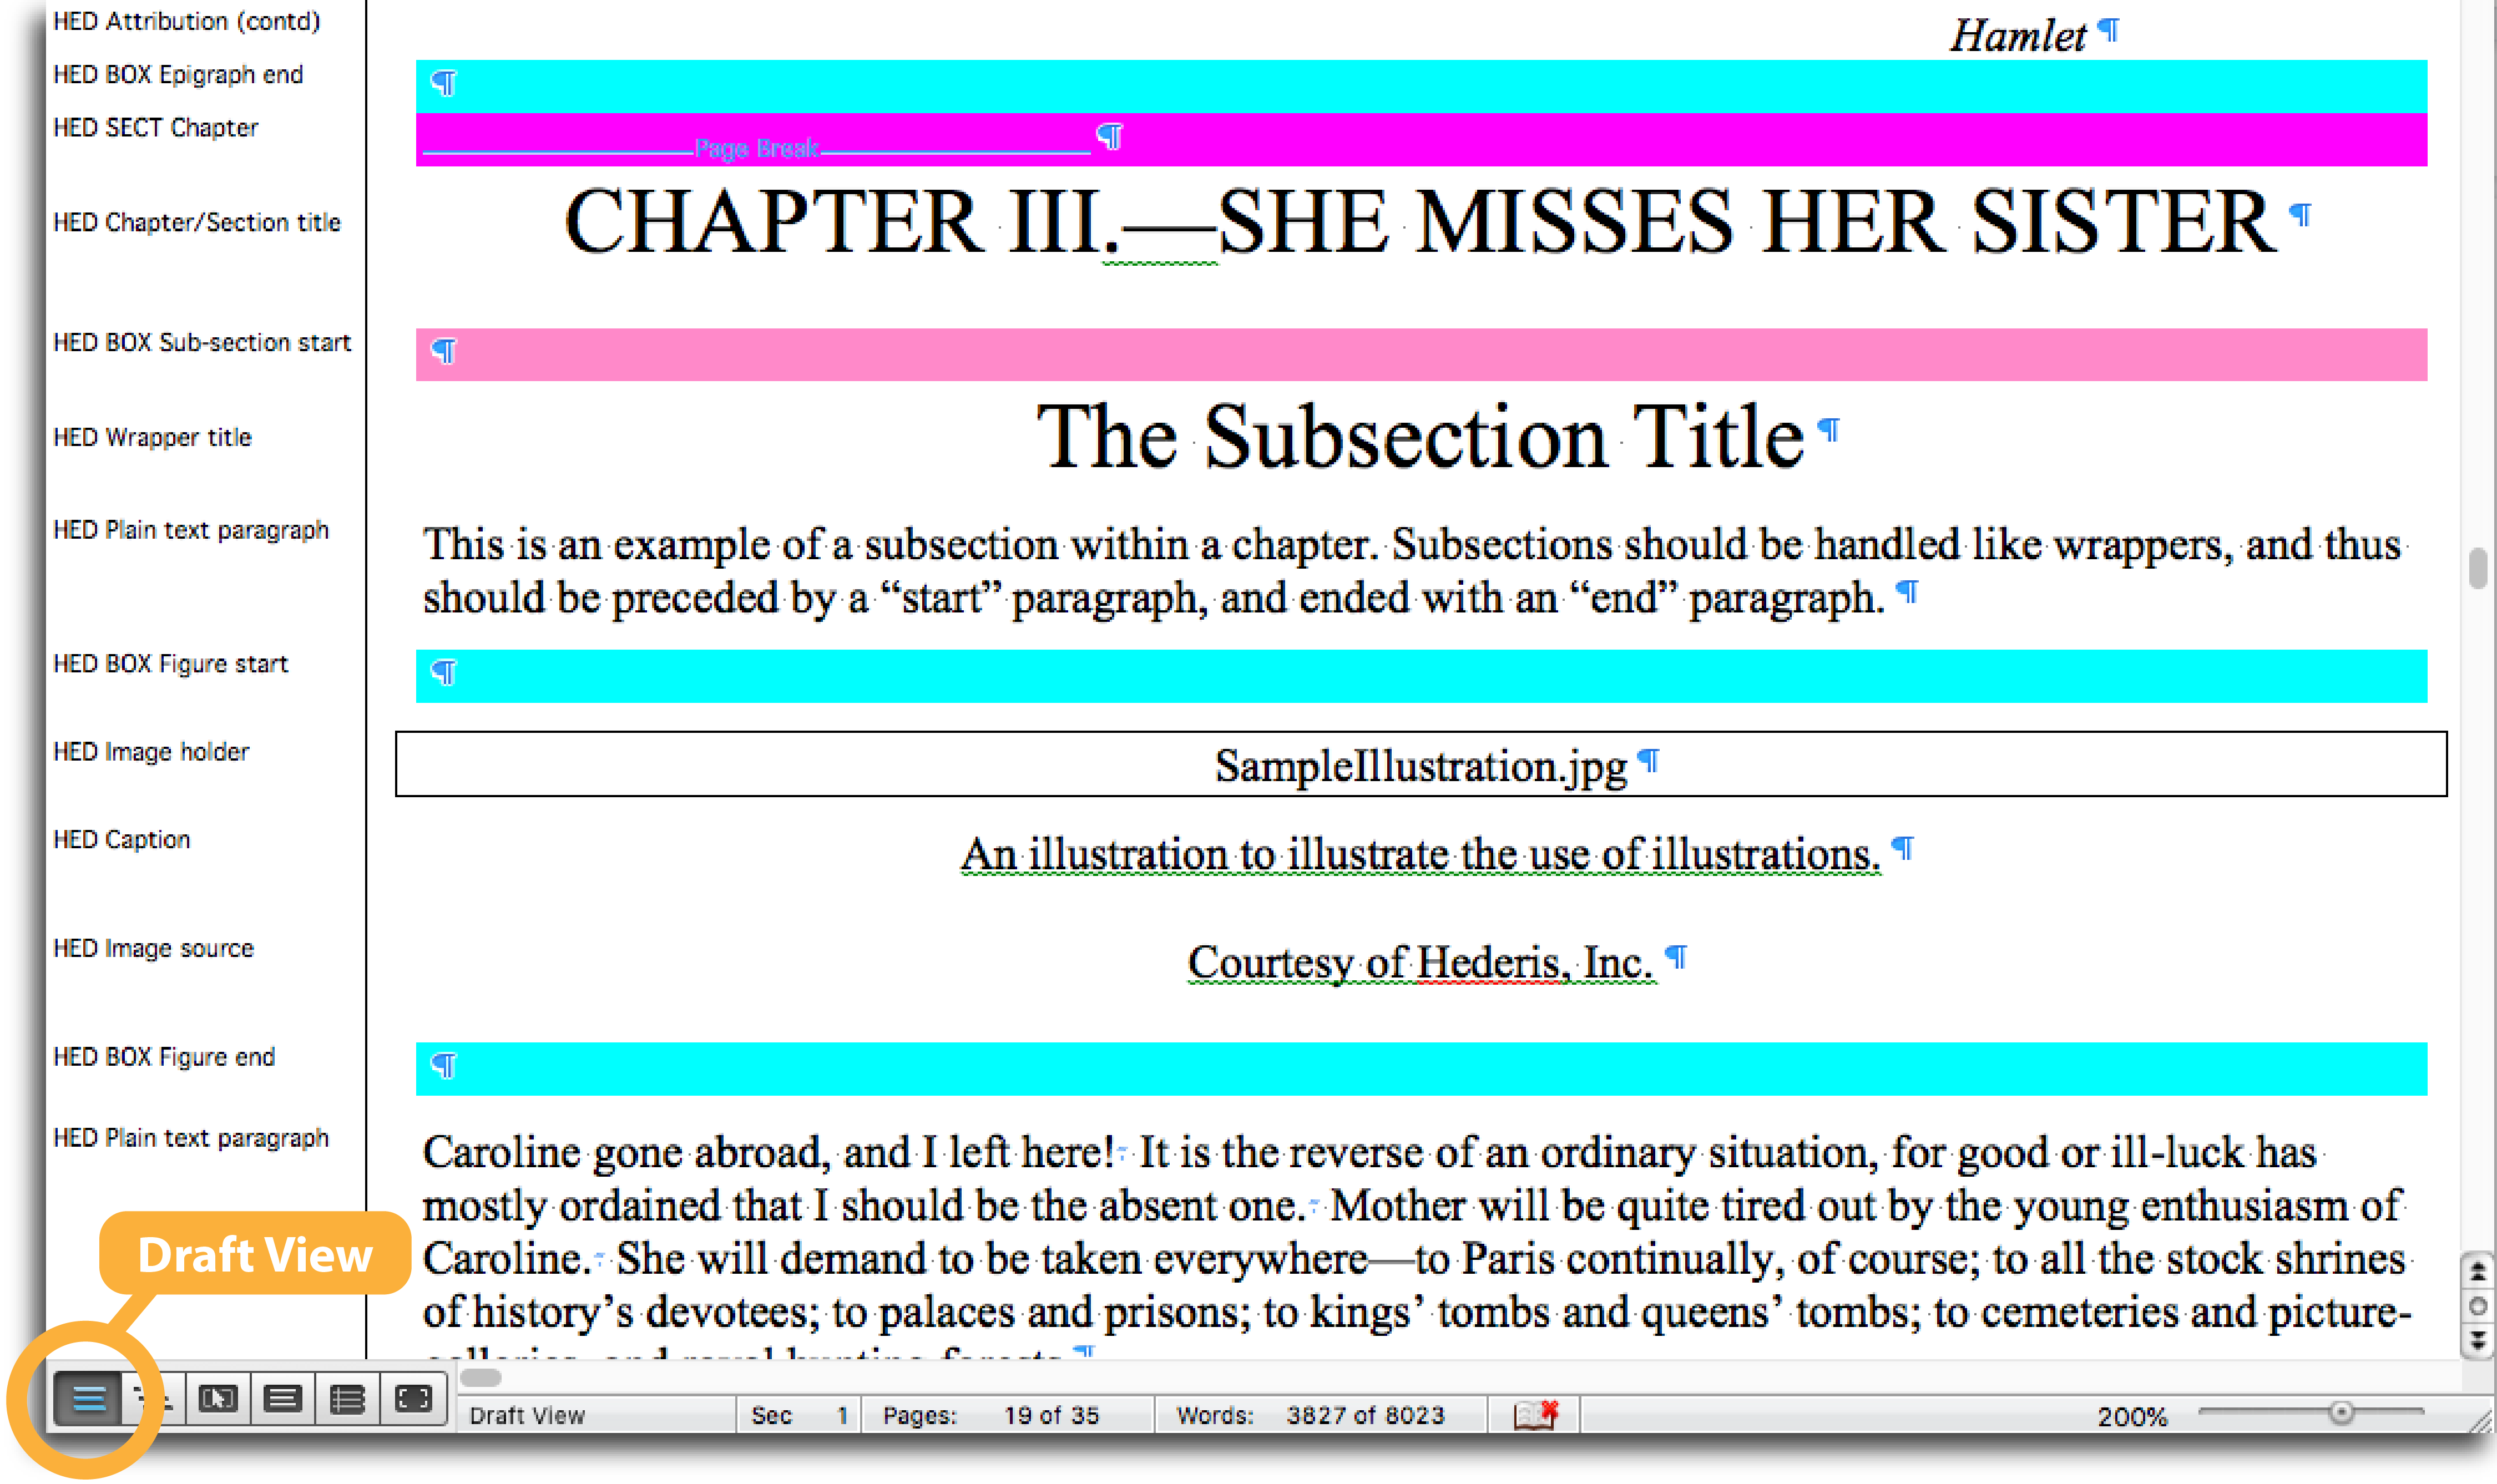
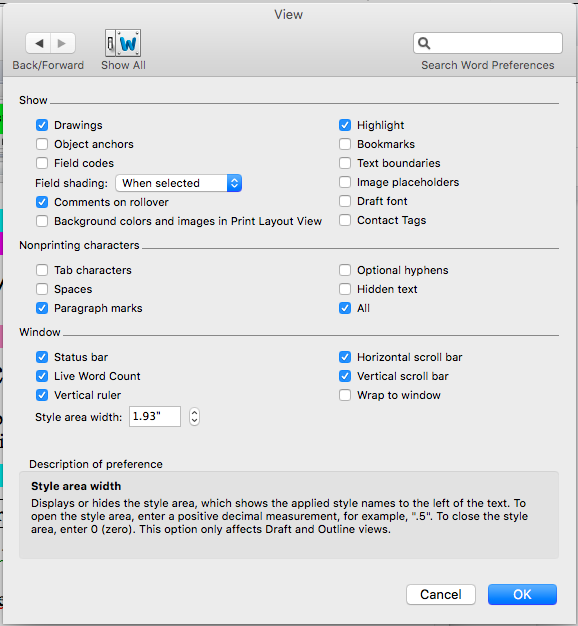
If you don’t see the sidebar that lists your paragraph style names, open Word > Preferences > View (Mac), or File > Options > Advanced and scroll down to the Display section (PC), and enter a value in the “Style area width” box (2 inches is usually a safe size). Here are some step-by-step instructions on how to do this: https://www.howtogeek.com/276836/how-to-see-all-the-paragraph-styles-used-in-your-word-document/
Now that you can see which styles are being used for all your paragraphs, scroll through the Word file to ensure that all paragraphs are correctly styled.
If you see a paragraph that needs to be re-styled, click on the paragraph, and then open the Styles pane by clicking the small button in the Home tab of your ribbon.
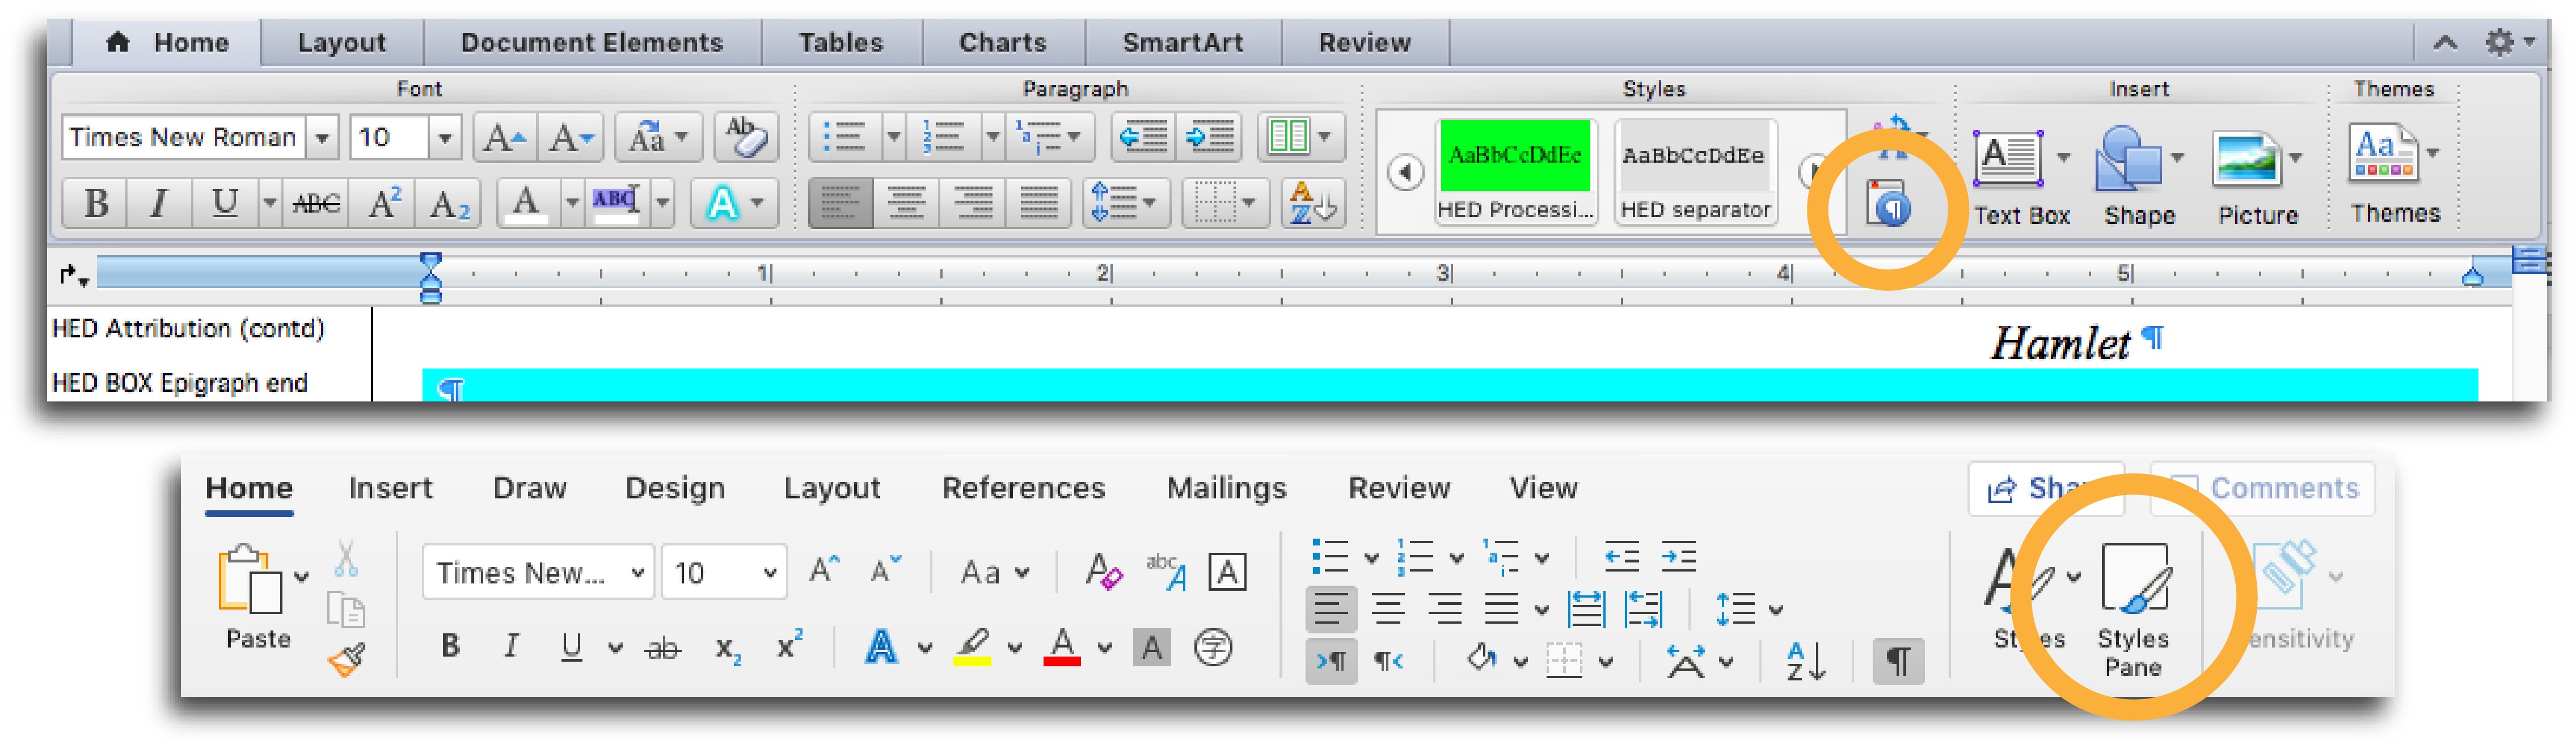
The button to open the Styles pane looks different depending on which version of Word you’re using. Here are two examples of what it might look like.
Scroll through the list of styles in the pane that appears to find the correct style and click to apply it to your selected paragraph.
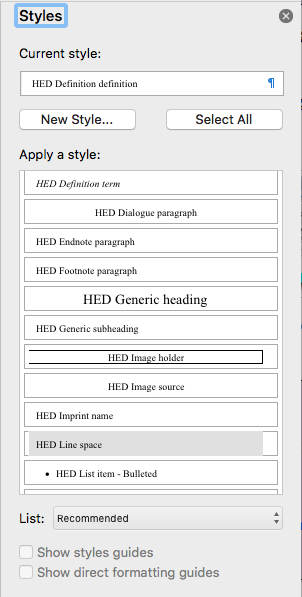
The Styles pane will pop up either next to your document, or in a window of its own, and should look something like this.
