Replace an Image
Summary
Images can be replaced by uploading a new image file, or editing the text in the Hederis Edit Text pane or the Word file.
Images can be deleted by editing the text in the Hederis Edit Text pane or the Word file.
Sometimes an image needs to be changed or updated, or maybe you need to use a different version of an image for an EPUB versus your print file (and you don’t want to use format-specific blocks, as described in “Include content only in the PDF or EPUB”). You have a couple of options for how to replace an existing image in your book:
Replace the Image Itself
By far the simplest way to replace the image is to upload a replacement file using the same filename as the old image. To do so:
On your computer, save your new replacement image with the same name as the old image that you want to replace.
Drag the new image onto your Hederis Project Dashboard.
The new image will replace the old version, and will automatically be sourced into your book wherever the old image was used previously.
Swap Out the Image File in the Book Text
Another way to replace your image is to update the file name in your book text. You can do that in the Edit Text pane of the app, or in your Microsoft Word file.
In the Hederis Edit Text pane:
You can make text edits directly in the Edit Text pane in the Hederis app, including replacing an image file name with a new file name.
First, upload the new image that you want to use, by dragging-and-dropping it onto your Project Dashboard.
Next, from the Project Dashboard, open the Edit Text pane.
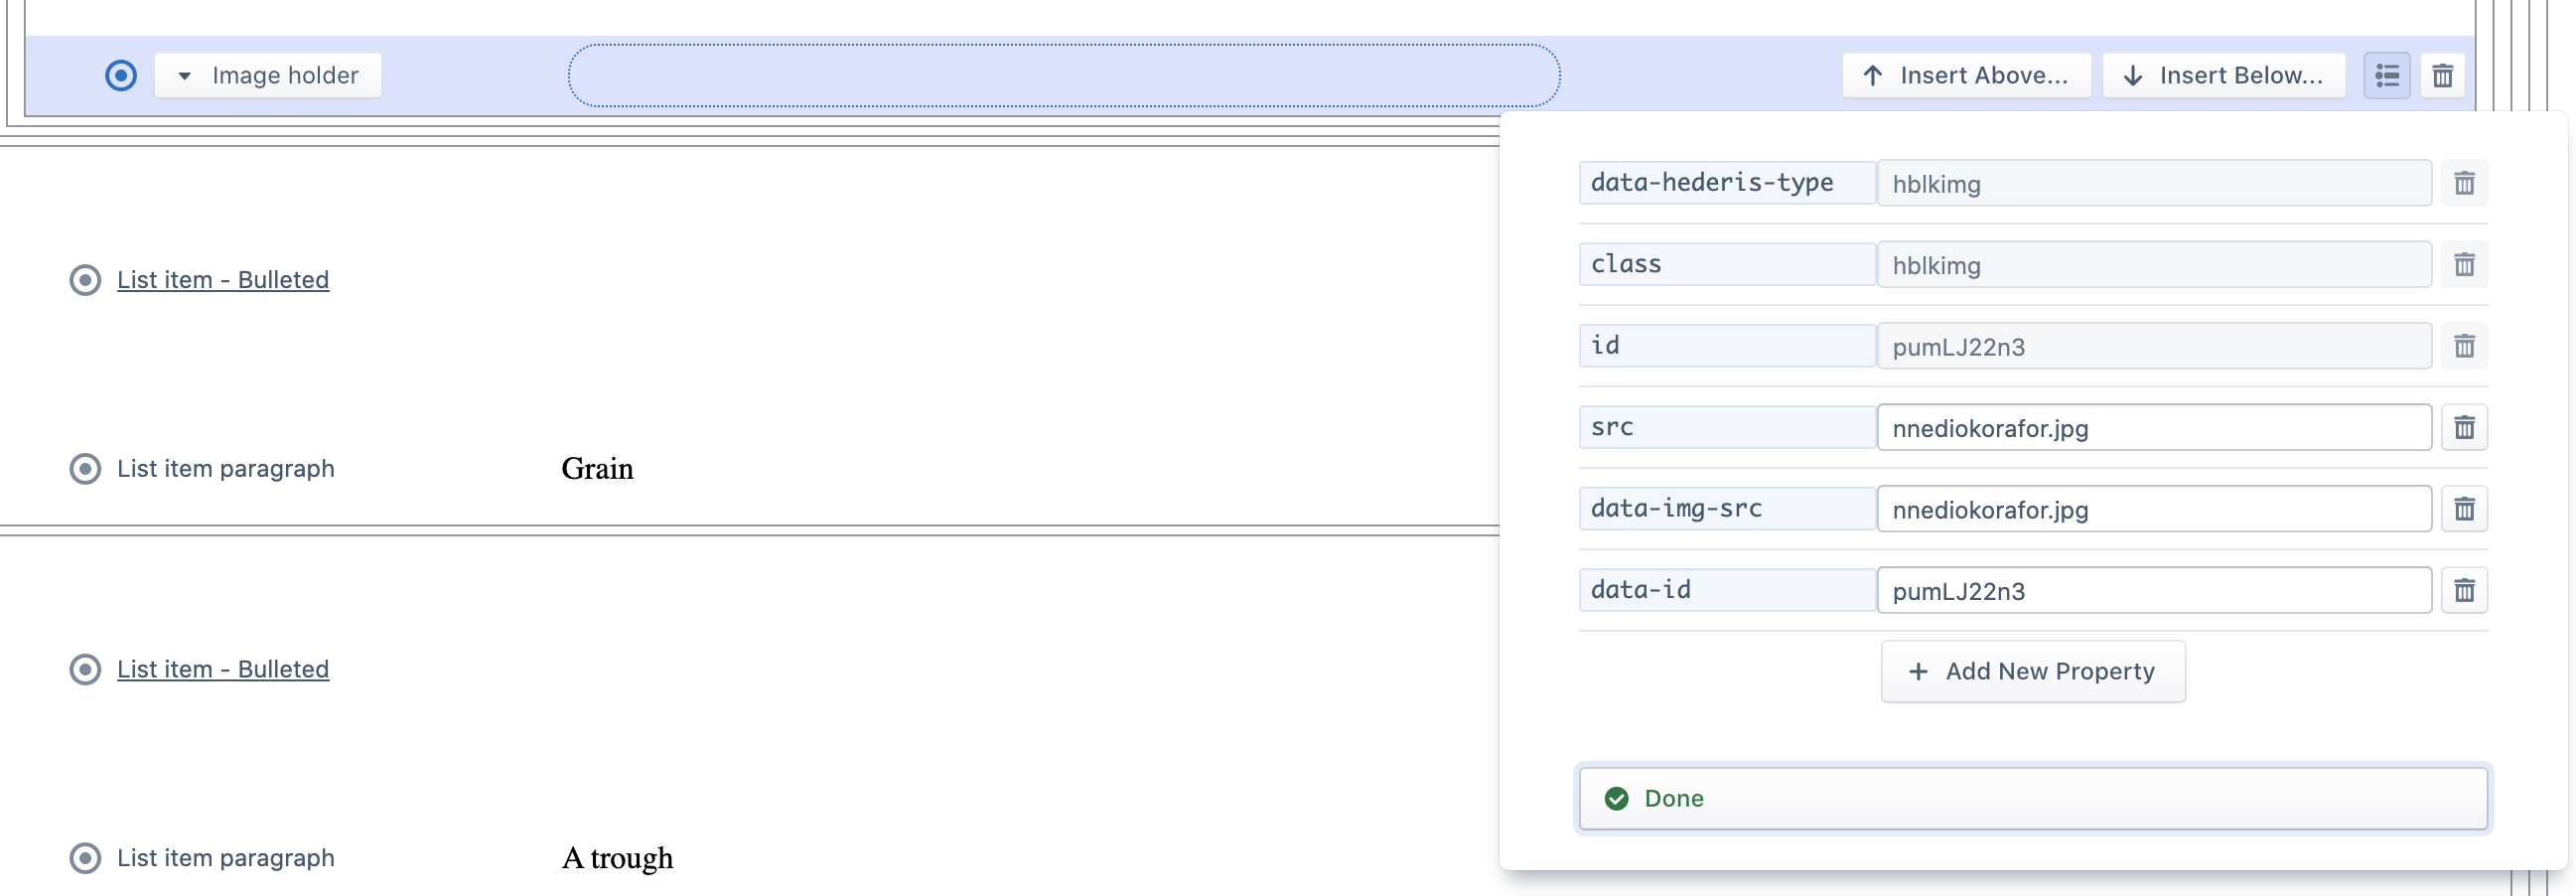
Navigate to your image paragraph. It will look like an empty paragraph.
Click the empty image holder paragraph, and then click the 3-horizontal-lines icon to the right, to open the Attribute Editor.
In the “src” field, type the new image filename exactly as it appeared when you uploaded it to the Dashboard, including capitalization and special characters.
Click Done to close the attribute editor, and then press Save Text at the top left.
Your new image should now be used instead of the old image.
In the Word file:
Find the Image Holder paragraph that contains the old filename.
Edit the text to match your new filename, making sure to match capitalization and special characters exactly.
Save your Word file, and upload it to Hederis by dragging-and-dropping it onto your Project Dashboard.
Delete an Image
In order to delete an image from your book entirely, you’ll need to edit your text to remove the reference to the image filename. You can do this in Hederis via the Edit Text pane, or in your Word file.
In the Hederis Edit Text page:
From the Project Dashboard, open the Edit Text pane.
Navigate to your image, by scrolling or using the section navigator at the top right.
Click to select the paragraph.
Click the trash can icon to the far right of the paragraph.

Press Save Text at the top left.
Your image has now been removed, and won’t show up in the Design preview, PDF, or EPUB files.
In the Word file:
Find the Image Holder paragraph that contains the old filename.
Delete the entire paragraph and all text in the paragraph.
Save your Word file, and upload it to Hederis by dragging-and-dropping it onto your Project Dashboard.
Your image has now been removed, and won’t show up in the Design preview, PDF, or EPUB files.
