Sometimes you only want to adjust the design of a specific paragraph, or a subset of paragraphs. For example, you may want to design Plain Text Paragraphs that appear inside of Note boxes differently than the Plain Text Paragraphs in your main text flow. Or, you may want to remove the text indent from every Plain Text Paragraph that follows a heading.
The great news is that you don’t need to create new styles for all of these types of variations; when you’re working with HTML, you can do this with the power of selectors! This article will walk you through your options and how to apply them. To learn more about exactly how these overrides work, and how to troubleshoot or remove them, see “‘Limit these changes’: Understanding Design Overrides and How to Remove or Change Them.”
When you click on a paragraph in your paged preview, you’ll see another dropdown menu in your design tools sidebar, below the paragraph style name—these are your selector options. There are 5 types of selectors you can choose from:
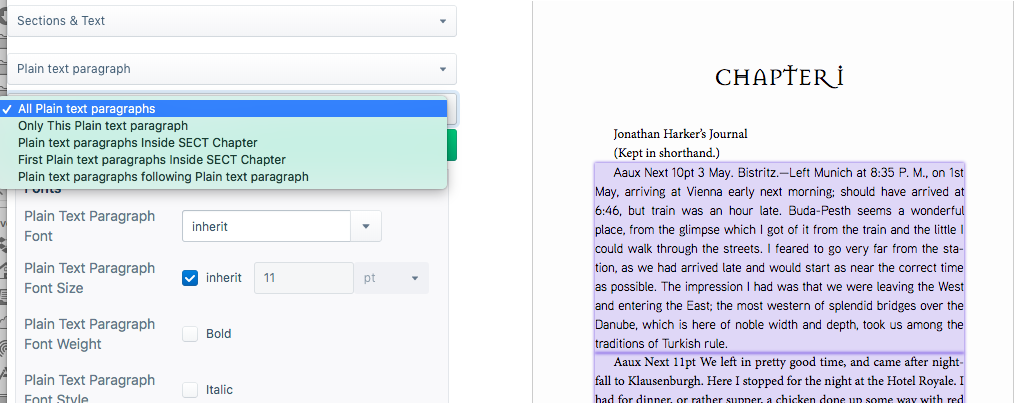
When you click on a paragraph in your paged preview, you’ll have 5 options in the Selectors dropdown menu.
All: The design you choose will apply to all paragraphs that use this style name. This is the default, and is what will happen if you choose a style name from the previous dropdown menu, rather than clicking on a paragraph.
Only this: Your design settings will only apply to the currently selected paragraph (i.e., the paragraph that you clicked on).
Note: When you’re working with these kinds of selectors, the changes may not immediately appear in the preview window, but if you click Save Design and then Run Layout, you’ll see your new design applied.
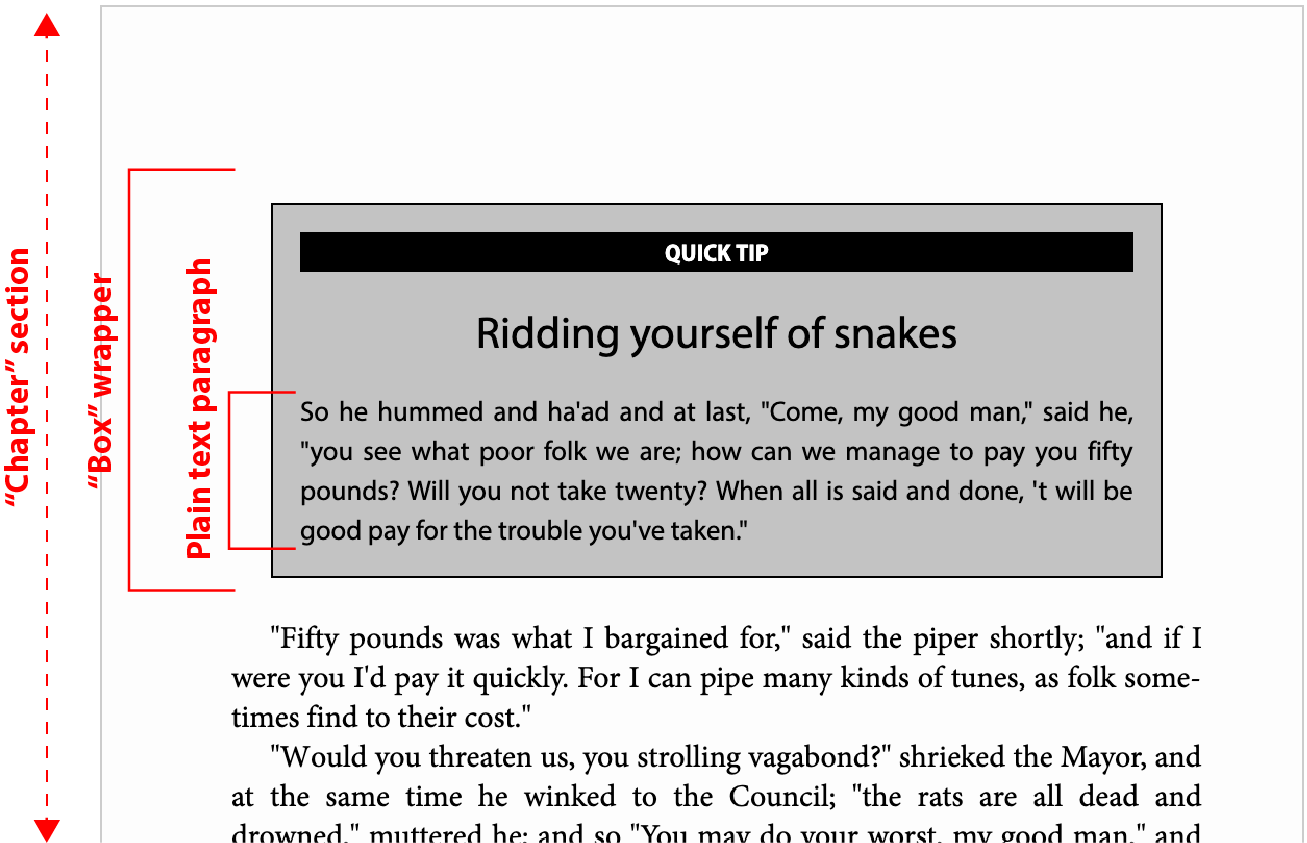
Anywhere Inside: This option lets you limit the scope of your design to only apply to paragraphs that use this style and are inside the same kind of parent element that your currently selected paragraph is inside of. For example, if you were to click on a paragraph inside an extract, then this option would read “Plain text paragraphs inside BOX Extract.” This allows us to reuse the same style name inside different types of parents, but create different designs depending on the container—you can use this selector to make all plain text paragraphs inside an extract look different than the rest of the plain text paragraphs in the chapter.
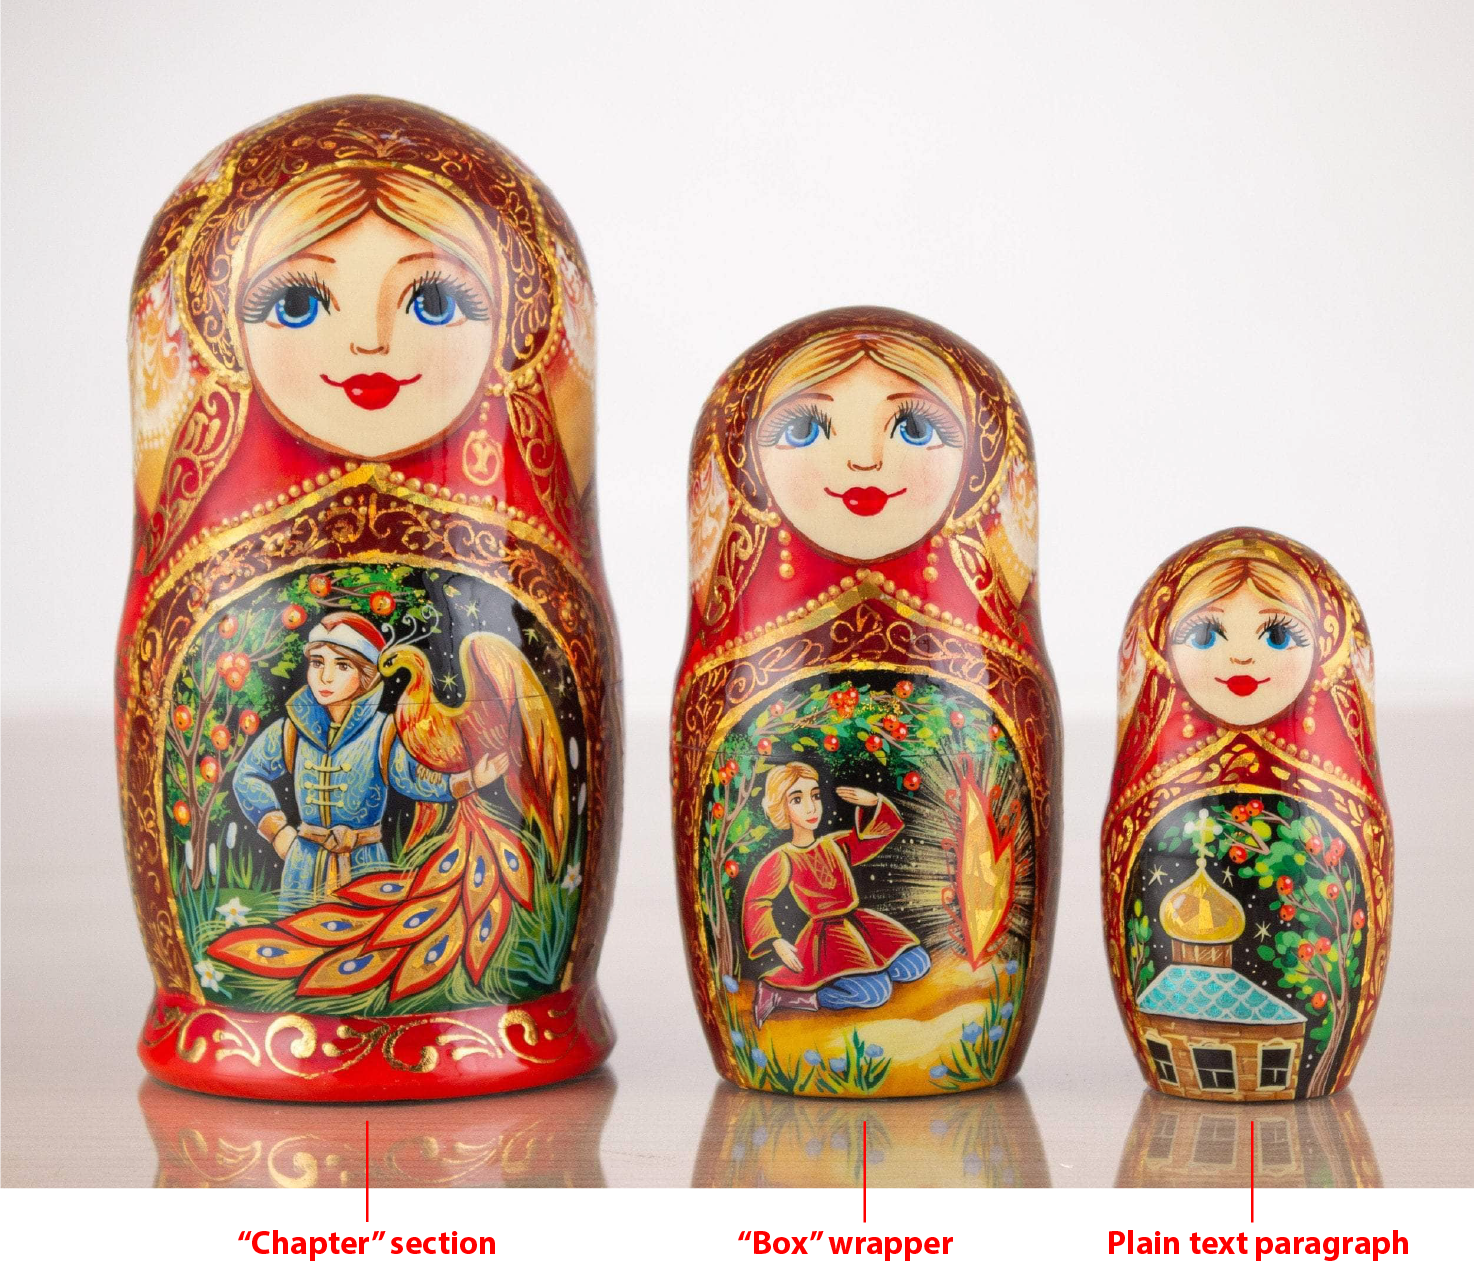
Directly Inside: This option is similar to the “anywhere inside” option, except that when you choose this one, it’ll only apply to paragraphs that are directly inside of their parent element. For example, think of a Russian nesting doll, where you have a tiny doll inside of a slightly larger doll, etc. etc. up until the final largest doll. While the smallest doll is technically inside of all the other dolls, it is only directly inside of the slightly larger doll.
First: Similarly, you can also limit your design to only the first instance of this style inside of a specific parent. For example, you could remove the indent from the first plain text paragraph inside your extract.
Following: Finally, you can create designs based on the order of elements in your book. For example, if you want to remove the indent from every plain text paragraph that follows a chapter title, you’d use this option (note that you have to actually find an instance in your book of a plain text paragraph following a chapter title, and then click on it, in order for this option to appear in your Selector menu). This is great for adding spacing around elements, without needing to create all new styles.
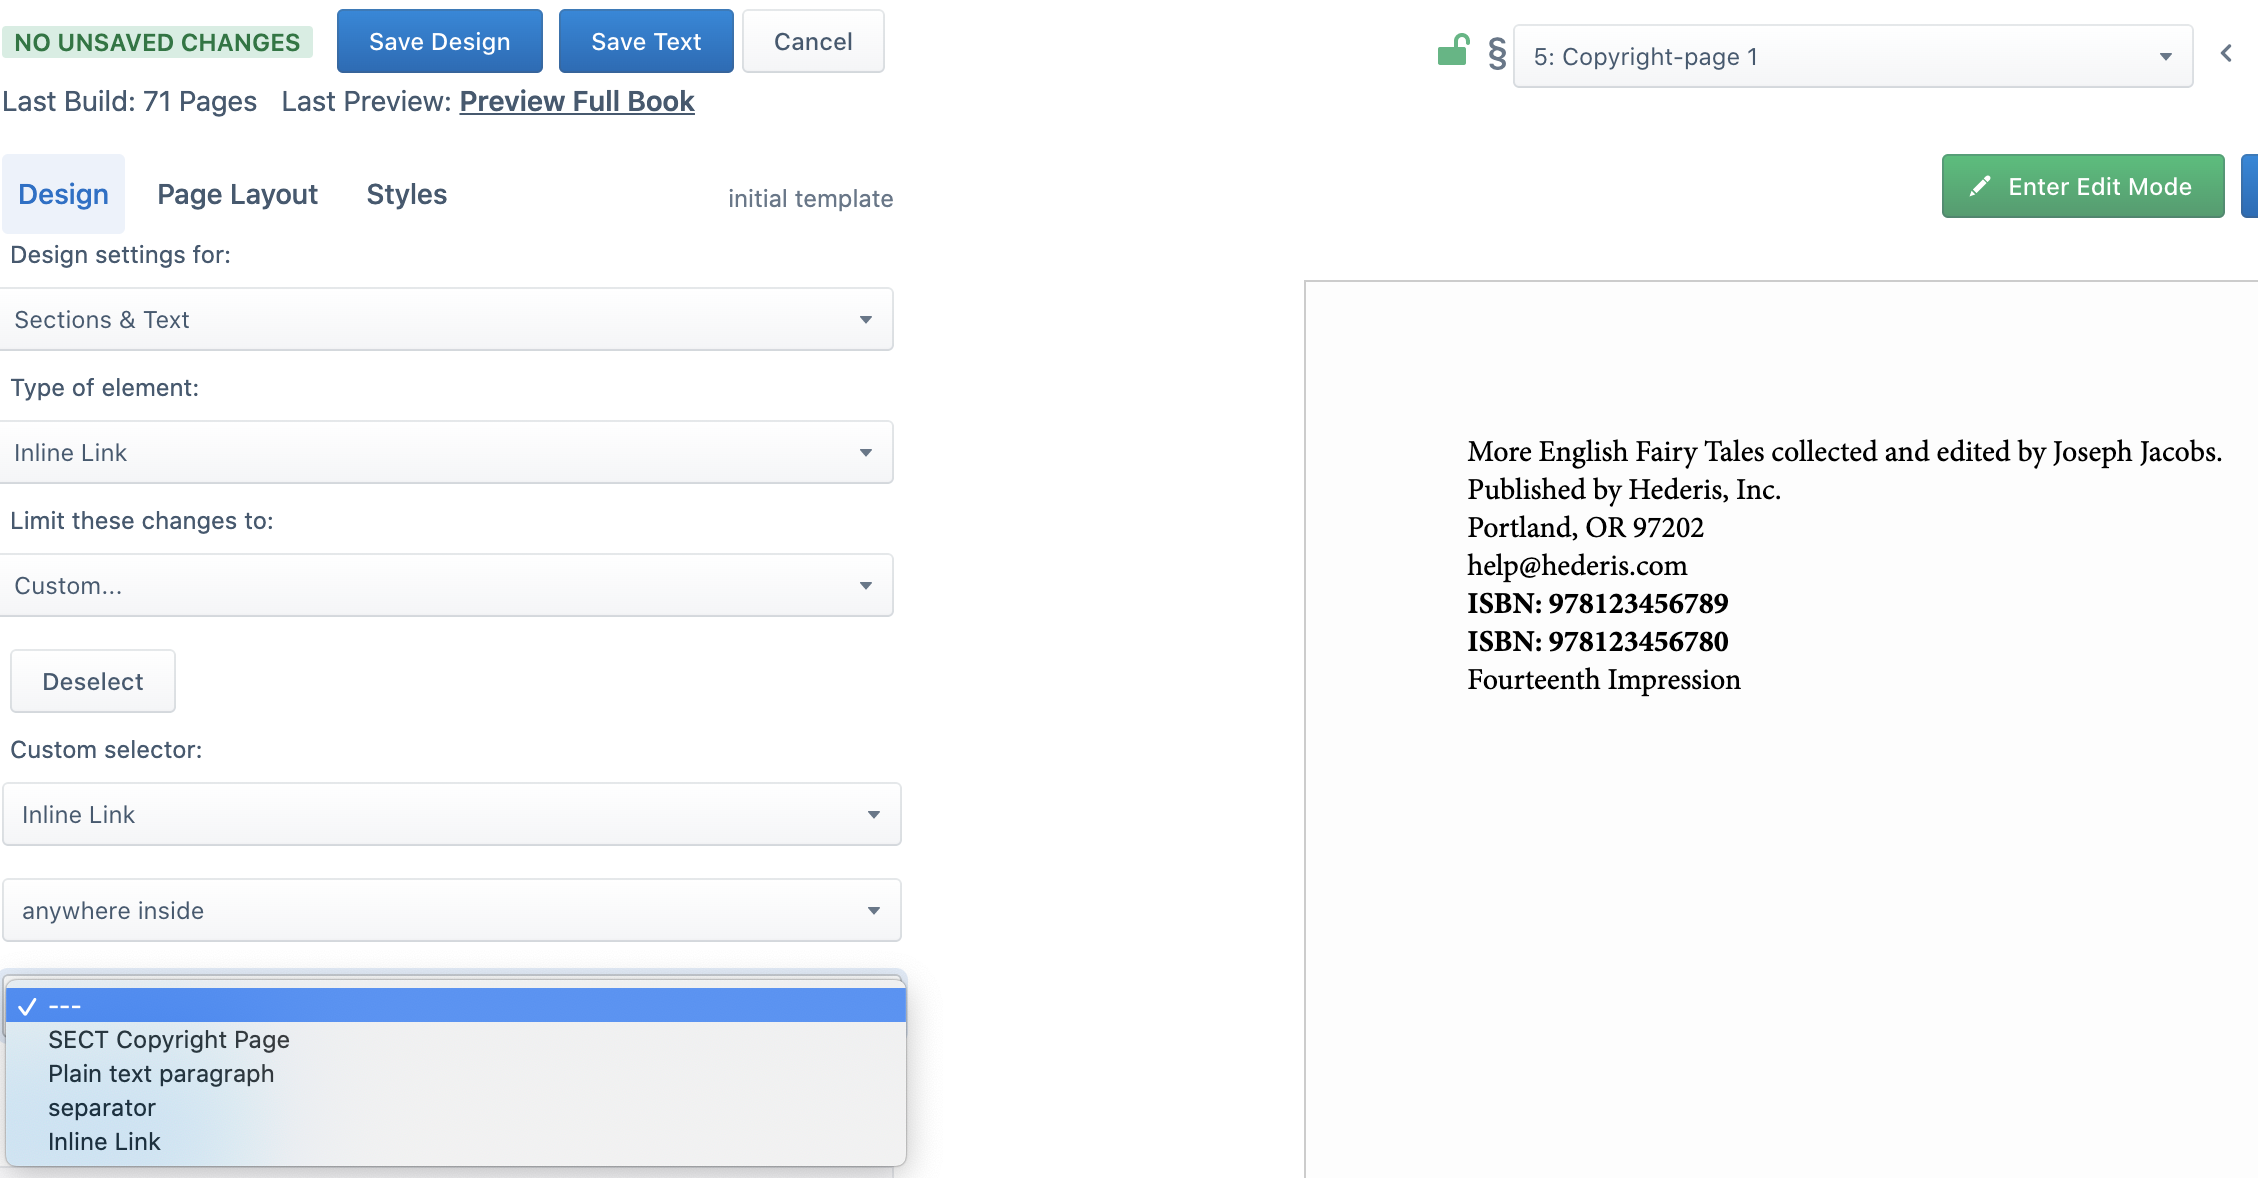
Custom: When you create a custom selector, you can choose different levels of parent elements to limit design. Think of the Russian nesting dolls again: while the built-in options in this menu only allow you to choose the direct parent of the element you’ve selected, with the Custom option you can choose any parent at any level outside of your selected element. To give you another example, let’s say you want to style links on your copyright page different from links in the main book text. With the standard “Limit these changes” options, you only have the option of styling links inside of their immediate “Plain text paragraph” parent:
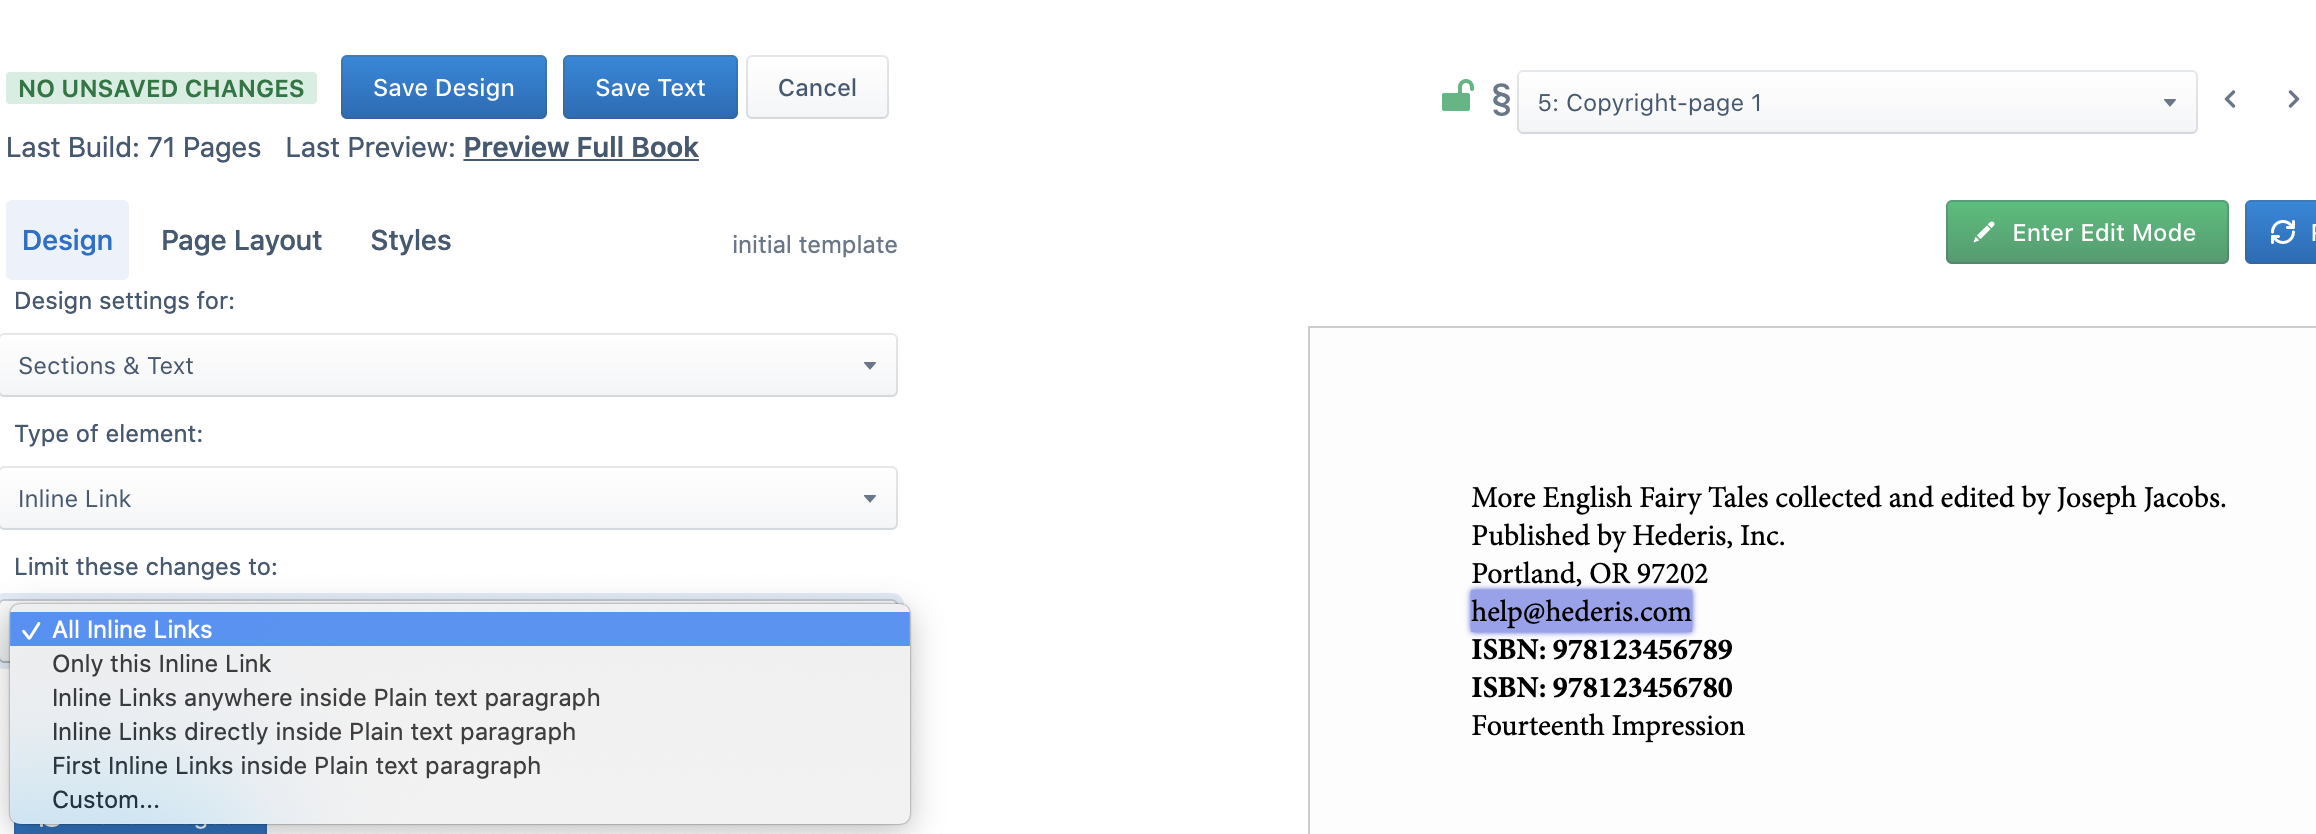
But with the Custom option, you can choose to style links anywhere inside of a copyright page:
Note: When you’re using these kinds of selectors, it’s very important that you re-download the Word file from Hederis any time you want to make extensive changes to the text. This allows us to store information about which paragraphs in the manuscript have custom designs applied. If you don’t use the updated Word file, then all your custom design work could get lost!
Here’s a video that walks you through the process of using the “Limit these changes” menu to apply a design to a single paragraph:
INTENTIONALLY BLANK
