Blog
List of Hederis Word Styles
Paragraphs
- HED Address
An address, for example in a letter, on a copyright page, etc.
- HED Attribution
The attribution to a quote.
- HED Attribution (contd)
Continuation paragraphs for a quote attribution. An attribution can have multiple continuation paragraphs.
- HED Author name
The name of an author. This could appear in a variety of places: on the main titlepage, following a preface title or chapter title, etc.
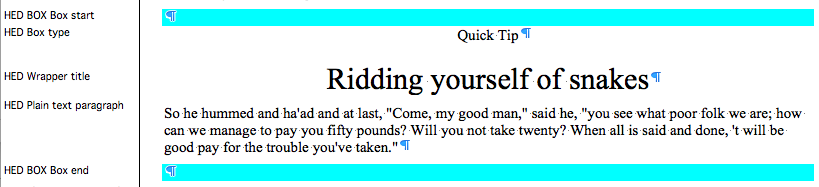
- HED Box type
Some books include multiple types of boxes and sidebars, that appear multiple times within a book. For example, a book might have a type of box called “Quick Tips”, that contains different tips that correspond to the current book topic. This style would be used to tag that Type heading, and is different from the main box heading.
- HED Caption
A caption, for example to accompany an image or to follow a table.
- HED Chap/Sect/Wrapper number
Number labels for any book section or wrapper, e.g., “Chapter 1”, or “Example 12”.
- HED Chapter/Section title
Titles of main book sections, like chapters, prefaces, appendixes, parts, and so on.
- HED Closing
The closing line of a letter, e.g., “Sincerely,”.
- HED Code paragraph
A block of computer code.
- HED Contributor
A book or section contributor, other than the author. For example, the name of an illustrator or editor that might appear on the titlepage or at the beginning of a chapter.
- HED Dateline
A dateline.
- HED Definition definition
The definition paragraph in a set of term/definition pairs. This paragraph is an example of the definition paragraph that corresponds to the term above.
- HED Definition definition (contd)
A continuation paragraph for a multi-paragraph definition, as defined above.
- HED Definition term
A term to be defined, often followed by a HED Definition definition paragraph.
- HED Dialogue paragraph
Dialogue.
- HED Endnote paragraph
A paragraph in an endnote.
- HED Footnote paragraph
A paragraph in a footnote.
- HED Generic heading
A generic heading, often used in the middle of boxes or sidebars when you want to introduce a block of text without creating a formal sub-section. Also often used as a heading preceding a letter body, e.g., “CONFIDENTIAL”.
- HED Generic subheading
Similar to the generic heading, a second level of heading that can be used when you want to create a logical grouping of text without creating a formal sub-section.
- HED Image holder
A placeholder for an image. See “Add an image” for more.
- HED Image source
The source of an image, e.g. “Courtesy of Getty Images”.
- HED Imprint name
The name of your imprint, often included on a titlepage.
- HED Line space
A line space, often used to create a logical break in time or context.
- HED List item (contd)
A second paragraph in a multi-paragraph list item (can be used for both bulleted and numbered list items).
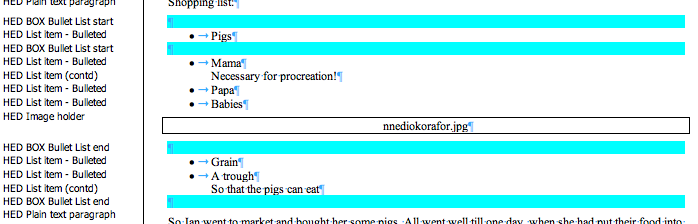
- HED List item – Bulleted
A bulleted or unordered list item. For multi-level lists, use the HED BOX Bullet List wrapper, nesting multiple levels of list wrappers within it, like this:
- HED List item – Numbered
A numbered or ordered list item. For multi-level lists, use the HED BOX Num List wrapper, nesting multiple levels of list wrappers within it, like this:

- HED Location
A location, for example the location of your office as it appears on the book titlepage, or the location in which a chapter is set.
- HED Mark for Deletion
A paragraph that should be deleted in the final output.
- HED Ornamental space
An ornamental break in the text, often used to create a logical break in time or context and containing a visual ornament.
- HED Plain text paragraph
This versatile style is used for plain text, for example in the main flow of a chapter, or a paragraph of text in an extract, or the body text of a letter. See “Paragraphs, Wrappers, and Sections” for more about this.
- HED Plain text paragraph (contd)
If a paragraph is broken up by an image or other content, use this style for the continuing text of the paragraph.
- HED Postscript
A postscript, as in a letter or foreword, e.g., “P.S., don’t forget to buy milk!”.
- HED Processing instruction
This special Hederis style is used to add extra instructions about how to transform the paragraphs and sections of your manuscript. See “Add special layout instructions” to learn all about processing instructions.
- HED Publisher name
The name of your publisher, for example appearing on a titlepage.
- HED Quote paragraph
A quote, that you don’t necessarily want to appear inside an extract.
- HED Salutation
A salutation, for example in a letter or foreword, e.g. “Dear reader,”.
- HED Signature
The signature of the author of a block of text, for example in a letter or foreword.
- HED Speaker name
A speaker in a block of dialogue.
- HED Subtitle
Subtitles for any type of section or wrapper. For example, could be used both for a chapter subtitle, and for a subtitle in a sidebar.
- HED TOC entry – backmatter
A table of contents entry for a backmatter section.
- HED TOC entry – chapter
A table of contents entry for a chapter.
- HED TOC entry – frontmatter
A table of contents entry for a frontmatter section.
- HED TOC entry – part
A table of contents entry for a part.
- HED Verse paragraph
A single line of verse.
- HED Wrapper title
Titles of wrappers and sub-sections. For example, for a sidebar title, extract title, sub-section title, etc.
- HED separator
Inline Styles
Inline styles are styles that you apply just to a few words or characters within a paragraph, without affecting the rest of the text in the paragraph. Hederis supports most of Word’s built-in character formatting tools (like italics, bold, underline, etc.), so you don’t need to use inline styles for everything. However, there are a few cases where inline styles come in handy:
- HED SPAN Small Caps Text
- HED SPAN Emphasis Text
Text that should be emphasized both visually and while being read aloud. This style is typically represented as italics. (In modern web development, “emphasis” has replaced “italic” as a code to add emphasis to your text.)
Note that you can use Word’s built-in Italic formatting button, and this style will automatically be applied when the .docx file is converted in Hederis.
- HED SPAN Strong Text
This style is typically used for bold text. (In modern web development, “strong” has replaced “boldas a code to add weight to your text.)
Note that you can use Word’s built-in bold formatting button, and this style will automatically be applied when the .docx file is converted in Hederis.
- HED SPAN Superscript Text
- HED SPAN Subscript Text
- HED SPAN Inline Link
A Link or url.
- HED SPAN Abbreviation Text
An abbreviation.
- HED SPAN Key phrase
A word or phrase that should be differentiated from the rest of the text, but doesn’t fall into any of the other Inline Style categories.
- HED SPAN Number
A numbered element, nested inside another paragraph. For example, this tag would be used to style a chapter number that runs in with the chapter title text, e.g. “1 Down the Rabbit Hole”.
- HED SPAN Introductory text
The first few letters or words of a paragraph or chapter.
- HED SPAN Loosen spacing
Loosen the character spacing in a span of text in the PDF. See “Adjust letter spacing (PDF-only)” for more.
- HED SPAN Tighten spacing
Tighten the character spacing in a span of text in the PDF. See “Adjust letter spacing (PDF-only)” for more.
- HED SPAN Line break after
Insert a line break after a word or character. See “Force a line break (PDF-only)” for more.
- HED SPAN Page break after
Insert a line break after a word or character. See “Force a page break (PDF-only)” for more.
HED SPAN Note reference
HED SPAN Note marker
Wrappers
- HED BOX Box start, HED BOX Box end
- HED BOX Bullet List start, HED BOX Bullet List end
- HED BOX Code Block start, HED BOX Code Block end
- HED BOX Definition List start, HED BOX Definition List end
- HED BOX Endnote start, HED BOX Endnote end
- HED BOX Epigraph start, HED BOX Epigraph end
- HED BOX Extract start, HED BOX Extract end
- HED BOX Figure start, HED BOX Figure end
- HED BOX Footnote start, HED BOX Footnote end
- HED BOX Letter start, HED BOX Letter end
- HED BOX Note start, HED BOX Note end
- HED BOX Num List start, HED BOX Num List end
- HED BOX Poetry start, HED BOX Poetry end
- HED BOX Sidebar start, HED BOX Sidebar end
- HED BOX Simple List start, HED BOX Simple List end
- HED BOX Sub-section start, HED BOX Sub-section end
- HED BOX Table start, HED BOX Table end
Sections
- HED SECT About the Author
- HED SECT Acknowledgments
- HED SECT Ad Card
- HED SECT Afterword
- HED SECT Appendix
- HED SECT Bibliography
- HED SECT Chapter
- HED SECT Colophon
- HED SECT Conclusion
- HED SECT Copyright Page
- HED SECT Dedication
- HED SECT Endnotes
- HED SECT Epigraph
- HED SECT Foreword
- HED SECT Glossary
- HED SECT Halftitle Page
- HED SECT Index
- HED SECT Interlude
- HED SECT Introduction
- HED SECT Part
- HED SECT Preface
- HED SECT TOC
- HED SECT Titlepage
Custom Code Library
Here are some custom processing instructions that you can copy, for frequently-requested customizations:
Override the author name in the running header
GLOBAL STYLE= string-set: authorname attr(data-author-name); SCOPE-BODY+ATTRS=data-author-name: INSERT YOUR NAME SCOPE-BODY;
This processing instruction allows you to override the author name that appears in the running header of your predefined template; include it after any paragraph, wrapper, or section. The author name text is traditionally pulled from any paragraph on your title page that is tagged with the HED Author name style; by using this processing instruction, you override that default text.
This processing instruction consists of two parts: a GLOBAL STYLE instruction that applies your custom text to the entire manuscript, and then an ATTRS instruction that contains a custom attribute with your new author name text, which will be applied to the main body container of your manuscript. In this snippet, the only bit that you need to change is the bolded “INSERT YOUR NAME” text – replace this with the text of your choice.
Override the book title in the running header
GLOBAL STYLE= string-set: booktitle attr(data-book-title); SCOPE-BODY+ATTRS=data-book-title: INSERT YOUR TITLE SCOPE-BODY;
This processing instruction allows you to override the book title that appears in the running header of your predefined template; include it after any paragraph, wrapper, or section. The book title text is traditionally pulled from any paragraph on your title page that is tagged with the HED Chapter title style; by using this processing instruction, you override that default text.
This processing instruction consists of two parts: a GLOBAL STYLE instruction that applies your custom text to the entire manuscript, and then an ATTRS instruction that contains a custom attribute with your new book title text, which will be applied to the main body container of your manuscript. In this snippet, the only bit that you need to change is the bolded “INSERT YOUR TITLE” text – replace this with the text of your choice.
Add custom HTML attributes
You can add custom HTML attributes to your final HTML, if you’ll be using the HTML in your own processes later – these attributes will also be included in your EPUB file. For example, you can customize the ID for a section, or you can add special role attributes to certain paragraphs so that your EPUB conforms to your company’s internal specification.
To add a custom attribute, use a processing instruction, like this:
Find the paragraph that you want to add custom attributes to, and insert a new “HED Processing instruction” paragraph below it (for more details on how to do this, see “Add special layout instructions”).
In your processing instruction paragraph, type the text ATTRS=.
Next, type the attribute name, followed by a colon, and then the attribute value.
To add more custom attributes, type a semi-colon, and then type the next attribute name, followed by a colon, and then the attribute value, and so on.

To add a custom attribute to a wrapper, insert the processing instruction paragraph after either the wrapper “start” or “end” paragraphs. (See “Customize the design of specific paragraphs, wrappers, or sections” for an example of what this looks like.)
To add a custom attribute to an entire section, insert the processing instruction paragraph after the section start paragraph. (See “Customize the design of specific paragraphs, wrappers, or sections” for an example of what this looks like.)
Using the SCOPE-BODY Option
You can also apply attributes to your entire document, by using the SCOPE-BODY option in your ATTRS processing instruction. This will apply the selected attribute to the main container element of your manuscript, rather than being applied to the immediately preceding element. To do this:
Type your ATTRS processing instruction, as described above.
After the custom attribute value, but before the closing semi-colon, type: SCOPE-BODY.
Your attribute will now be applied to the body element.

In this processing instruction, we’re overriding the running header text with our own custom text. You can read more about this code snippet in “Custom Styles Library”.
Note that the SCOPE-BODY option must be invoked for each attribute that you want to apply to the body. For example, in the image below, because only the “data-author-name” attribute invokes the SCOPE-BODY option, only that attribute will be applied to the entire body, and the “id” attribute will be applied to the immediately preceding element (in this case, the chapter title) as usual.

Add Roman Text After Italicized Text, in a Locked Chapter
When you’re working with locked chapters, the assumption is that you want to restrict your line breaks and page breaks from changing unless you explicitly adjust them. For this reason, locked chapters are not synced with the text in the Edit Text pane, which can make it tricky to enter all the little edits and typo fixes that you need.
To edit text in a locked chapter, open the Design pane. At the top right, you’ll see a button labeled “Enter Edit Mode.” Click this button and start hovering over your text—you’ll see that each line in your locked paragraphs gets highlighted as you scroll over it.
A fairly common proofreading edit is to un-italicize punctuation following an italicized span of text. This can be a little tricky in a locked paragraph, but here’s a little hack that might help:
Click to select the line that contains the text you need to edit.
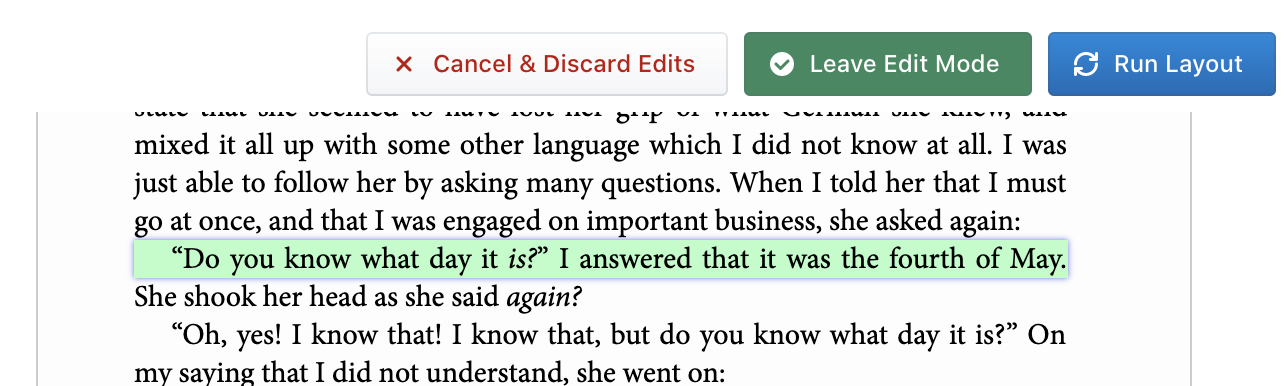
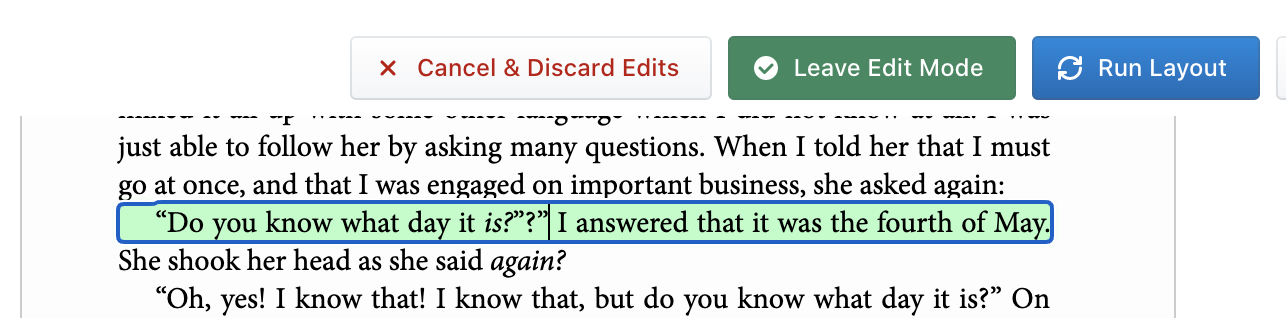
Click your cursor in the position that you want to start editing. If you just press backspace and re-type the character, you can see that it will still be italicized. That’s because it is inside an inline tag—you can see this even more clearly if you select Emphasis Text from the Sections & Text menu in the Design tab. We’re going to do a little trick to get out of that tag.

We’ve selected all the Emphasis Text spans, to make it easier to see how these inline tags wrap around text.
Move your cursor one character to the right (or however many you need to move in order to have one character between your cursor and the italicized text. Now type your new, unitalicized text.
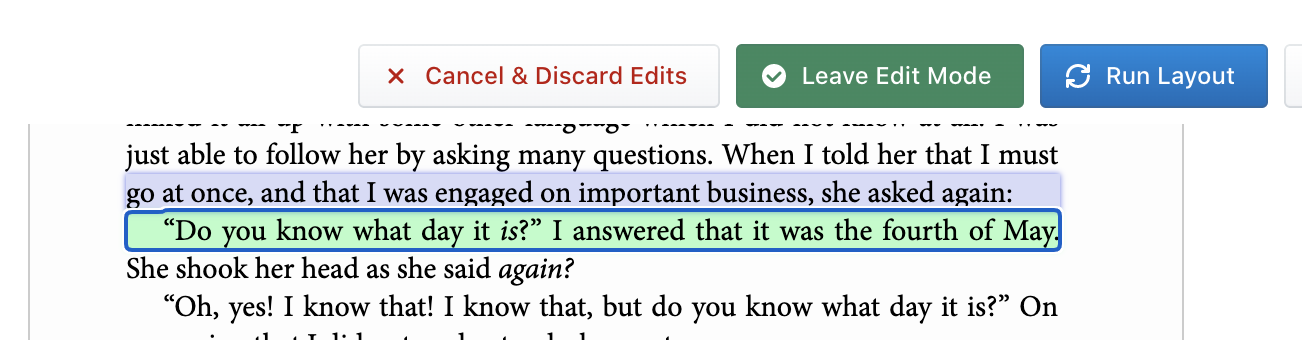
Next, hold down the shift key, and press the left arrow to select the unitalicized character(s) between your new text and the italic block.
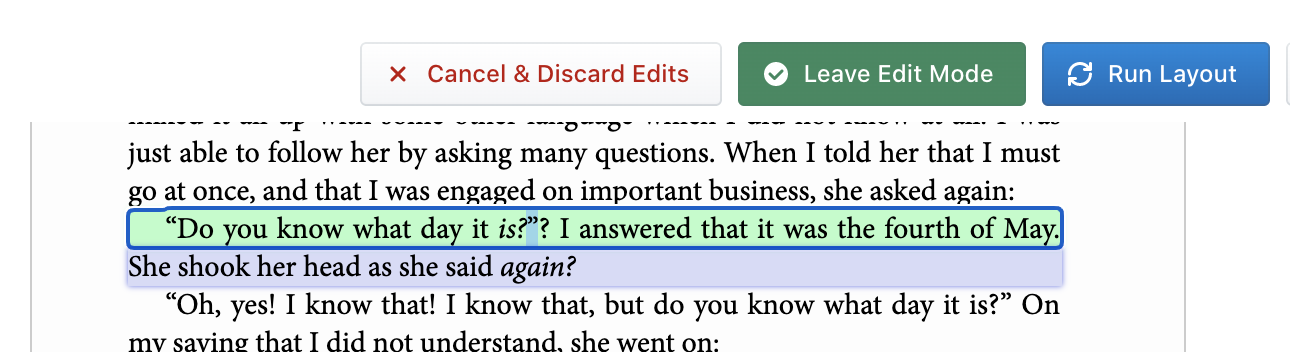
Let go of the shift key, and press command-c/Ctrl-c to copy those characters.
Now move your cursor back so that it just follows the new text you typed, and press command-v/Ctrl-v to paste your copied text.
Again move your cursor so that it just precedes your new text, and press delete/backspace to remove all the old characters, including the italicized text that you wanted to replace.
You should now have your desired result!
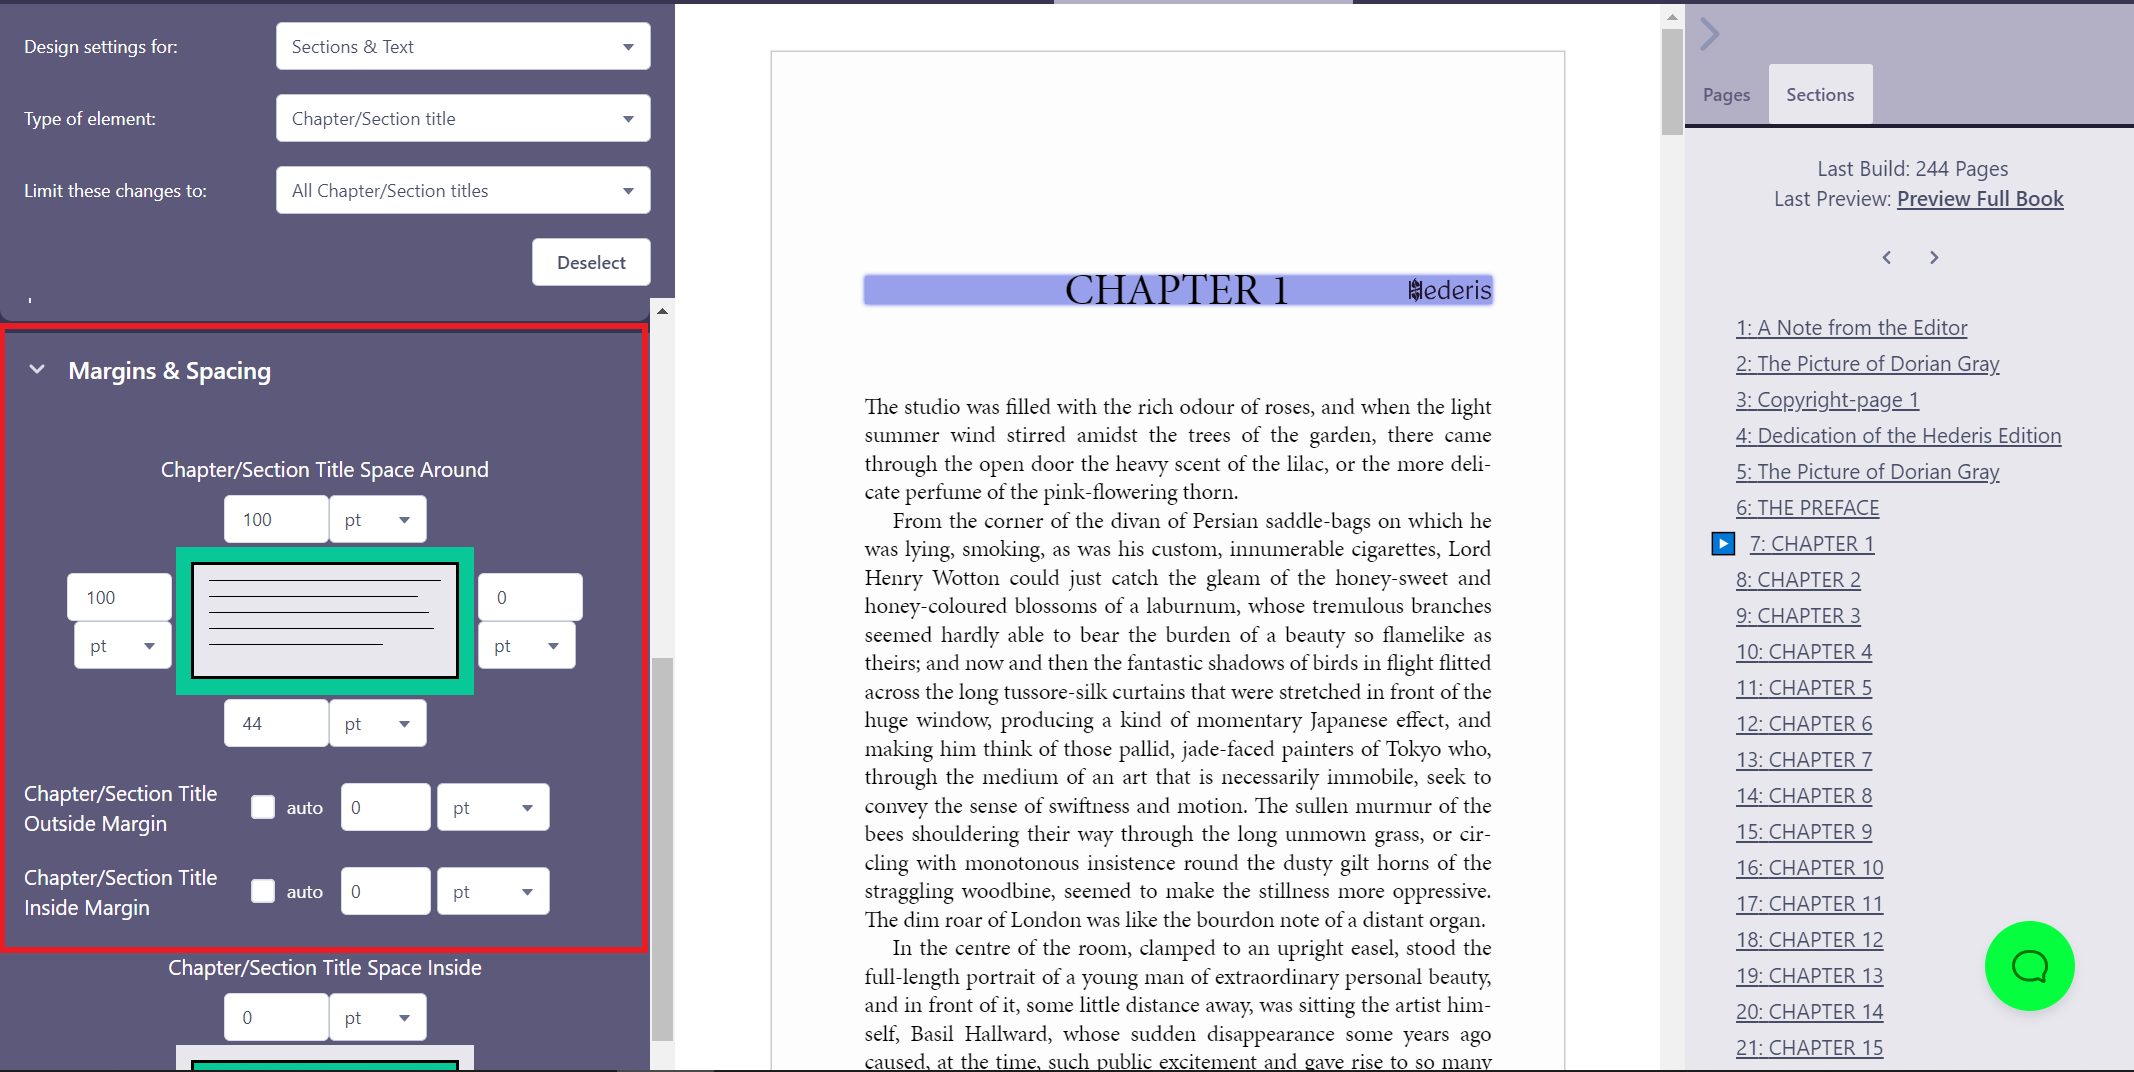
Add an Ornamental Image on the Same Line as a Chapter Title Paragraph
There are a few different ways you can add an image on the same line as text, but using a background image is probably the tidiest way.
Open the Design pane, navigate to a chapter that you know includes a title paragraph, and make sure you’re on the Design tab.
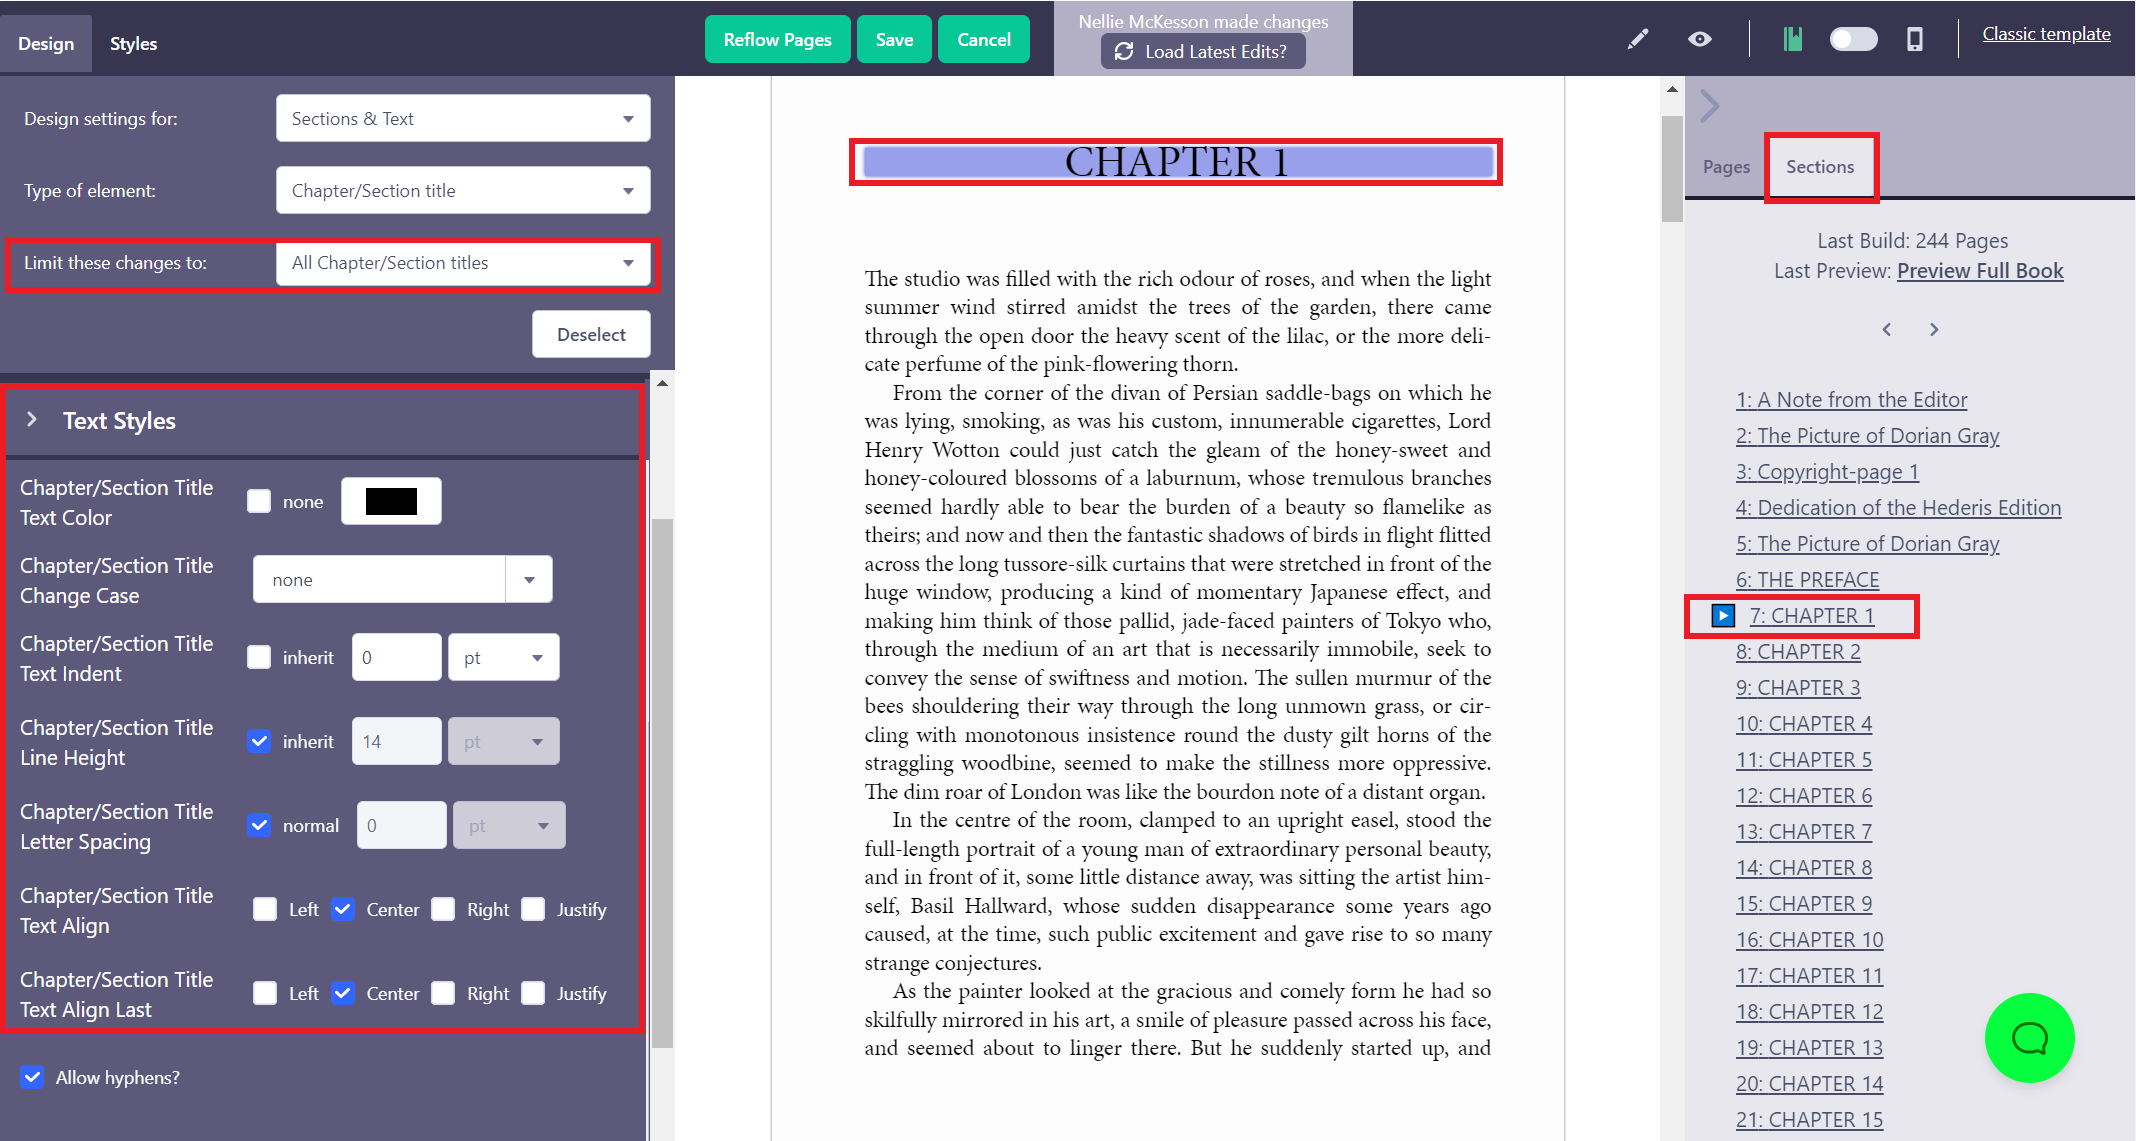
Open the Sections & Text menu, and choose Chapter/Section title.
If you want to limit your design to a subset of the title paragraphs in your book, click the title text, and then choose the limitation you want to apply (e.g., “Chapter/Section titles inside SECT Chapter”, to limit the design to only the titles that occur inside a “Chapter” section, as opposed to any other sections like Titlepage, Copyright-page, Preface, etc.)
First, set the text settings for your titles. You can come back and adjust these later, but it’ll be easier to layout your ornament if you know how the text is going to look. The most important things to set are your text size and alignment.
Now let’s add the image, and then we’ll deal with getting it to fit. Scroll to the Background menu, and in the Background Image dropdown menu, choose the image you want to use.
Depending on the size of your image, it may look cropped at first, and might even be overlapping the text, but we’ll fix that in a moment. Do your best to set the image to your desired size using the Background Width and Background Height options, but don’t worry about whether you can see the whole thing yet. You can also set one option to a fixed value, and leave the other option set to “auto” to preserve your image’s proportions.
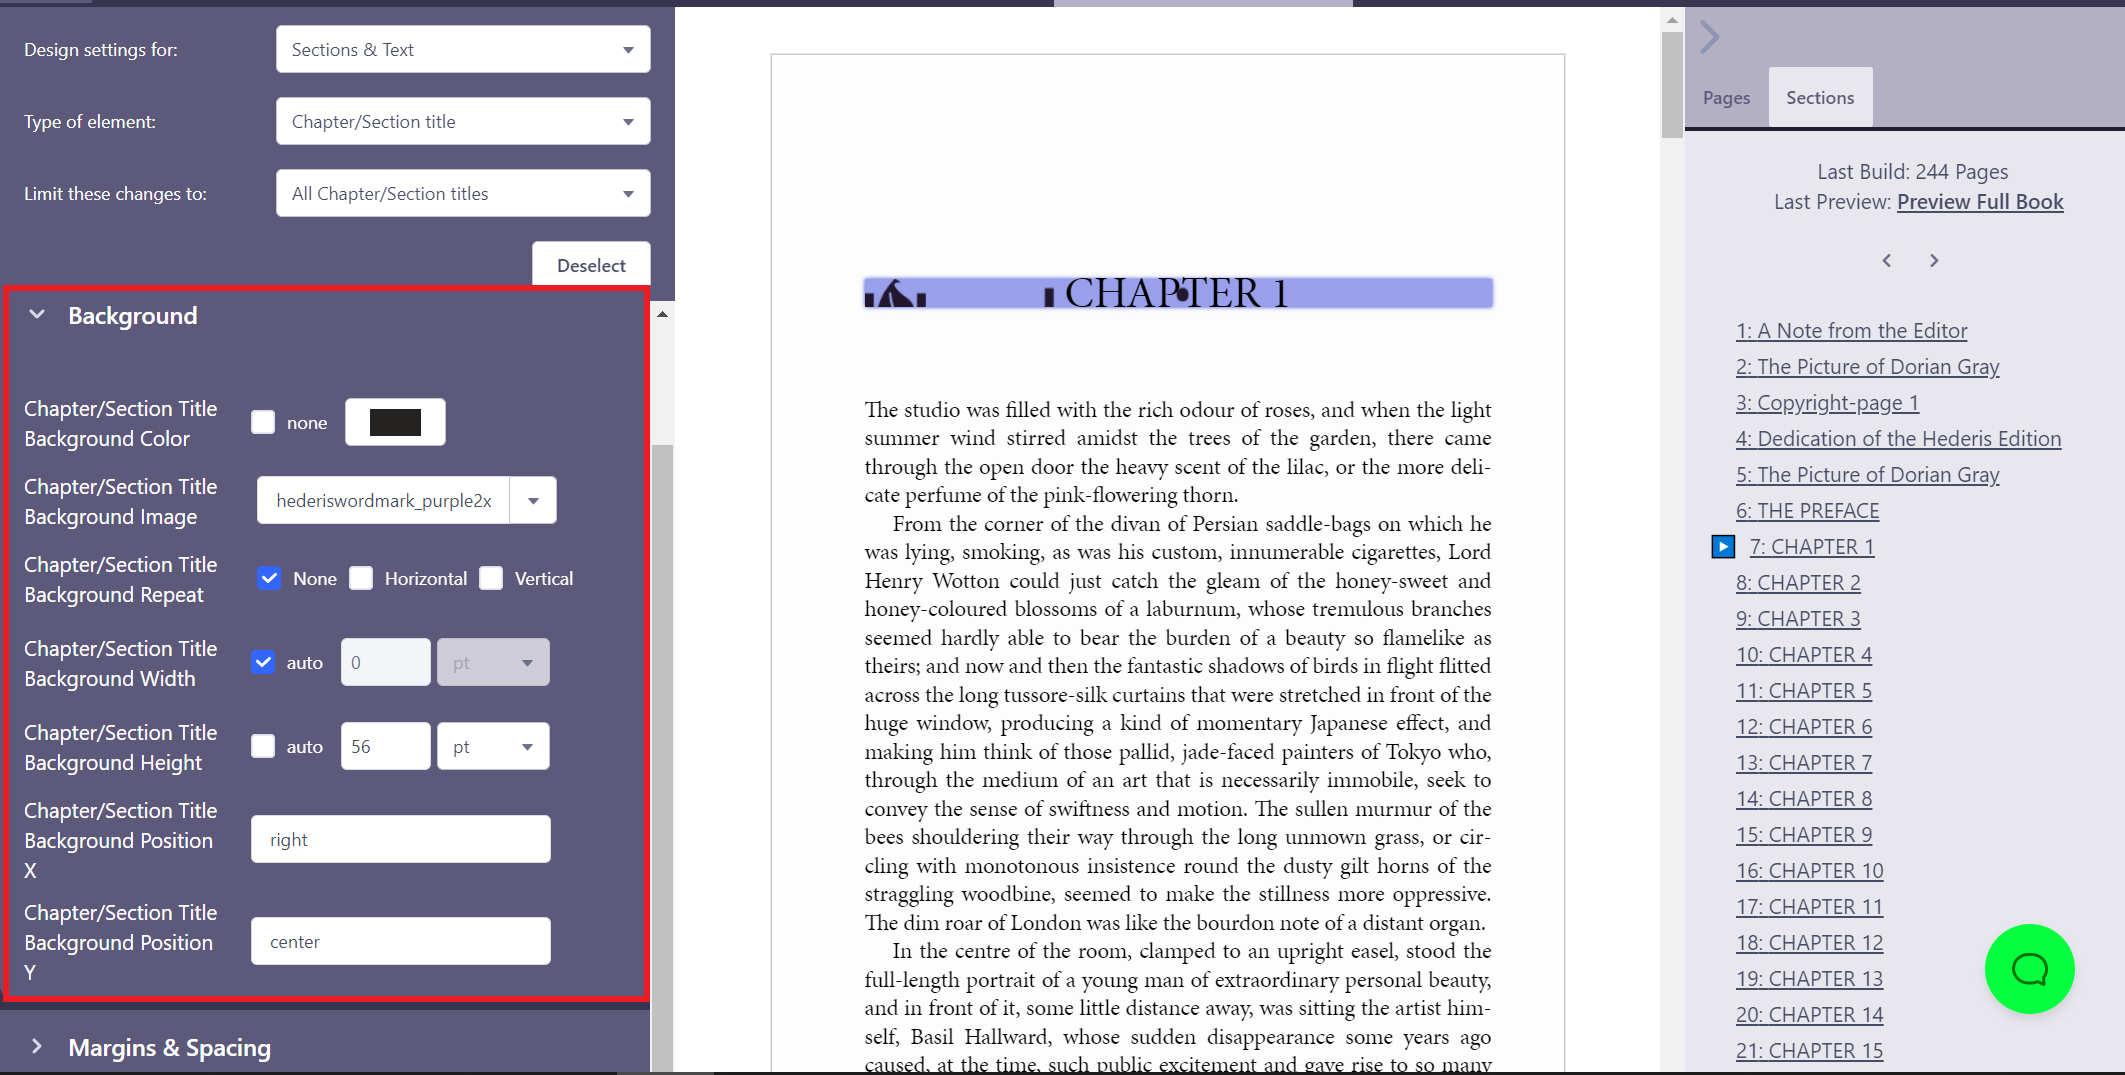
Adjust the position of the image by entering a keyword or number into the Background Position X and Background Position Y boxes (“X” controls the horizontal position, and Y controls the vertical position). You can use the keywords “left”, “center”, and “right” for the X position, and “top”, “center”, and “bottom” for the Y position. You can also enter a number or a percentage, to really fine-tune to position of your image behind your text.
Now let’s make sure we can see our whole image. Scroll down to the Margins & Spacing section, and find the Padding box. The trick to background images is that they will not appear behind any margins you add, but they will appear behind padding space. This means we can use padding to fine tune both how much space is allotted to the image, and how the paragraph text also sits inside that space.
Play around with adding space to your padding boxes to set the alignment of the text and image. For example, if you add more padding on the top, the text will be shifted down towards the bottom of the image. To get the image to appear to the right of the text, add enough padding on the right to fit the whole image.
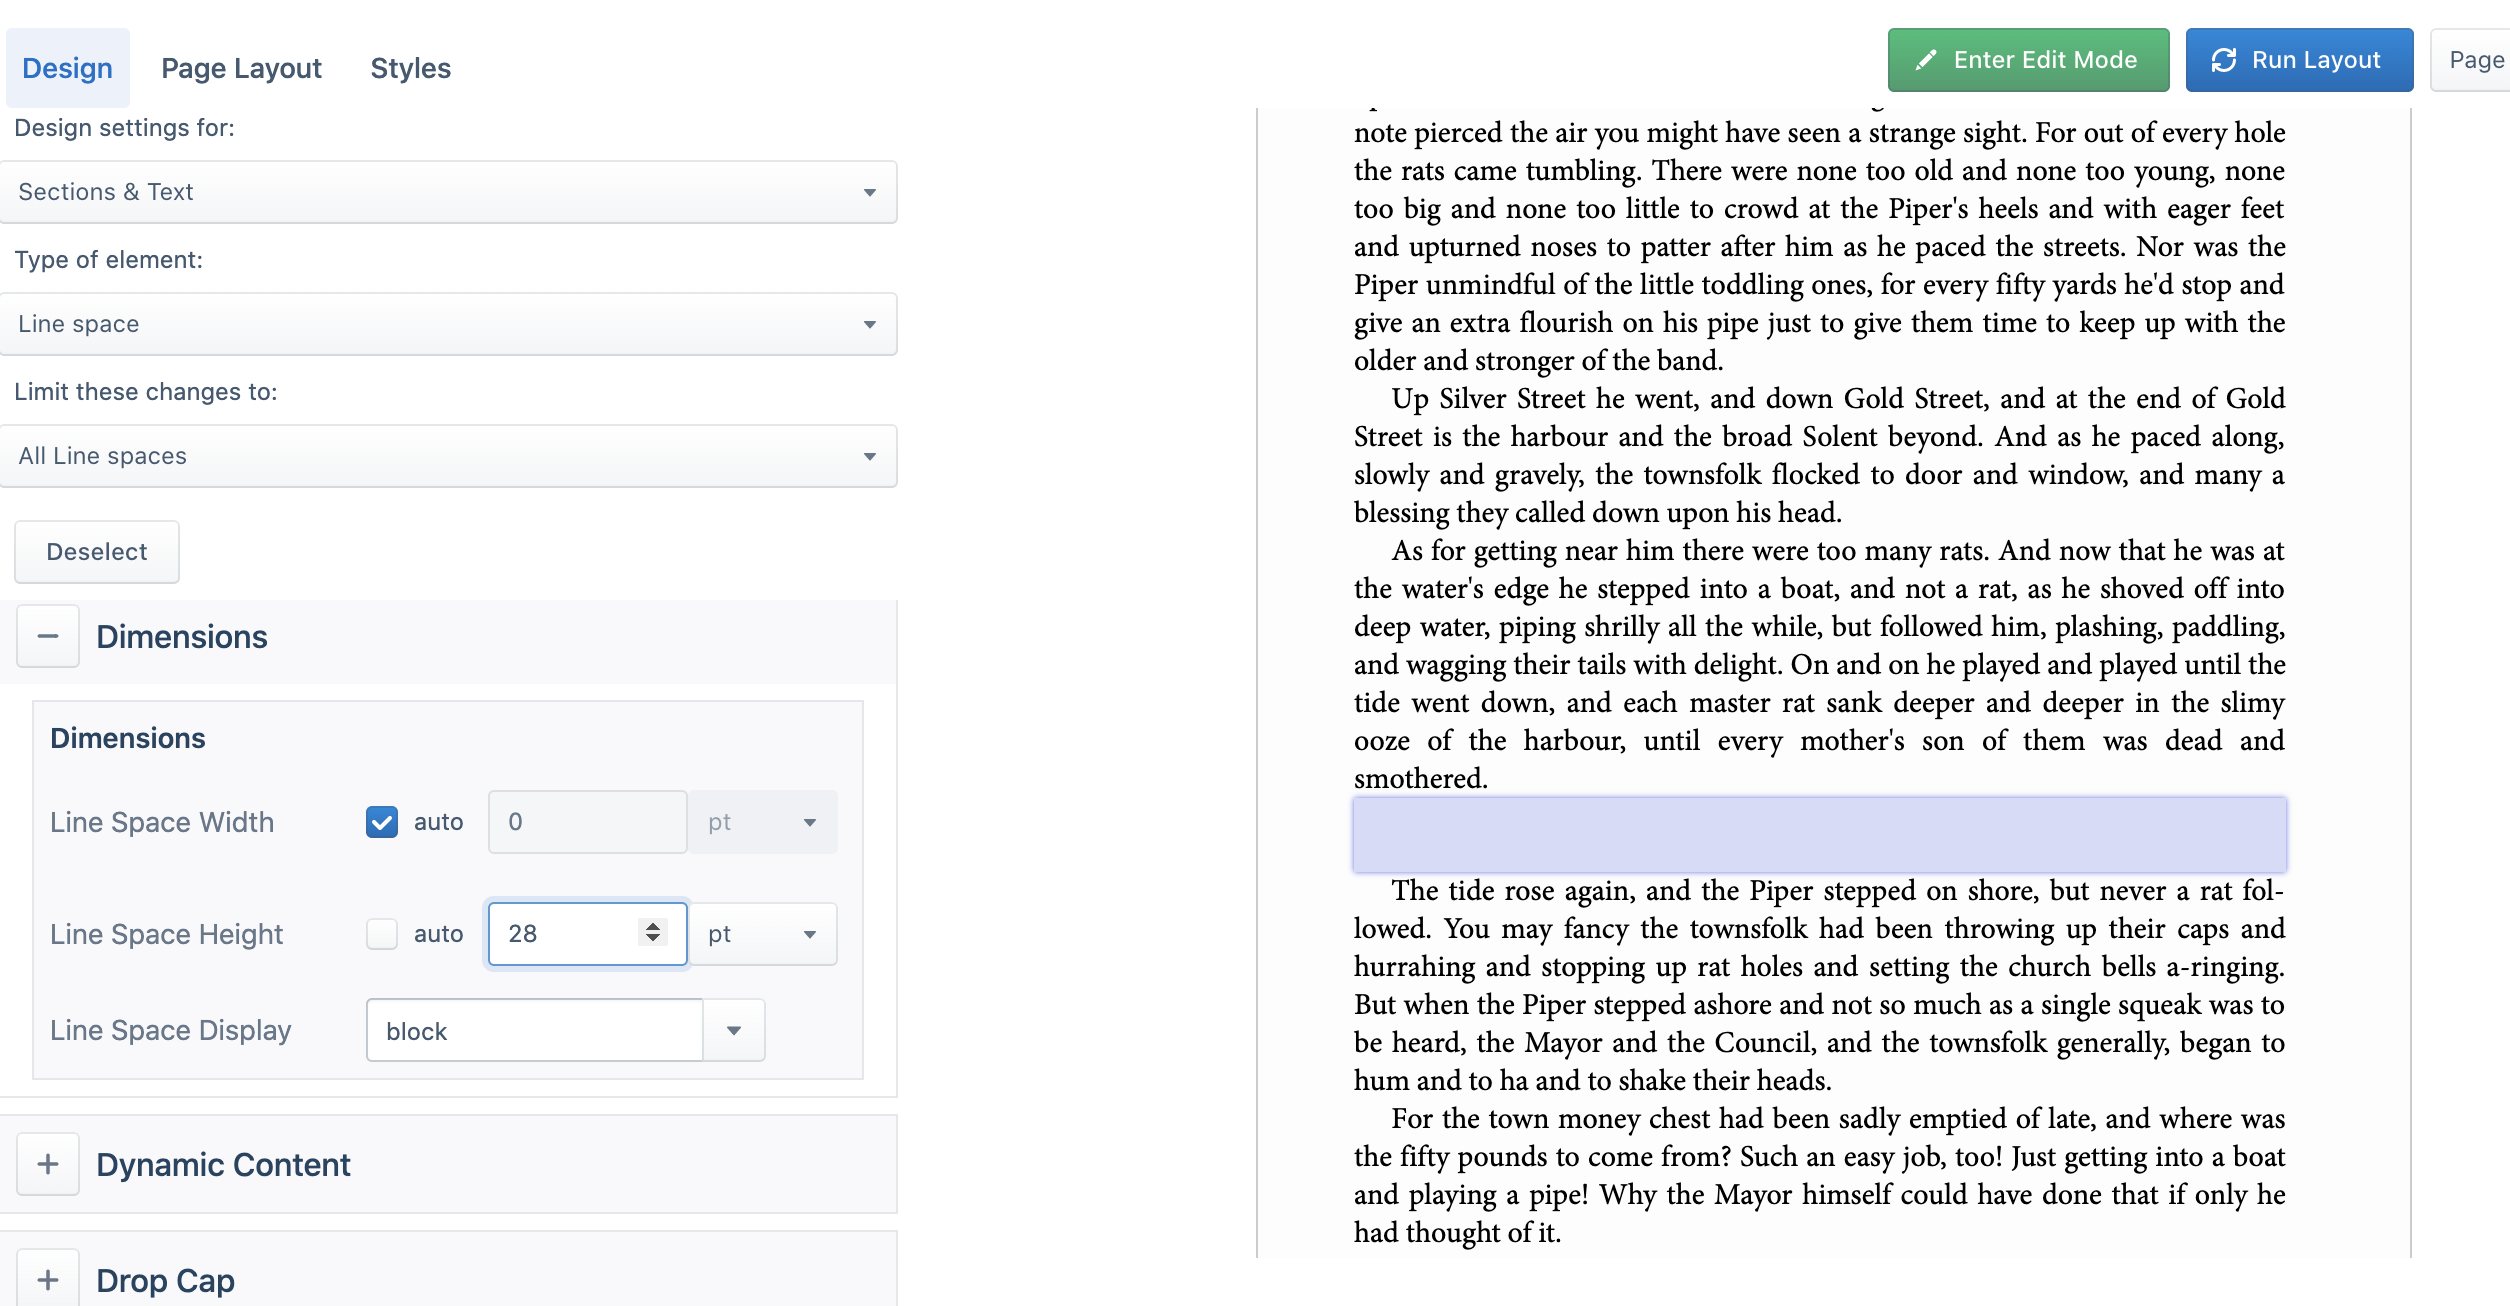
Add an Ornamental Image to a Line Space Paragraph
You can use background images to add an ornament to your line space paragraphs. Prepare your image file and upload it to your Hederis project, and then do the following.
Open the Design pane, navigate to a chapter that you know includes a line space paragraph, and make sure you’re on the Design tab.
Open the Sections & Text menu, and choose Line Space (or Ornamental Space, if you’re using that paragraph style instead).
If you want to limit your design to a subset of the line space paragraphs in your book, find a line space paragraph in the text, click it, and then choose the limitation you want to apply (e.g., “Line space paragraphs inside SECT Chapter”, to limit the design to only the line spaces that occur inside a “Chapter” section, as opposed to any other sections like Appendix, Copyright-page, Preface, etc.)
Now that you’ve selected the element you want to design, first scroll down to the “Dimensions” menu in the design sidebar. Because your line space paragraphs are probably empty right now, we want to give them a fixed height, to force them to show up in the text. Enter your desired height here (using a multiple of the base line height will help you keep everything aligned to the baseline (see “Single View, Guides, Grid, and Run Layout” for more).
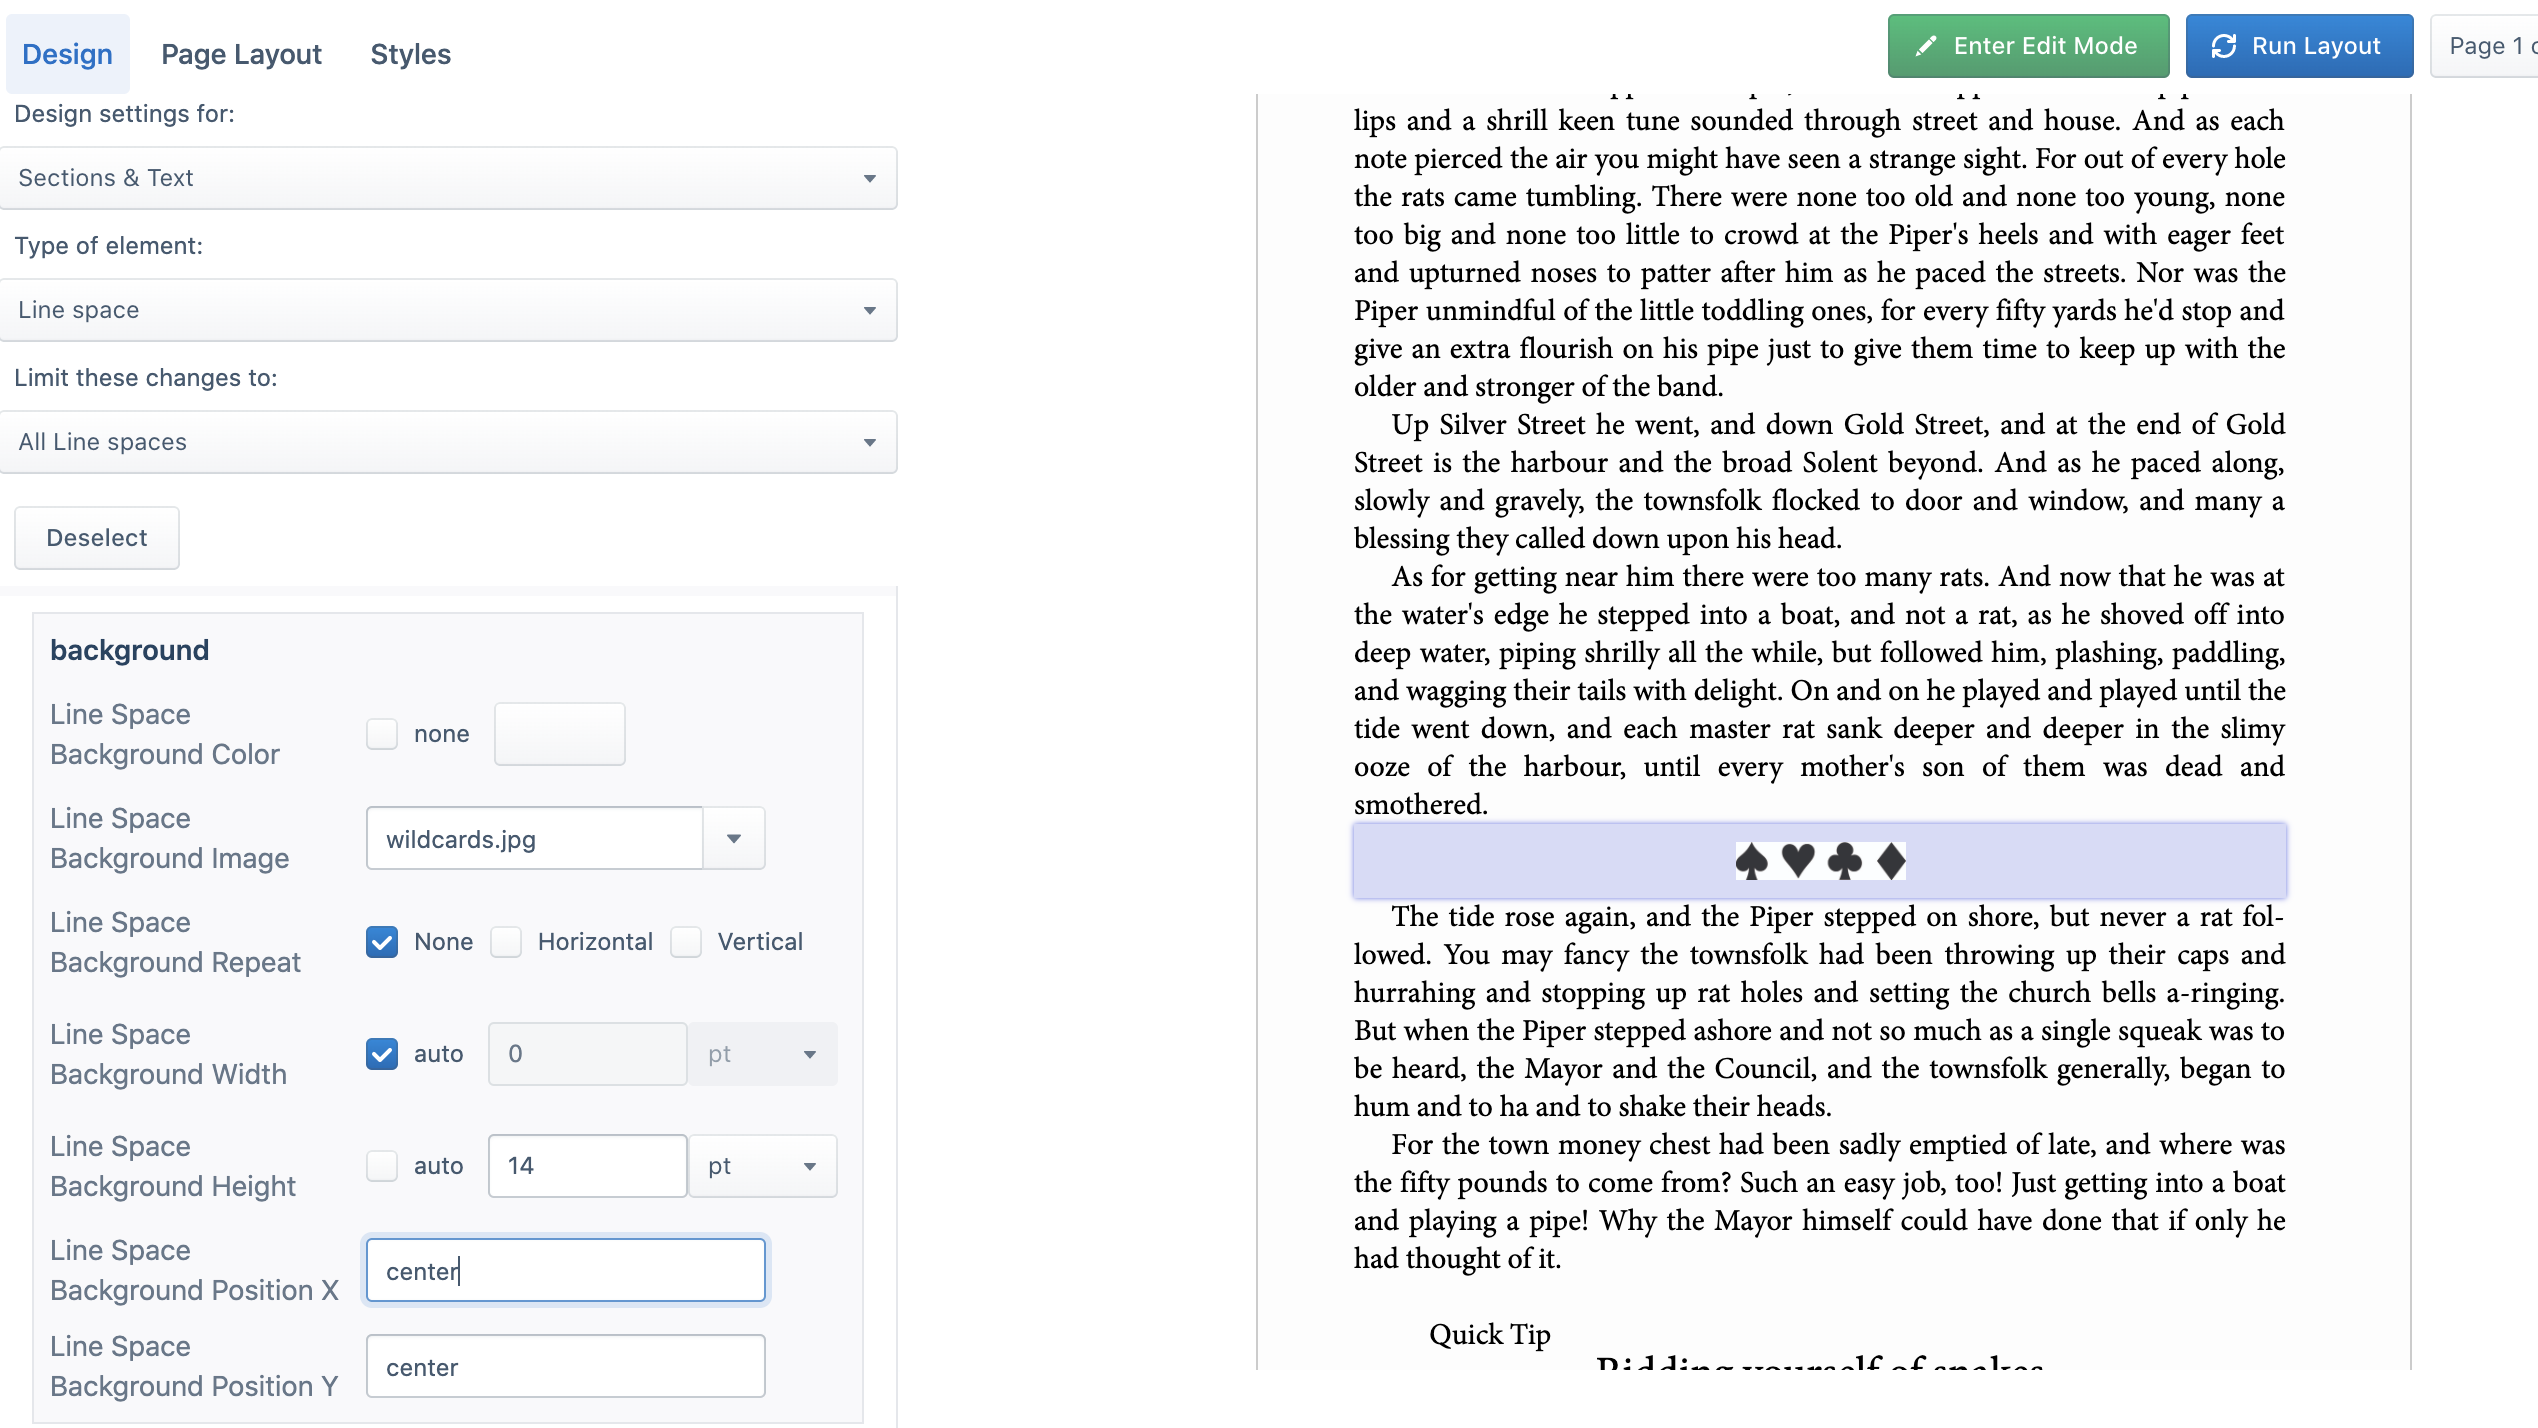
Now scroll up to the “Background” menu. This is where you get to finally add your image!
In the Background Image dropdown menu, choose the image you want to use.
Adjust the size of the image using the Background Width and Background Height options. You can set one option to a fixed value, and leave the other option set to “auto” to preserve your image’s proportions.
Adjust the position of the image by entering a keyword or number into the Background Position X and Background Position Y boxes (“X” controls the horizontal position, and Y controls the vertical position). You can use the keywords “left”, “center”, and “right” for the X position, and “top”, “center”, and “bottom” for the Y position. You can also enter a number or a percentage, to really fine-tune to position of your image behind your text.
And that should do it! Still have questions? Email us at help@hederis.com.
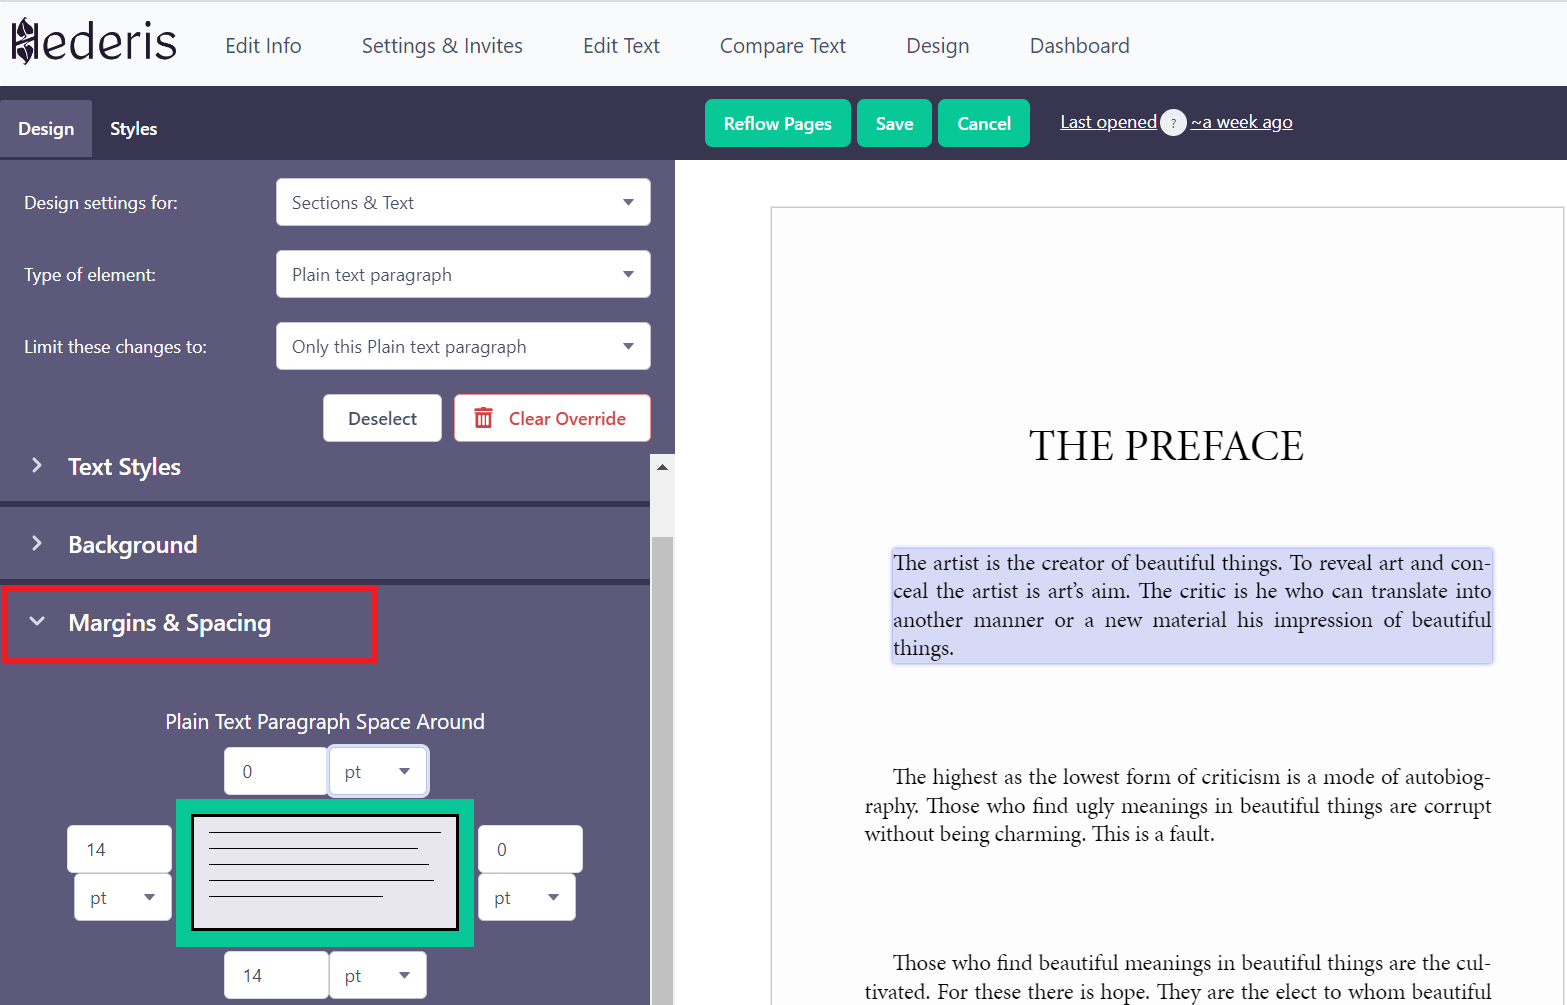
Create a Hanging Indent
Creating a hanging indent is easy, by using a combination of the margin and text indent properties. Instead of adding a positive number to the text indent field, which would indent the first line, you’ll add a negative number, which will pull that first line to the left of the rest of the paragraph.
Select the paragraph or type of paragraph to which you want to add a hanging indent. If you only want to add it to a single paragraph, or to a subset of that type of paragraph, make sure you select the appropriate “Limit these changes to…” option.

Go to the Margins & Spacing section, and add a left margin equal to the amount that you want the first line to hang.
Now go to the Fonts section, and add a negative text indent equal to the same amount that you set for the left margin.
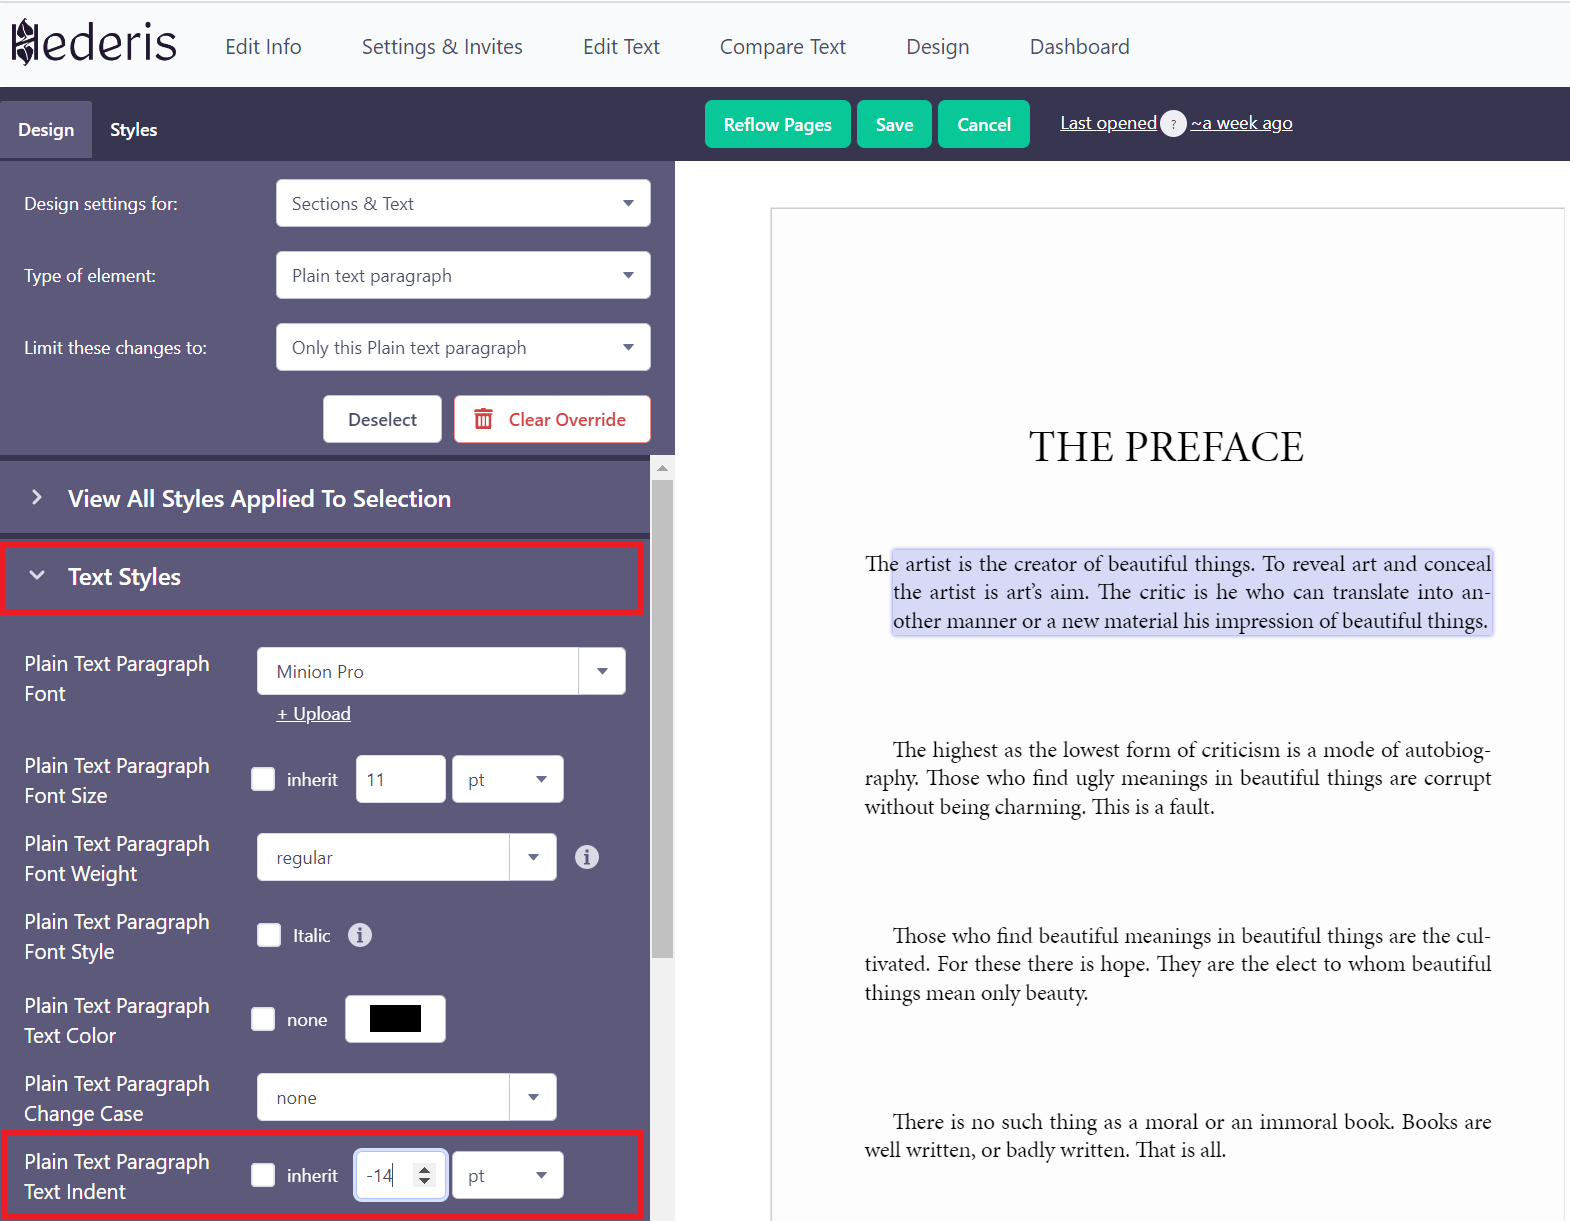
Viola! Your paragraph now has a hanging indent.
