Blog
Use a Custom Font
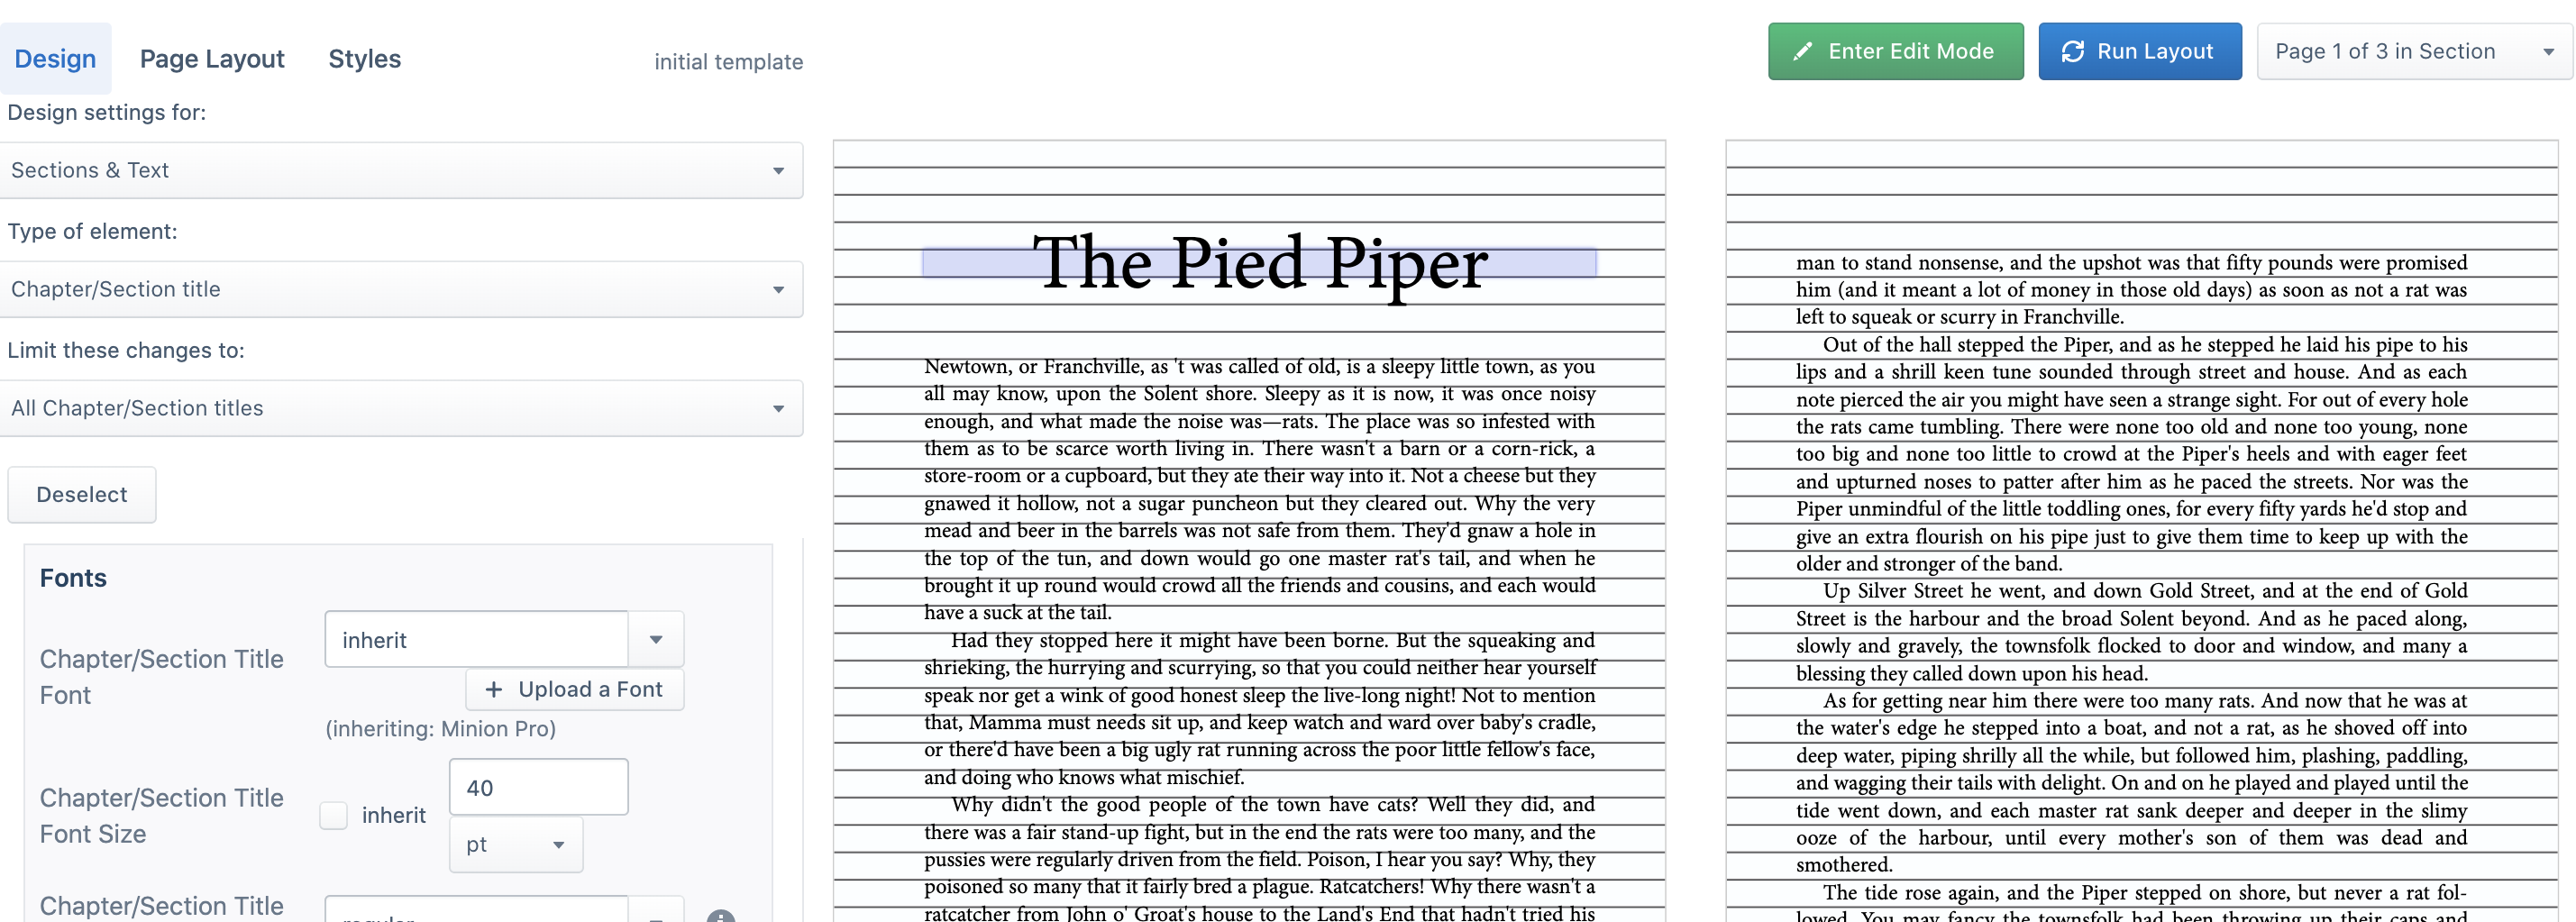
You can upload your own fonts from the Sections & Text menu in the Design preview. Choose an element to design, scroll down to the Font section, and click the “Upload Font” button.
Designing text paragraphs
You can completely customize the text formatting for every type of paragraph in your book, including the font family, size, line height, alignment, and more. You can also add borders to your paragraphs, and add extra space above and below.
If you turn on the “Float to bottom?” checkbox, that type of paragraph will get positioned at the bottom of the current page. This is great for titlepages, for example if you want to position the publisher name at the bottom of the page.
Designing BOX elements (wrappers)
Sometimes text needs to be set aside from the main flow of text in some way, for example as an extract or note (see “Paragraphs, Wrappers, and Sections” for more about this). You can format the text in your wrappers differently from the rest of your text, and you can add borders and extra spacing around your wrappers. You can also set a specific width or height for your wrappers, or let the wrappers size themselves automatically based on the width of the text inside the wrapper (choose “auto”).
Designing SECT elements (sections)
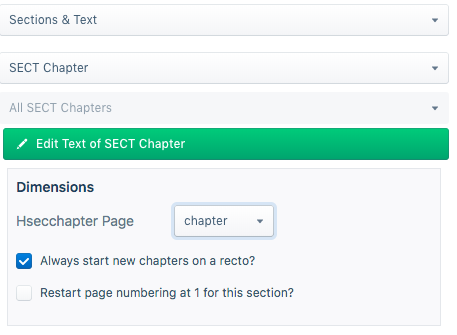
All the content in your book is split up into different types of sections (see “Paragraphs, Wrappers, and Sections”), and you have just a few options for designing each section:
The first option, Page, is where you choose the type of page template to apply to this type of section. You can also choose to always start this type of section on a recto page, and to restart the page numbering at 1 for this specific section (for example, if this is the first chapter after the frontmatter).
Sections & Text
This is where you’ll find all the tools for designing the text of your book, and where you’ll probably spend most of your time. The options that appear here change based on the type of element you have selected. The first thing in this toolset is the element selection dropdown menu, which lists all the types of elements in your book. Choose a type of element, and you’ll see a variety of options appear, as outlined in the next sections.
By default, your designs will apply to every element of a certain type within your book (e.g., every wrapper that uses the “BOX extract” style, or every paragraph that uses the “Plain text paragraph” style), but you can limit your design to a subset or even just a single element. Click on a paragraph in the preview window, and the Selection dropdown menu will become activated and give you a variety of options:
Only this element. You can customize the formatting of any individual element or paragraph.
This type of element inside this type of parent. Because of the way that book content is nested in Hederis, you can limit your formatting based on the type of element that your selected paragraph is inside of. For example, “Plain text paragraphs” inside of “Extract wrappers,” or “Chapter Titles” that only occur inside of Chapters (but not Prefaces or Appendixes or any other type of section).
First element like this inside this type of parent. Similarly, you can limit your formatting to apply only to the first occurrence of a type of paragraph inside its parent.
This type of element that follows the previous type of element. You can also limit your formatting to apply only to elements that follow a specific other type of element. This is great for removing the indent from chapter opener paragraphs: you can format all “Plain text paragraphs” that follow a “Chapter Title.”
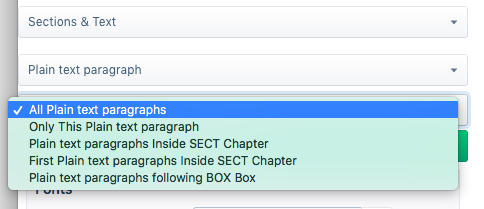
Here's an example of what you might see in the Selection dropdown menu when you click on a “Plain text paragraph” in the preview window.
Page Templates
INTENTIONALLY BLANK
Page templates control the general layout of all the different sections in your book. This is different from a book’s design template: a design template includes design instructions for all the paragraphs and elements in your book, as well as the running content, margin widths, and so on. Page templates, however, determine only the page margins, where the running headers and footers go and what kind of content should appear in them, and how to format that text. Page templates are just one part of a book’s design template.
You can configure 5 different page templates: chapters, 2 types of frontmatter, backmatter, and parts. While these page templates are applied to certain types of sections by default, you can change the page template that is used in any section, in the Sections & Text toolset.
Each type of page template has 4 pages that can be configured:
The first page of the section: You can change the top and bottom margins for the first page of the section, or change the running header and footer content. For example, you might choose to insert just the page number at the bottom of the first page, and then to include full running headers and footers on your recto and verso pages.
Recto and verso pages: These are the main content pages of your section, and this is also where you set the inside and outside margins that will be applied to all the pages in your section (including first and blank pages).
Blank pages: Sometimes a section will include pages that don’t include any book content—for example, if this section ends on a recto page, but the next section is required to also start on a recto page, then an extra blank verso page will be added to the end of the first section. In these cases, you can choose to suppress the running header and footer content, or have different running headers and footers appear.
Running headers and footers can consist of text content, or use our built-in variables. To add text to your running headers or footers:
Click the margin area that you want to add content to.
Click inside the text box, and type an opening quotation mark (“).
Now type the text that you want to appear, and then type a closing quotation mark (”).
Finally, press the Enter or Return key. Your text will appear as a gray bubble. To remove your typed text, simply press the X immediately to the right of the gray bubble.
Variables let you insert dynamic content that is pulled right from your book text, like the most recent chapter title, the book title, or the author name. You can also insert a variable to dynamically add the up-to-date page number. To include a variable, simply click on it and it will appear in the text box as a green bubble.

This example shows a running footer that uses our built-in Page Number variable, and a running header with text content.
You can also combine text and variables, by following the same steps above for each type of content you want to include.
General Page Design
INTENTIONALLY BLANK
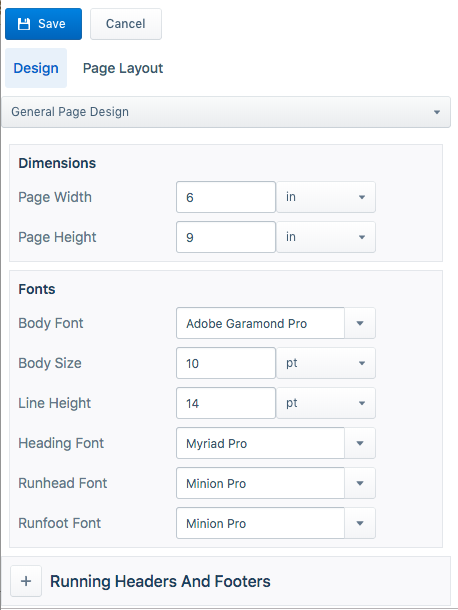
In this toolset, you can configure your trim size, as well as type settings that will cascade down to all the elements in your book (but you can customize each element, as described in “Sections & Text”).
The left sidebar: Design tools
The left sidebar is where you’ll find all your text design tools.
At the top, you see your Save and Cancel buttons—remember to save early and often!
Below those buttons, you have menu tabs for Design and Page Layout, with the design tools selected by default.
The design tools are split into three different toolsets: General Page Design, Page Templates, and Sections & Text. You can jump between these toolsets using the dropdown menu at the top of the Design tab. We’ll describe those toolsets in detail in the following sections.
Working with the Baseline Grid
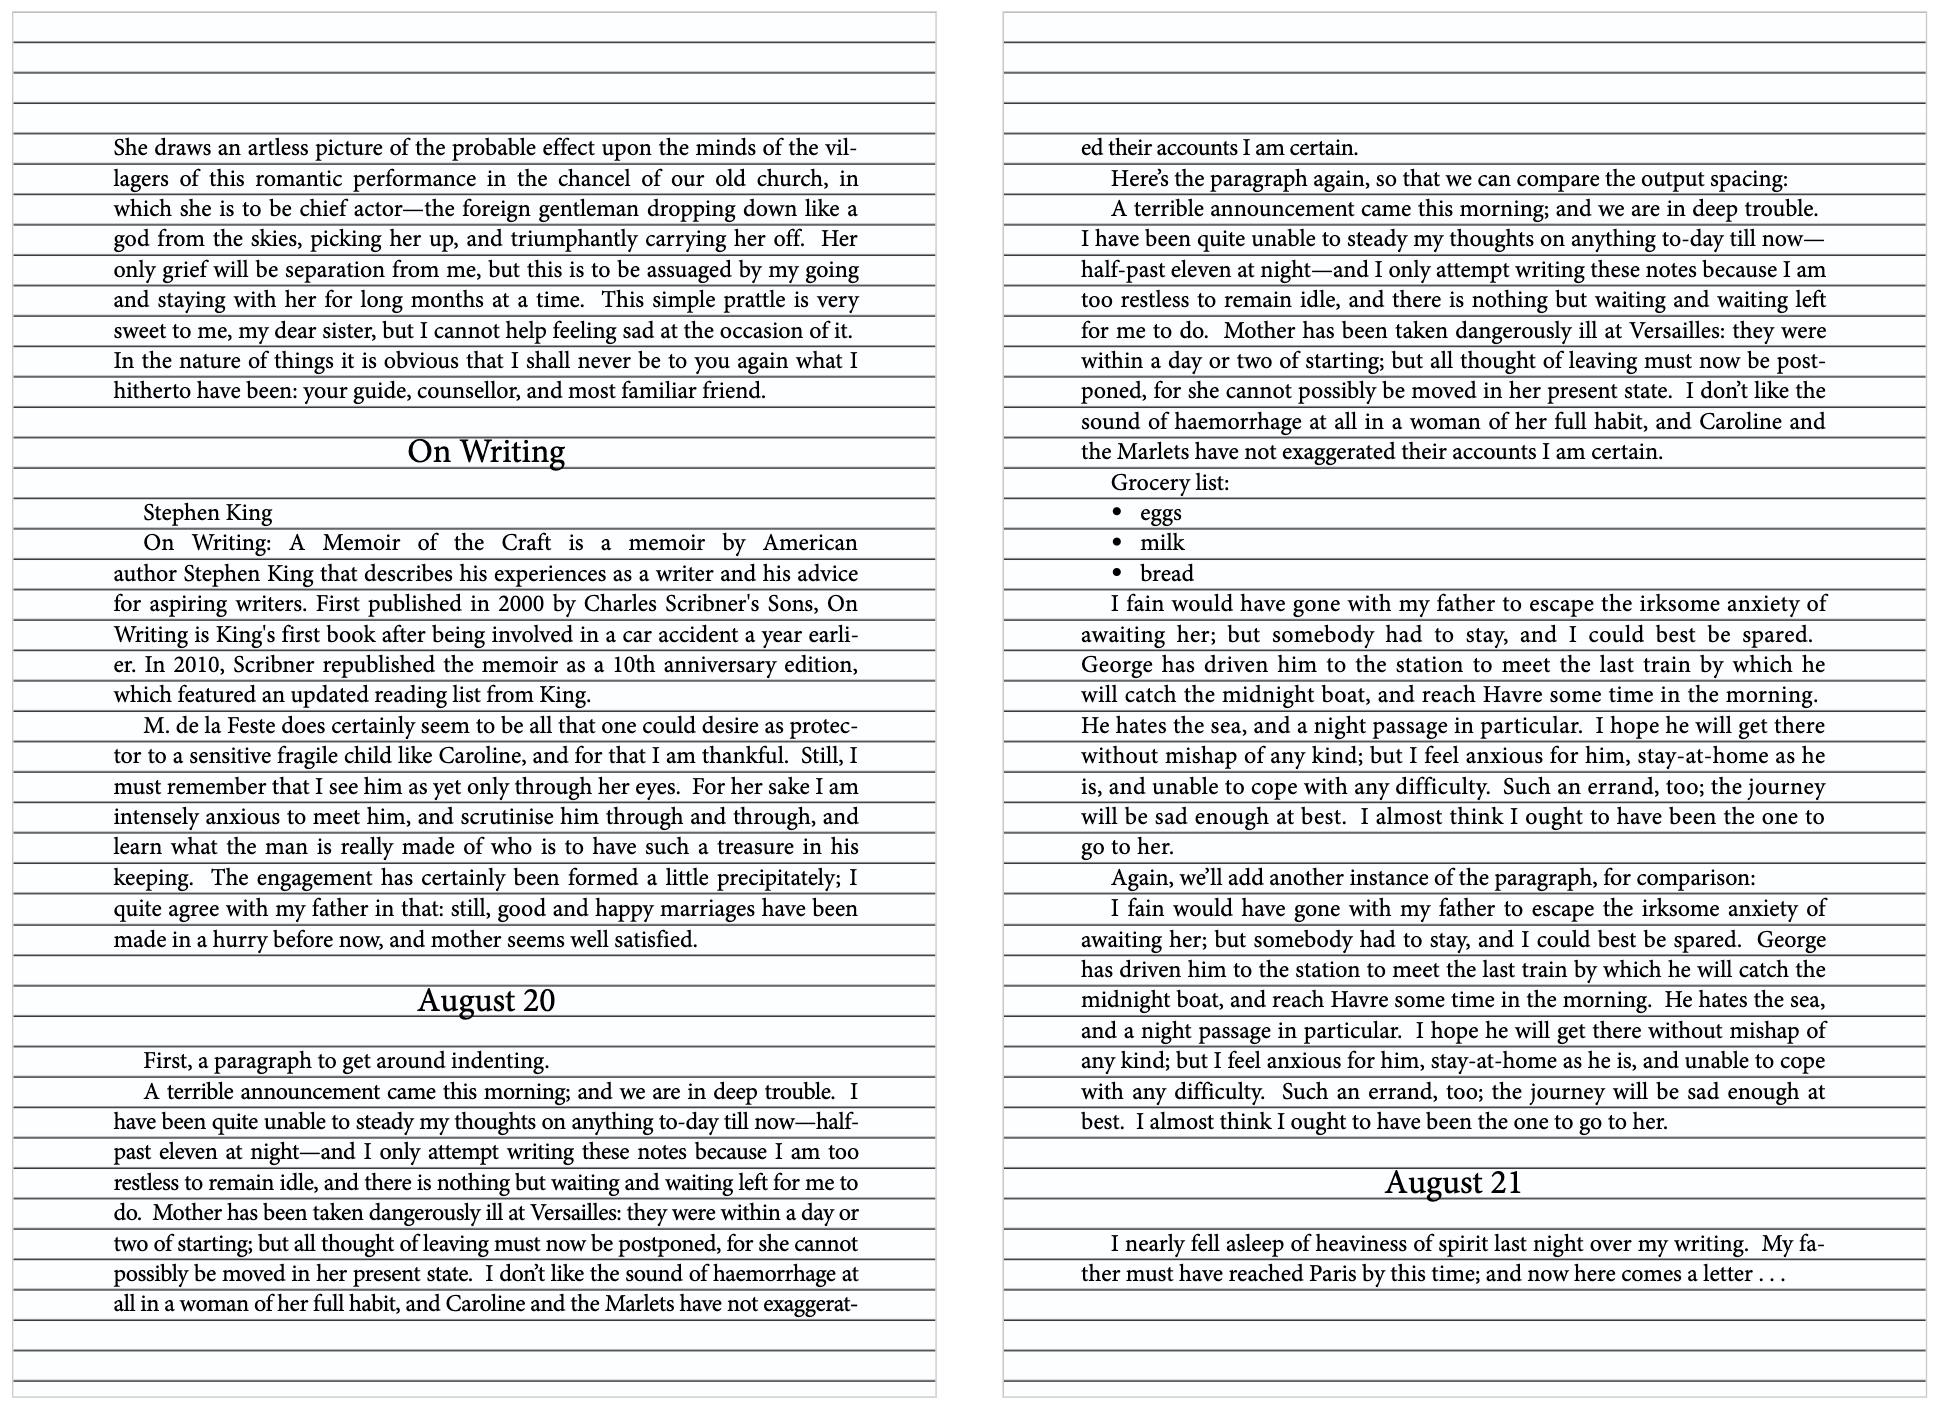
Balanced pages are a hallmark of professional book typesetting. “Balanced” means having the same number of lines on each page, and making sure that the lines on both pages in a spread line up across the spread, like this:
To help you make sure your text lines up, we’ve built in a grid. You can view the grid by clicking the Grid button in the top right of the Design pane, after which you’ll see a grid of horizontal lines running across each page. The height of the grid is determined by the “Line height” option in your General Page Design settings. By default, all text elements will inherit their line heights from this same setting, which helps to make every line of text take up the same amount of vertical space.
You can customize the line height setting for any text element in the Sections & Text menu. However, in order to keep your text lined up on the baseline grid, it’s generally wise to work in multiples (or fractions) of your general line height setting, or to keep the baseline grid on as you’re adjusting things like font sizes, line heights, and spacing, so that you can make sure everything fits the grid as you work.
For example, the following chapter title was set to use a larger type size and line height than the body text (which is still using the line height and font size from the General Page Design menu, rather than being configured separately in the Sections & Text menu). Without adjusting any of the spacing, you can see that these changes to the chapter title have caused the text on the first page to get mis-aligned with the rest of the text in the chapter.
To fix this, we can adjust the spacing below the chapter title, in order to get the following text to fit into the grid as needed:

The top-right toolbar: Single View, Guides, Grid, and Run Layout
INTENTIONALLY BLANK
At the top right of the previewer, you should see three rows of buttons. At the top are your standard page navigation buttons, to take you back to the Dashboard, to your Settings options, and the book info editor.
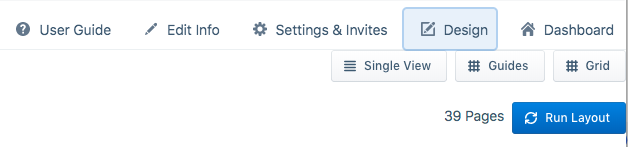
Just below that, you have three buttons:
Single View: This doesn’t do much right now, but soon it will allow you toggle between viewing your pages as spreads or as single pages.
Guides: This button toggles your page guides on and off. This guides highlight the different margin areas and the page content area, so that you can see how everything lines up.
Grid: This toggles on and off your baseline grid, which is determined by your line-height setting in the General Page Design menu. When you turn this on, you’ll see a grid of horizontal lines on all your pages, so that you can adjust your text margins and padding as needed to ensure it all lines up with the baseline grid. See “Working with the Baseline Grid” for more info.
Below your view options, you’ll see the current page count for your book, and the Run Layout button. The Run Layout button will become your best “frenemy” as you use the app, and is how you reflow your content through your pages after you update the design.
Most design changes will automatically reflow your content (unless your chapters are locked, of course). However, there are a handful of design options that require you to manually click the run Layout button in order to see them. For example, changes to your Page Templates, or when you’re limiting your changes to a subset of elements (like “Only this plain text paragraph”).
