To create a group, do the following:
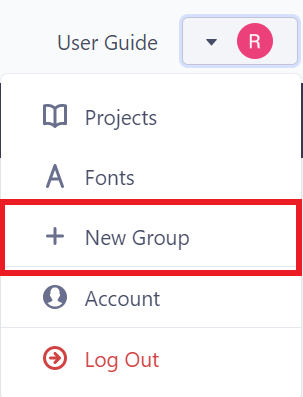
Click your user icon in the top right corner of the screen.
Click the “+ Create Group” button.
In the form that appears, give your group a name.
Click the Create Group button.
Your new group will be created, and you’ll be taken to the group admin page where can see other members of the group, and any projects created in the group. To add a project to your group, simply create a new project, and in the Project Details form, make sure to select your new group from the “Group” dropdown menu.
