By default, all images in the PDF will be sized down to fit within your specified margin and page dimensions (see “Adjust PDF trim size and margins”). However, you may designate an image to be “full bleed”, which means that it will take up the entire page and extend into the bleed area beyond the page, creating a graphic that is flush with the edge of the book in the final product. To do so, you’ll need to use a processing instruction (see “Add special layout instructions”).
In the Hederis Edit Text pane:
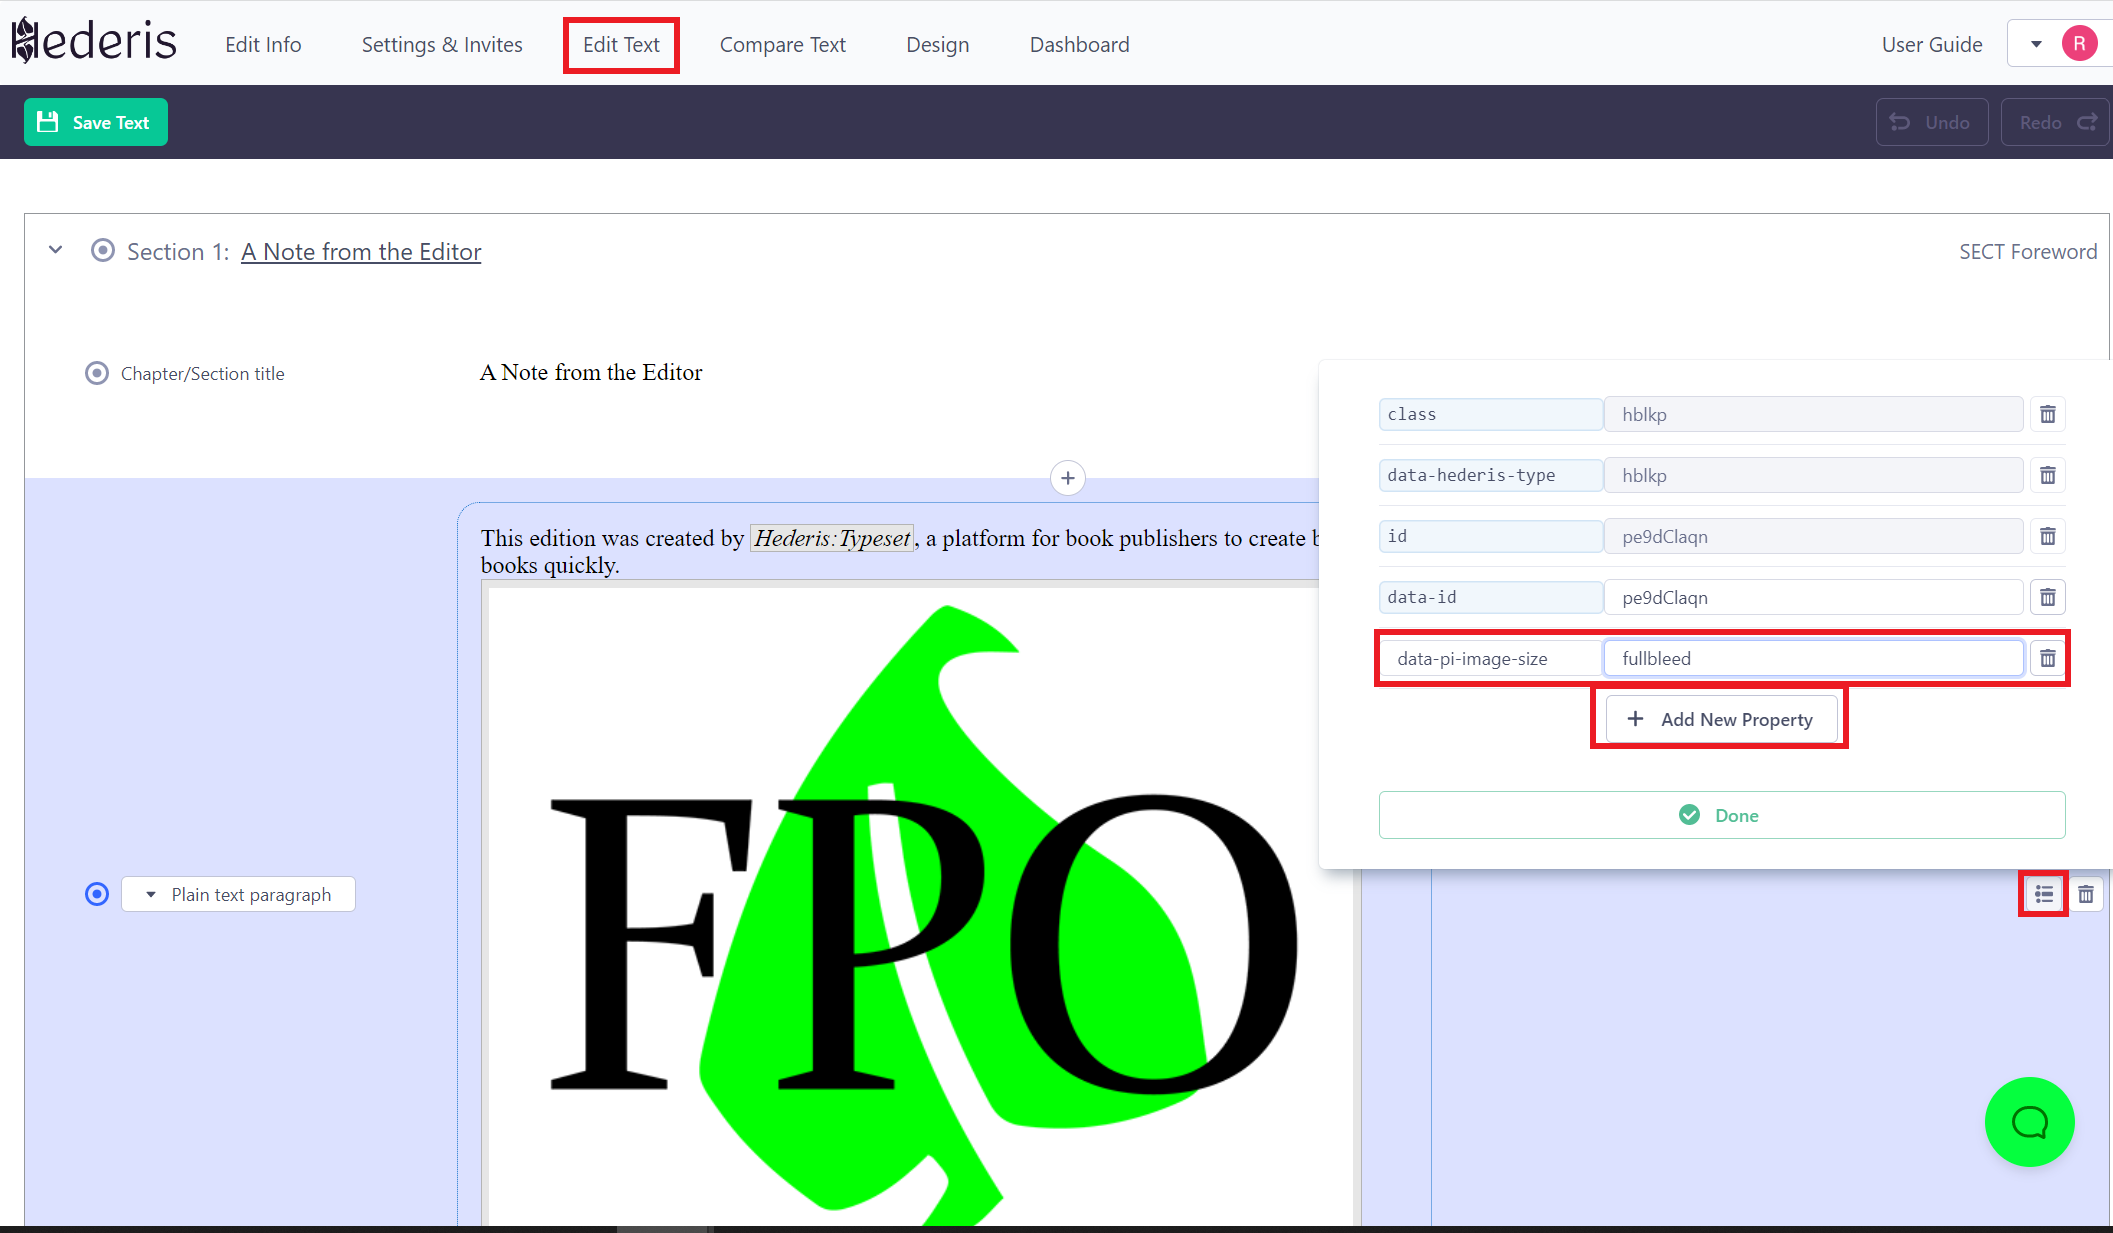
In Edit Text pane, navigate to the Image Holder paragraph that contains your image, and click to select it.
Click the 3-horizontal-lines icon to the right of the paragraph to open the Attribute Editor.
Click the “Add New Property” button. For the property-name, type data-pi-image-size, and for the value, type fullbleed.
Click Done to close the Attribute Editor, and then click Save Text at the top left of the screen.

In Microsoft Word:
In your Word manuscript, find the “HED Image holder” paragraph that contains your image filename.
Insert a new paragraph below your image holder paragraph, and apply the “HED Processing instruction” style to it.
Type the following text inside your new HED Processing instruction paragraph: IMAGE-SIZE=fullbleed
Your Word manuscript should look like this:
