The best way to make sure that an image is centered in the PDF, EPUB, and Kindle EPUB is to put the image inside of a BOX Figure wrapper, and then adjust the design settings as described below.
If you only want to adjust the layout for a specific image, then you’ll need to use the Limit These Changes menu. That means that first, you need to create a “magic clickable spot” to select your BOX Figure wrapper:
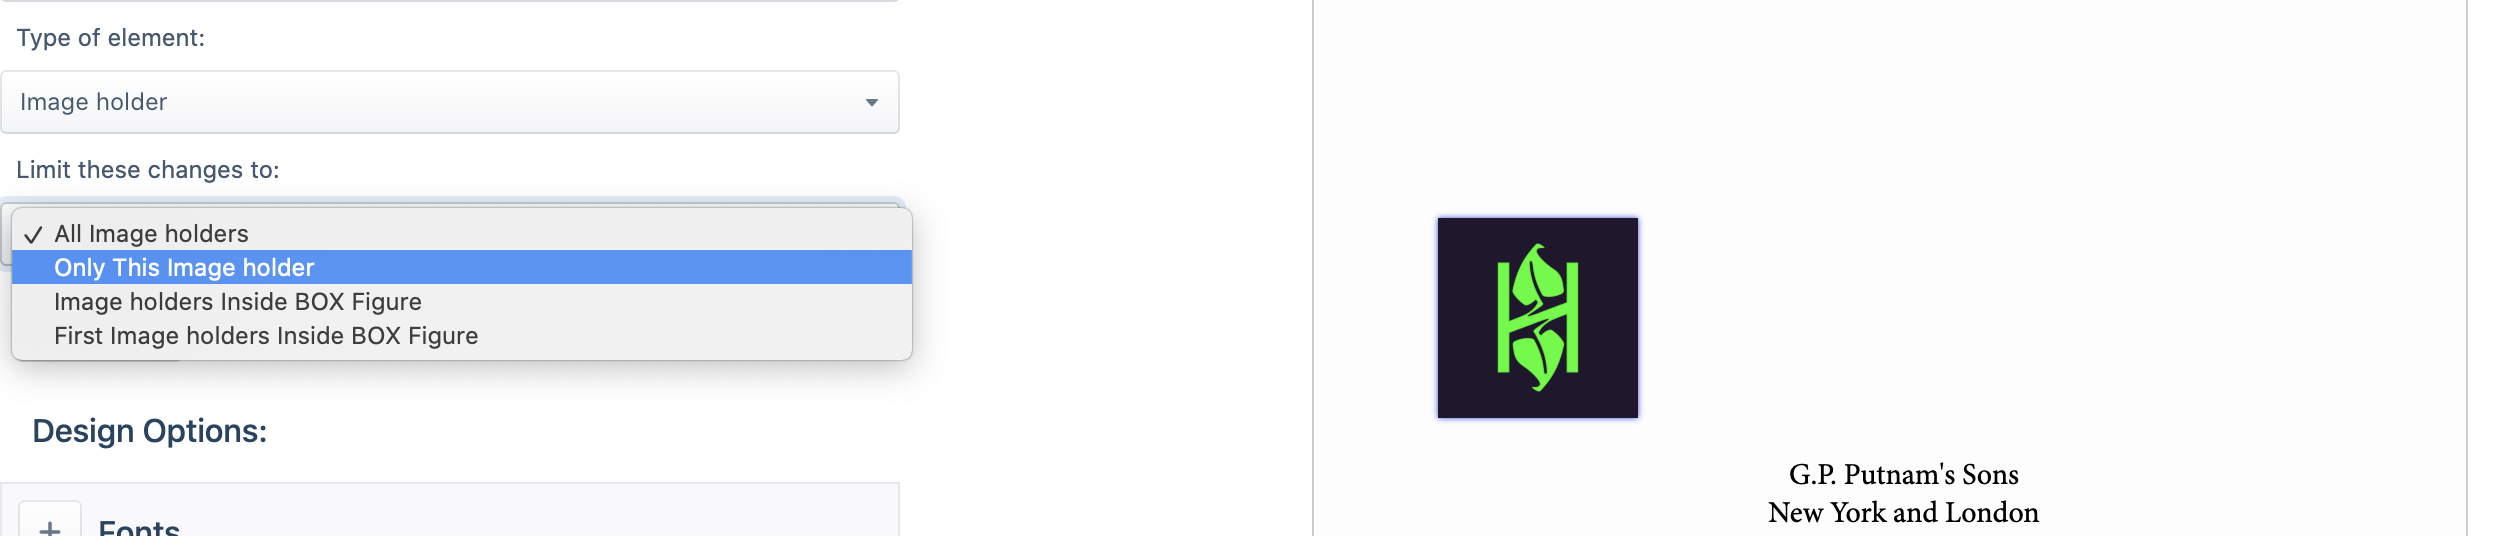
Click the image to select it.
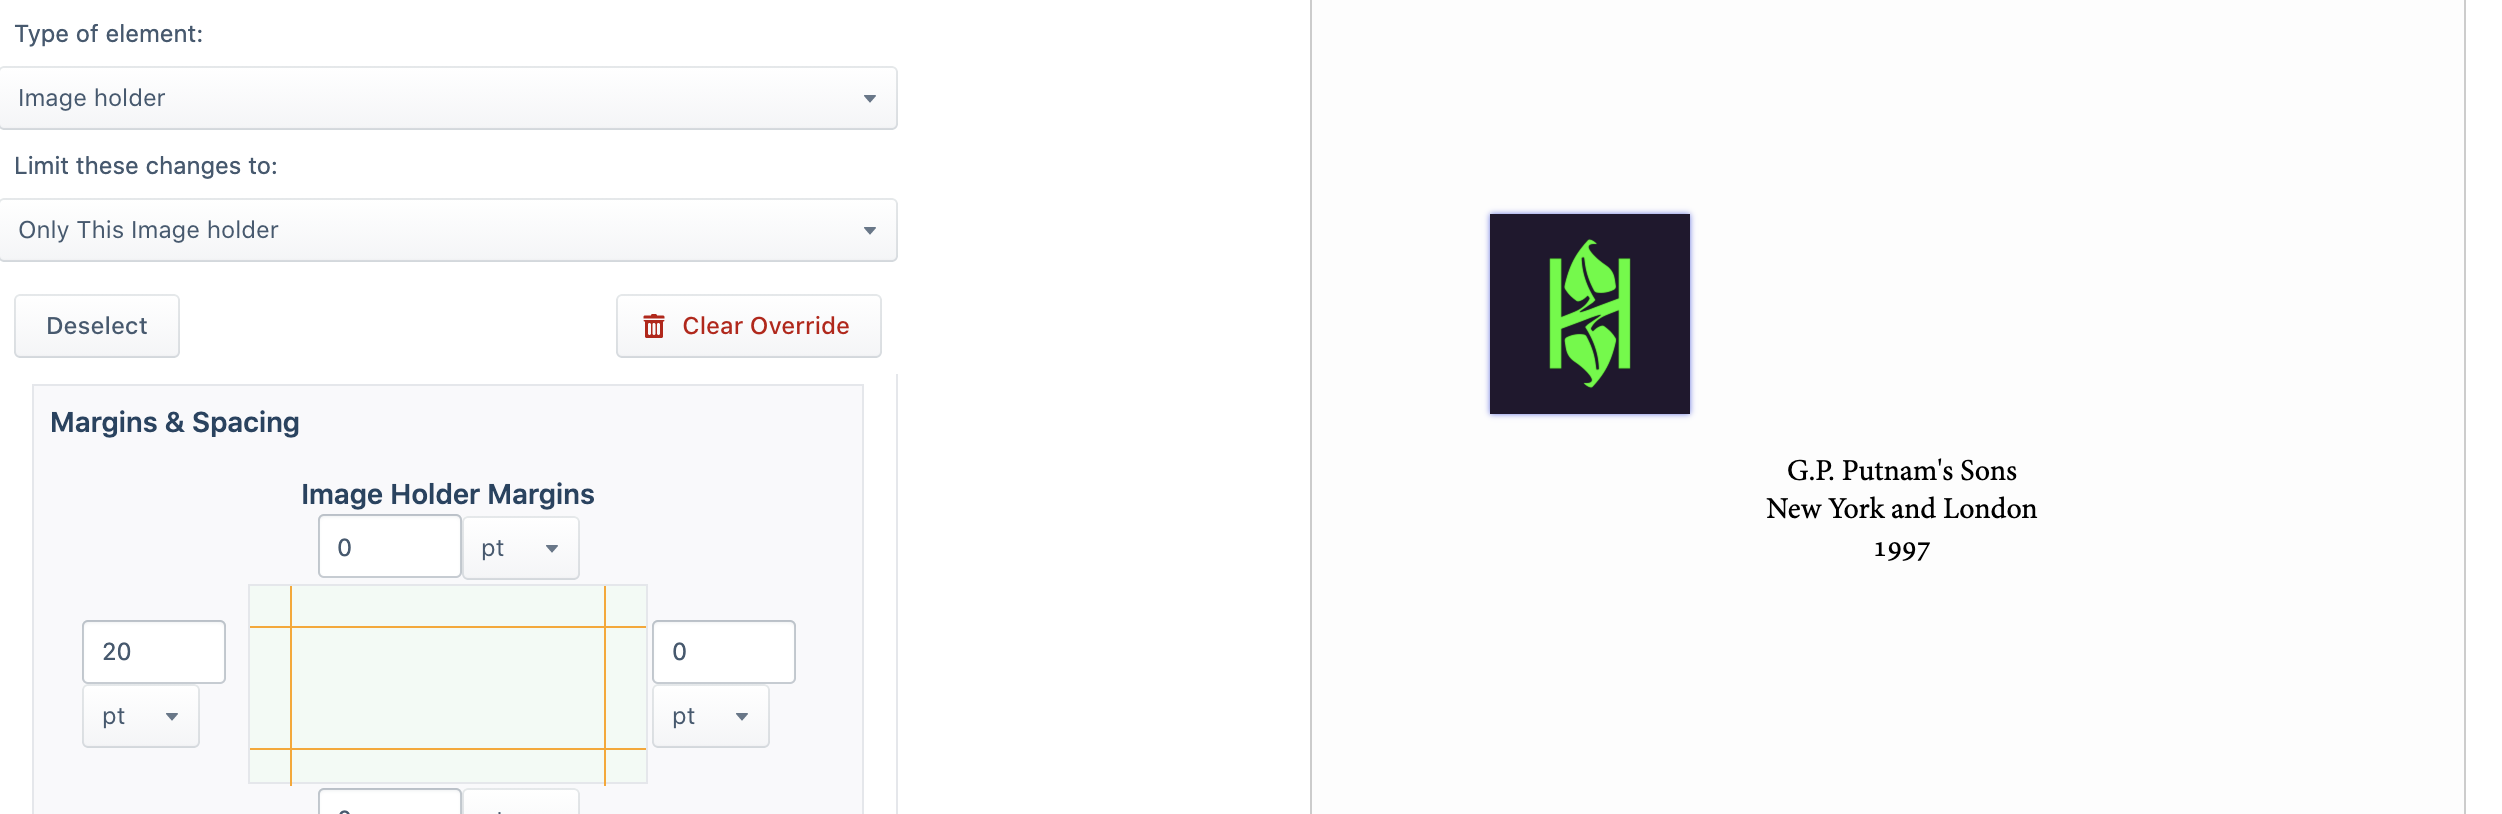
In the Limit These Changes menu, choose “Only this Image Holder”.
Scroll down to the Margins & Spacing section, and in the left margin box, add some non-miniscule amount of margin (for example, 20pt).
Click Run Layout to see the change take effect.
Note
If you want to center all the images in your book, then you can skip the previous steps, and choose “BOX Figure” from the Sections & Text dropdown menu without needing to actually click the BOX Figure wrapper, and then skip any following steps related to choosing options from the Limit These Changes menu. But if you want to limit the design settings at all, then you’ll need to do the previous steps and all of the following steps.
You’ll remove this margin at the end of these steps, but you’ll need it for the next step: adjusting the design settings for BOX Figure wrapper.
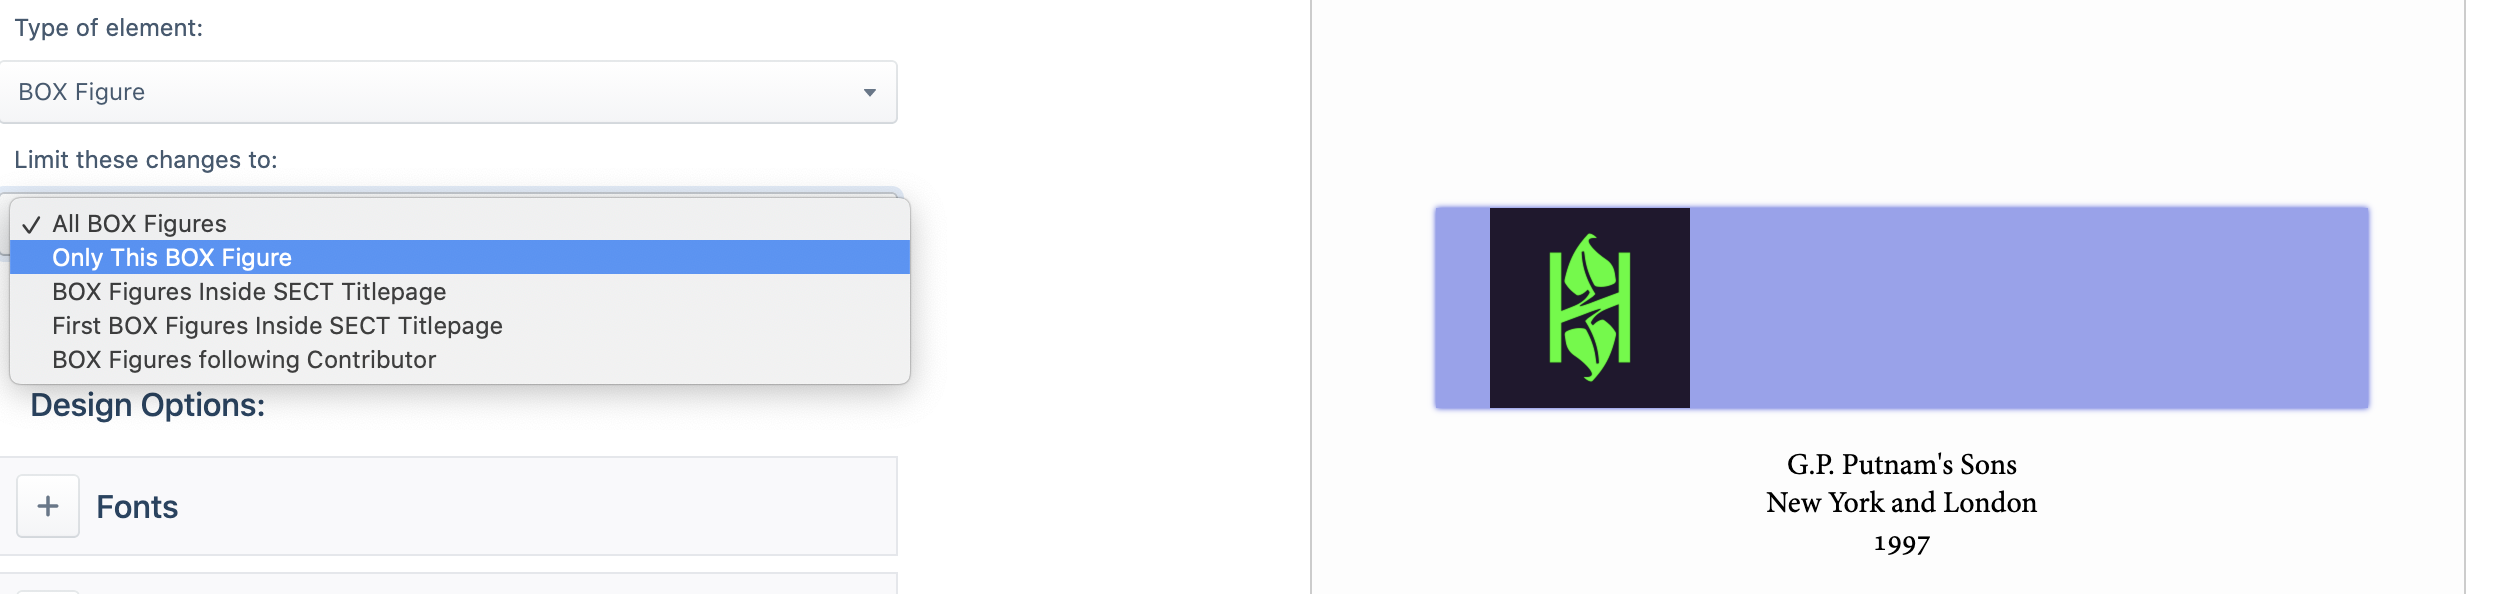
For the BOX Figure:
Click in the new extra space that should now appear to the left of your image (this is the extra margin that you added, that you’ll remove at the end). BOX Figure should appear selected in the Sections & Text dropdown menu.
In the Limit These Changes menu, choose “Only this BOX Figure” (or whatever limitation you want to apply).
Open the Font settings and set Text Indent to 0.
For both the Text Align and Text Align Last settings, choose "center".
Now for the actual image:
Click the image itself to select it.
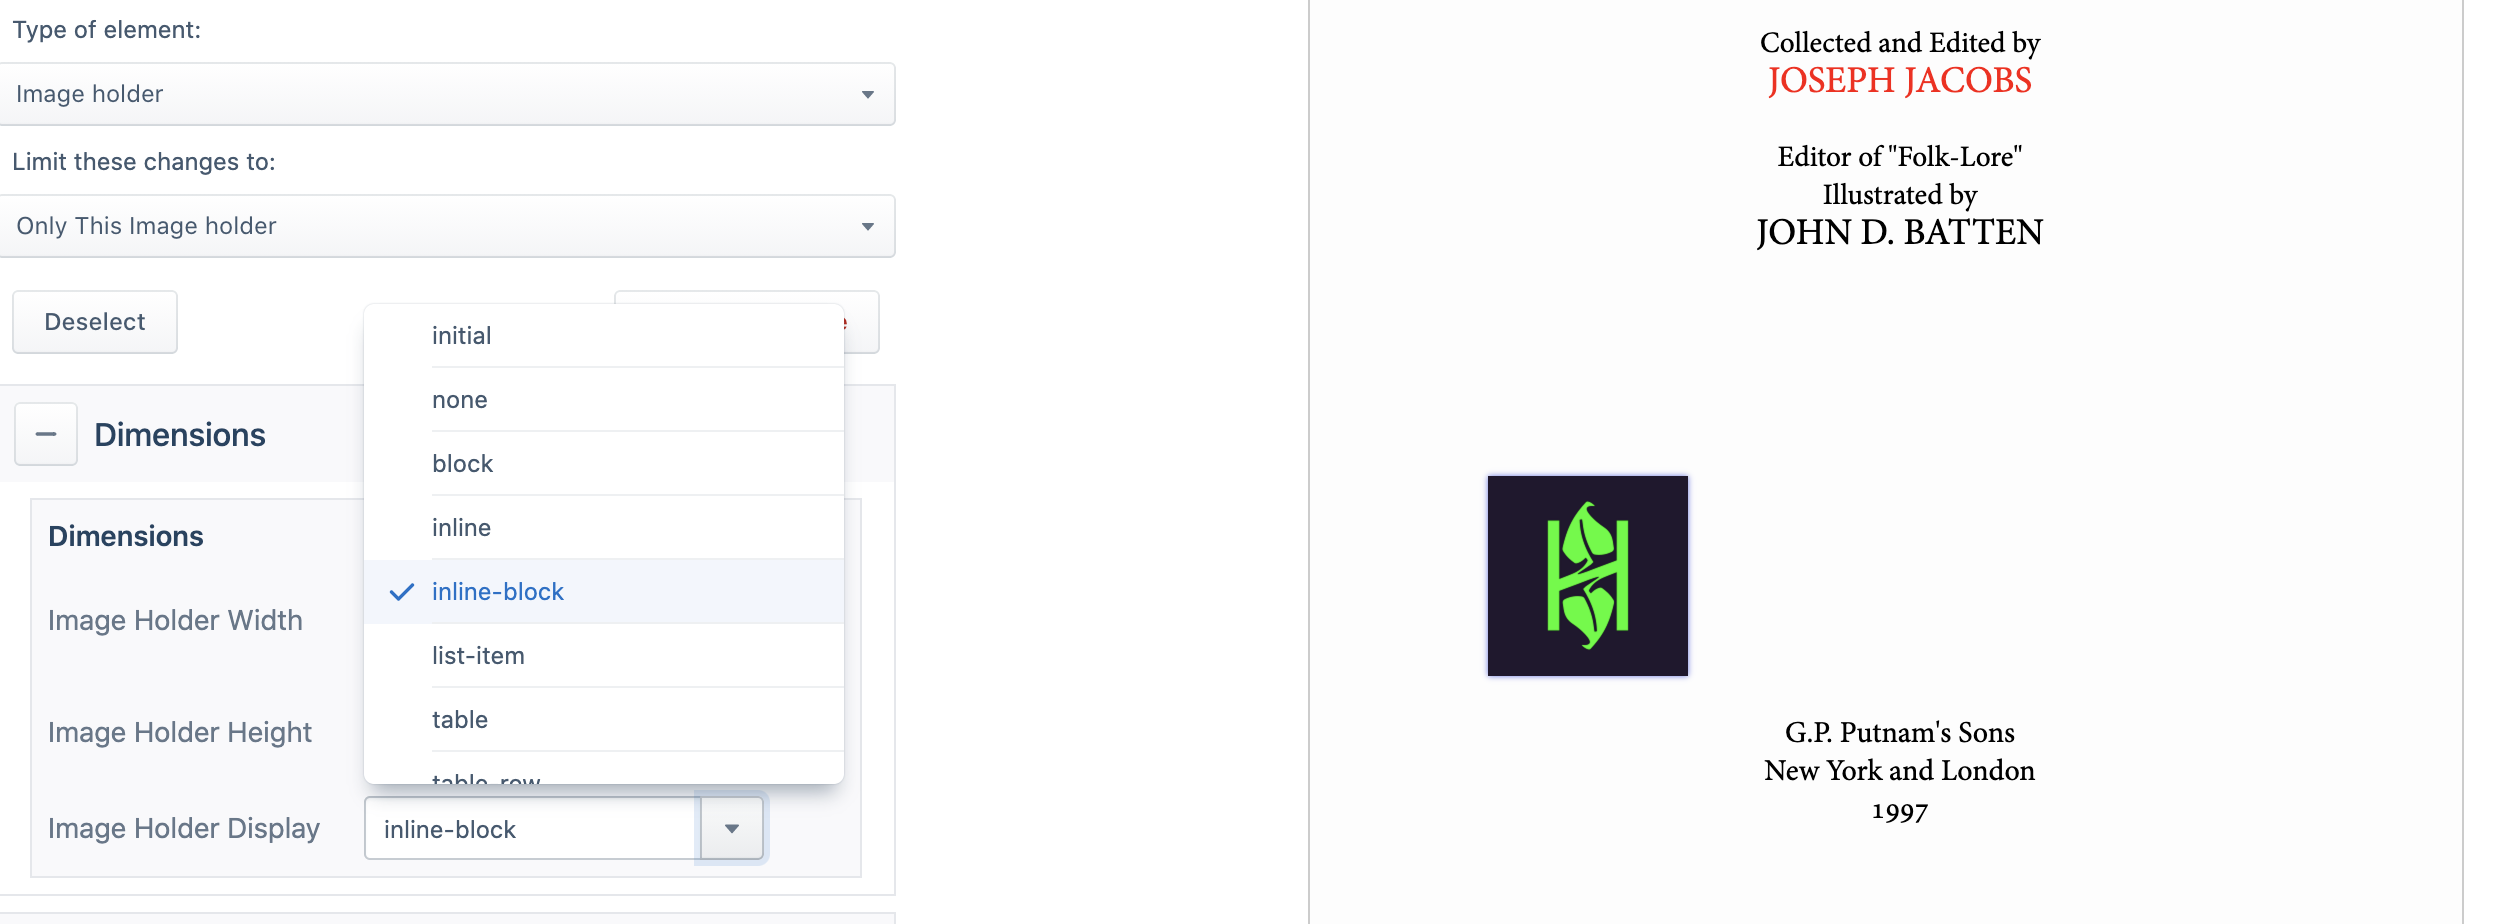
Again, in the Limit These Changes menu, choose "only this Image Holder."
In the Margins & Spacing settings, set both the left and right margins to 0 (removing the extra margin that you added previously).
Scroll down to the Dimensions settings and set Display to "inline-block".
Click Run Layout—you should see all your changes take effect, and the image should now be centered.
Finally, click Save Design.

